Home › Power Source / Network › POWER DISTRIBUTION › INTEGRATION RELAY

INTEGRATION RELAY > ON-VEHICLE INSPECTION

for Preparation Click here


1. INSPECT NO. 1 INTEGRATION RELAY

HINT:
  1. This inspection is not for the No. 1 integration relay itself, but for the wire harness that is connected to the No. 1 integration relay. If the result is within the specified condition, the No. 1 integration relay may be malfunctioning.
  2. If the result is not as specified, one of the electrical load connected to the No. 1 integration relay may be malfunctioning.
  3. Make sure that the malfunction is reproduced when performing the inspection below.
  4. After the wire harness has been repaired, disconnect all connectors that are connected to the No. 1 integration relay, and turn the power switch on (READY) to clear the DTCs.


  1. Diagnosis Terminal

    1. Confirm the system that is malfunctioning.

    2. Make sure that the malfunctioning is reproduced.


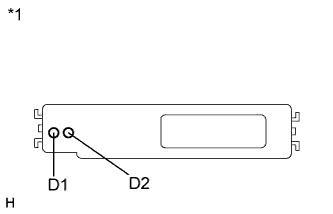
    3. E184982E01
    4. Measure the voltage according to the value(s) in the table below.

      Standard Voltage :
      Tester Connection
      Condition
      Specified Condition
      D1 - Body ground
      Power switch on (IG) or (READY)
      3.5 to 5.0 V
      D2 - Body ground
      Power switch on (IG) or (READY)
      3.5 to 5.0 V

      Text in Illustration 
      *1
      Component with harness connected
      (No. 1 Integration Relay)
      If the result is not as specified, one of the electrical load connected to the No. 1 integration relay may be malfunctioning.