Before connecting the connector, check that the position of the white housing lock is correct as shown in the illustration.
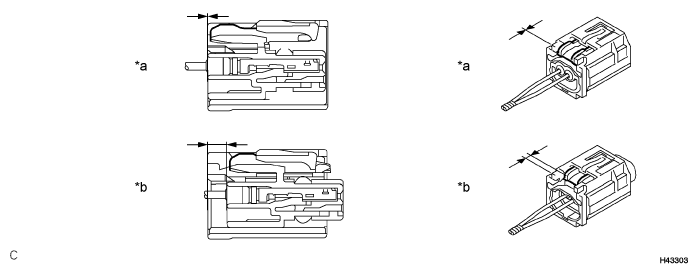
| *a | Incorrect | *b | Correct |
REAR AIRBAG SENSOR > INSTALLATION |
| 1. INSTALL SIDE NO. 2 AIRBAG SENSOR ASSEMBLY |
Check that the power switch is off.
Check that the cable is disconnected from the negative (-) auxiliary battery terminal.
Before connecting the connector, check that the position of the white housing lock is correct as shown in the illustration.
| *a | Incorrect | *b | Correct |
Insert the pin (stopper) into the body hole and install the side No. 2 airbag sensor assembly to the vehicle body with the bolt.
Connect the connector to the side No. 2 airbag sensor assembly.
Be sure to engage the connectors until they are locked (when locking, make sure that a click sound can be heard).
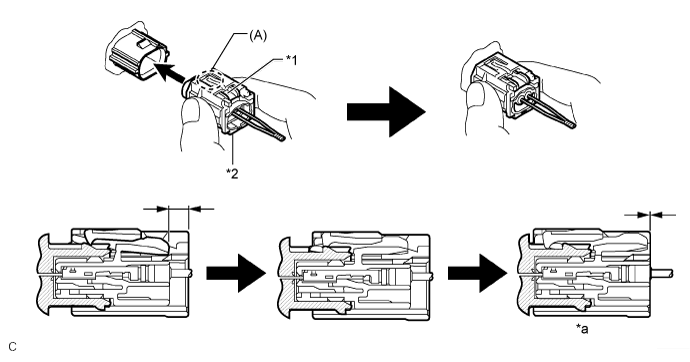
| *1 | White Housing Lock | *2 | Yellow CPA |
| *a | Connection is Completed | - | - |
Check that there is no looseness in the installation parts of the side No. 2 airbag sensor assembly.
| 2. INSTALL DECK TRIM SIDE PANEL ASSEMBLY |
Engage the guide, 4 claws and 4 clips.
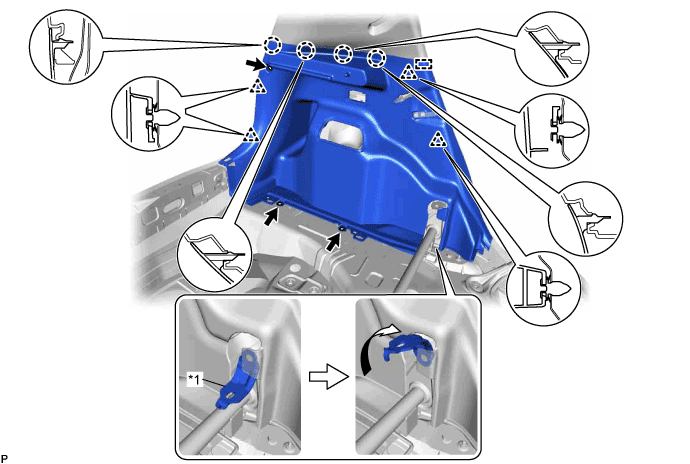
| *1 | Rear Seatback Hinge | - | - |
Install the deck trim side panel assembly LH with the bolt and 2 screws.
Turn the rear seatback hinge in the direction indicated by the arrow shown in the illustration.
| 3. INSTALL NO. 1 LUGGAGE COMPARTMENT LIGHT ASSEMBLY (for LH Side) |
Connect the connector.
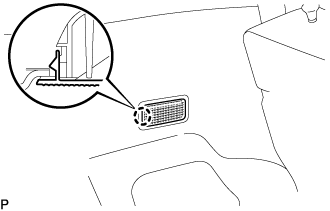 |
Engage the claw to install the No. 1 luggage compartment light assembly.
| 4. CONNECT REAR SEAT 3 POINT TYPE OUTER BELT ASSEMBLY |
Engage the 2 claws.
Install the floor anchor of the rear seat 3 point type outer belt assembly with the bolt.
| 5. INSTALL REAR DECK TRIM COVER |
Engage the 2 guides and 4 claws.
Install the rear deck trim cover with the 2 clips.
| 6. INSTALL PACKAGE TRAY TRIM PANEL ASSEMBLY |
Install the package tray trim panel assembly.
| 7. INSTALL DECK FLOOR BOX LH |
Install the deck floor box LH.
| 8. INSTALL DECK FLOOR BOX RH |
| 9. INSTALL DECK BOARD ASSEMBLY |
Install the deck board assembly.
| 10. CONNECT REAR DOOR OPENING TRIM WEATHERSTRIP |
| 11. INSTALL REAR DOOR SCUFF PLATE |
Engage the guide and the 5 claws to install the rear door scuff plate.
| 12. CONNECT CABLE TO NEGATIVE AUXILIARY BATTERY TERMINAL |
| 13. INSTALL REAR SEATBACK ASSEMBLY |
| 14. INSTALL REAR SEAT CUSHION ASSEMBLY |
Place the rear seat cushion assembly in the cabin.
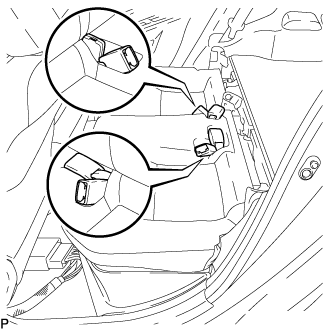 |
Push out the seat belt buckles from the back of the rear seat cushion assembly so that they are positioned as shown in the illustration.
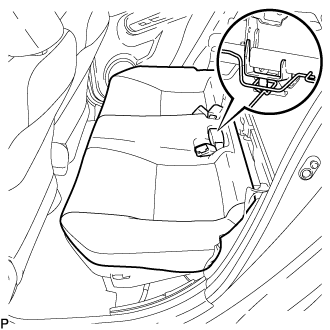 |
Engage the hook of the rear seat cushion assembly to the CRS anchor bracket.
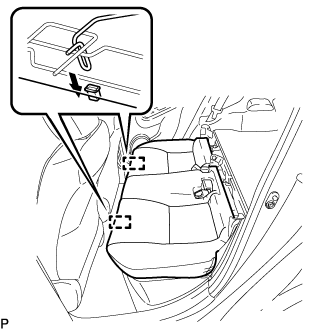 |
Engage the 2 rear seat cushion lock hooks to install the rear seat cushion assembly as shown in the illustration.
Confirm that the seat cushion is firmly installed.
Engage the 2 clips.
| 15. INSTALL FRONT CENTER FLOOR COVER |
Engage the 2 guides to install the front center floor cover.
Install the 3 clips.
| 16. INSTALL FRONT FLOOR COVER LH |
Engage the 3 guides.
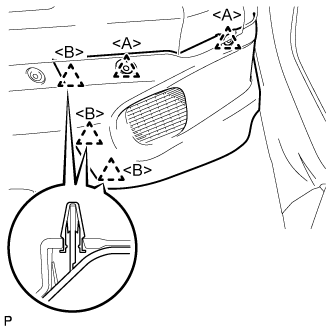 |
Engage the clip <B> to install the front floor cover LH.
Install the 2 clips <A>.
| 17. INSTALL FRONT FLOOR COVER RH |
Engage the 3 guides.
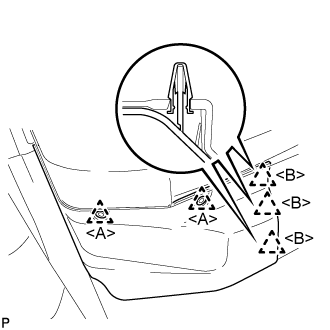 |
Engage the clip <B> to install the front floor cover RH.
Install the 2 clips <A>.
| 18. INSTALL REAR CENTER SEAT HEADREST ASSEMBLY (for LH Side) |
| 19. INSTALL REAR SEAT HEADREST ASSEMBLY |
| 20. PERFORM DIAGNOSTIC SYSTEM CHECK |
| 21. INSPECT SRS WARNING LIGHT |