Home › Vehicle Exterior › DOOR / HATCH › HOOD

HOOD > ADJUSTMENT

for Preparation Click here


B211130E07
Text in Illustration 
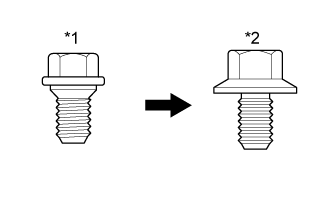
*1
Centering Bolt
*2
Standard Bolt

HINT:
  1. Centering bolts are used to mount the hood hinge and hood lock. The hood and hood lock cannot be adjusted with the centering bolts installed. Substitute the centering bolts with standard bolts when making adjustments.
  2. Specified torque for standard bolts is shown in the standard bolt chart (Click here).


1. INSPECT HOOD SUB-ASSEMBLY


  1. Check that the clearance measurements of areas "a" through "f" are within each standard range.
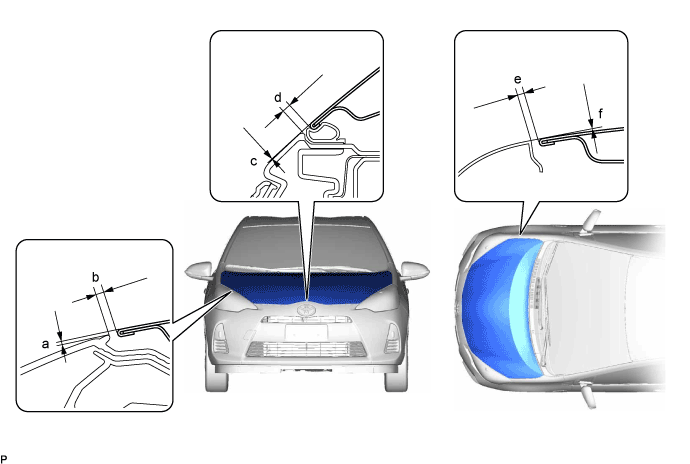

    B301498E02


    Standard Clearance 
    Area
    Measurement
    Area
    Measurement
    a
    -0.85 to 3.15 mm (-0.0335 to 0.124 in.)
    b
    1.65 to 5.65 mm (0.065 to 0.222 in.)
    c
    -1.85 to 2.15 mm (-0.0728 to 0.0847 in.)
    d
    2.35 to 6.35 mm (0.0925 to 0.25 in.)
    e
    2.0 to 5.0 mm (0.0787 to 0.197 in.)
    f
    -1.5 to 1.5 mm (-0.0591 to 0.0591 in.)


2. ADJUST HOOD SUB-ASSEMBLY


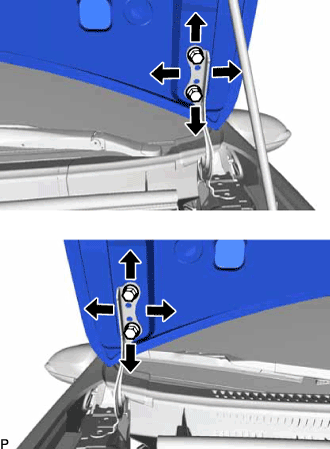
  1. Horizontally and vertically adjust the hood.


      B301499
    1. Loosen the 4 hinge bolts of the hood.

    2. Adjust the clearance between the hood and front fender by moving the hood.

    3. Tighten the 4 hinge bolts after the adjustment.

      Torque:
      13 N*m{ 133 kgf*cm , 10 ft.*lbf }


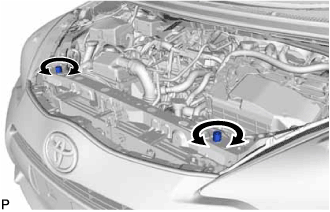
  1. Adjust the height of the front end of the hood using the cushion rubbers.


      B297000
    1. Adjust the 2 cushion rubbers so that the heights of the hood and fender are aligned.

      HINT:
      Raise or lower the front end of the hood by turning the 2 cushion rubbers.


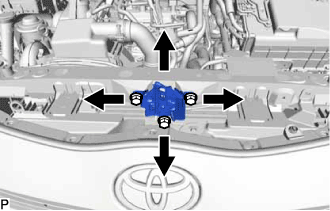
  1. Adjust the hood lock.


      B301500
    1. Loosen the 3 bolts.

    2. Tighten the bolts after adjustment.

      Torque:
      7.5 N*m{ 76 kgf*cm , 66 in.*lbf }

    3. Check that the striker can engage with the hood lock smoothly.