Home › Engine / Hybrid System › 1NZ-FXE ENGINE MECHANICAL › CYLINDER HEAD

CYLINDER HEAD > INSPECTION

for Preparation Click here


1. INSPECT CYLINDER HEAD FOR FLATNESS


    A265774E01
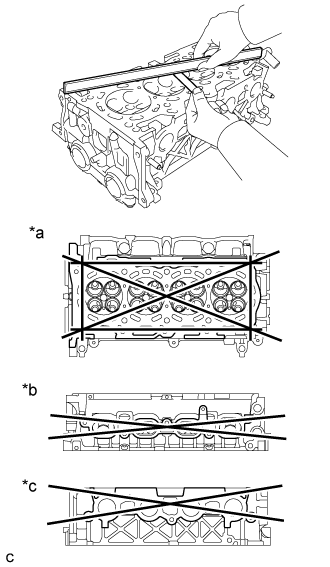
  1. Using a precision straightedge and feeler gauge, measure the warpage of the contact surfaces where the cylinder head sub-assembly contacts the cylinder block and manifold.
    Text in Illustration 
    *a
    Cylinder Block Side
    *b
    Intake Manifold Side
    *c
    Exhaust Manifold Side

    Maximum warpage:
    Surface
    Specified Condition
    Cylinder block side
    0.05 mm (0.00197 in.)
    Intake manifold side
    0.10 mm (0.00394 in.)
    Exhaust manifold side
    0.10 mm (0.00394 in.)
    If the warpage is greater than the maximum, replace the cylinder head sub-assembly.


2. INSPECT CYLINDER HEAD FOR CRACKS


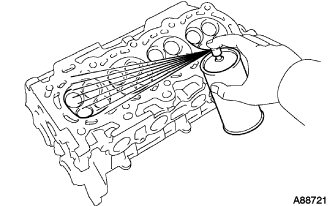
    A088721
  1. Using a dye penetrant, check the intake ports, exhaust ports and cylinder head sub-assembly surface for cracks.
    If cracked, replace the cylinder head sub-assembly.


3. INSPECT INTAKE VALVE


    A121380E09
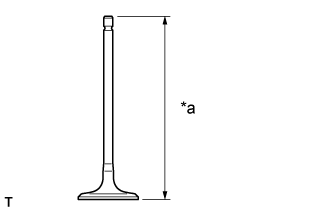
  1. Using a vernier caliper, measure the overall length of the intake valve.
    Text in Illustration 
    *a
    Overall Length

    Standard overall length:
    89.25 mm (3.51 in.)

    Minimum overall length:
    88.95 mm (3.50 in.)

    If the overall length is less than the minimum, replace the intake valve.


    A121378
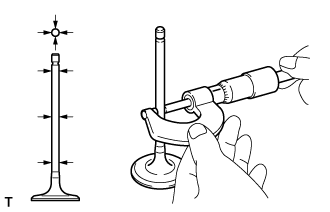
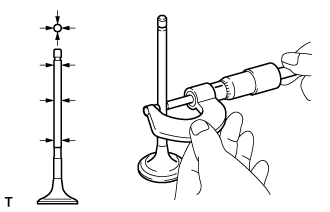
  1. Using a micrometer, measure the diameter of the valve stem.

    Standard valve stem diameter:
    4.970 to 4.985 mm (0.19567 to 0.19626 in.)

    If the valve stem diameter is not as specified, check the oil clearance.


    A194996E03
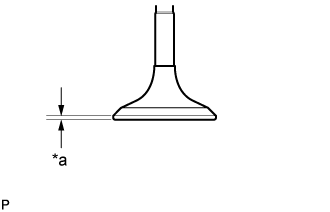
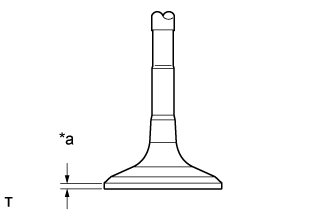
  1. Using a vernier caliper, measure the valve head margin thickness.
    Text in Illustration 
    *a
    Margin Thickness

    Standard margin thickness:
    1.0 mm (0.0394 in.)

    Minimum margin thickness:
    0.7 mm (0.0276 in.)

    If the margin thickness is less than the minimum, replace the intake valve.


4. INSPECT EXHAUST VALVE


    A121383E09
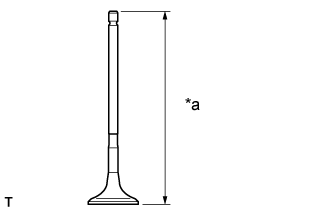
  1. Using a vernier caliper, measure the overall length of the exhaust valve.
    Text in Illustration 
    *a
    Overall Length

    Standard overall length:
    87.90 mm (3.46 in.)

    Minimum overall length:
    87.60 mm (3.45 in.)

    If the overall length is less than the minimum, replace the exhaust valve.


    A121381
  1. Using a micrometer, measure the diameter of the valve stem.

    Standard valve stem diameter:
    4.965 to 4.980 mm (0.19547 to 0.19606 in.)

    If the valve stem diameter is not as specified, check the oil clearance.


    A121382E13
  1. Using a vernier caliper, measure the valve head margin thickness.
    Text in Illustration 
    *a
    Margin Thickness

    Standard margin thickness:
    1.15 mm (0.0453 in.)

    Minimum margin thickness:
    0.85 mm (0.0335 in.)

    If the margin thickness is less than the minimum, replace the exhaust valve.


5. INSPECT COMPRESSION SPRING


    A194990
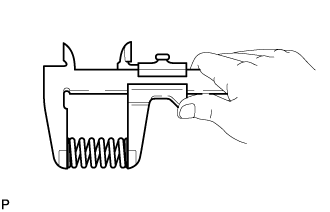
  1. Using a vernier caliper, measure the free length of the compression spring.

    Standard free length:
    59.77 mm (2.35 in.)


    A194991E06
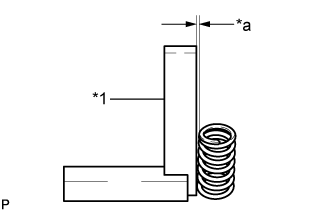
  1. Using a steel square, measure the deviation of the compression spring.
    Text in Illustration 
    *1
    Steel Square
    *a
    Deviation

    Maximum deviation:
    1.6 mm (0.0630 in.)


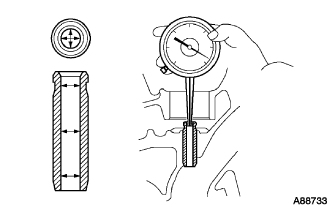
6. INSPECT VALVE GUIDE BUSH OIL CLEARANCE


    A088733
  1. Using a caliper gauge, measure the inside diameter of the valve guide bush.

    Bush inside diameter:
    5.01 to 5.03 mm (0.197 to 0.198 in.)

  1. Subtract the valve stem diameter measurement from the valve guide bush inside diameter measurement.

    Standard oil clearance:
    Valve Guide Bush
    Specified Condition
    Intake
    0.025 to 0.060 mm (0.000984 to 0.00236 in.)
    Exhaust
    0.030 to 0.065 mm (0.00118 to 0.00256 in.)

    Maximum oil clearance:
    Guide Bush
    Specified Condition
    Intake
    0.08 mm (0.00315 in.)
    Exhaust
    0.10 mm (0.00394 in.)
    If the oil clearance is greater than the maximum, replace the valve and valve guide bush (Click here).


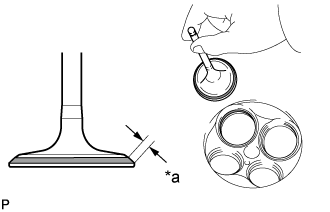
7. INSPECT VALVE SEATS
  1. Apply a light coat of Prussian blue to the valve face.

  1. Lightly press the valve face against the valve seat.


    A194998E03
  1. Check the valve face and seat according to the following procedure.
    Text in Illustration 
    *a
    Width

    1. If Prussian blue appears 360° around the valve face, the valve face is concentric. If not, replace the valve.

    2. If Prussian blue appears 360° around the valve seat, the guide and valve face are concentric. If not, resurface the valve seat.

    3. Check that the valve seat contact is in the middle of the valve face with the valve seat width between 1.0 and 1.4 mm (0.0394 to 0.0551 in.).


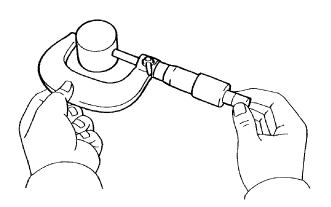
8. INSPECT VALVE LIFTER


    P016860E01
  1. Using a micrometer, measure the valve lifter diameter.

    Standard lifter diameter:
    30.966 to 30.976 mm (1.2191 to 1.2195 in.)


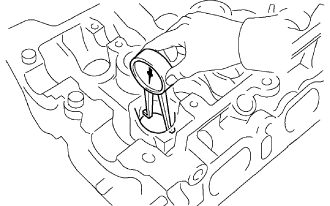
9. INSPECT VALVE LIFTER OIL CLEARANCE


    A088724E01
  1. Using a caliper gauge, measure the valve lifter bore diameter of the cylinder head sub-assembly.

    Standard lifter bore diameter:
    31.009 to 31.025 mm (1.2208 to 1.2215 in.)

  1. Subtract the lifter diameter measurement from the lifter bore diameter measurement.

    Standard oil clearance:
    0.033 to 0.059 mm (0.00130 to 0.00232 in.)

    Maximum oil clearance:
    0.1 mm (0.00394 in.)

    If the oil clearance is greater than the maximum, replace the valve lifter. If necessary, replace the cylinder head sub-assembly.


10. INSPECT CAMSHAFT


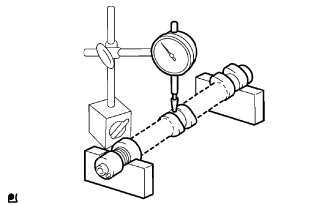
  1. Inspect the camshaft for runout.

    1. Place the camshaft on V-blocks.


    2. A088725E01
    3. Using a dial indicator, measure the circle runout at the center journal.

      Maximum circle runout:
      0.03 mm (0.00118 in.)

      If the circle runout is greater than the maximum, replace the camshaft.


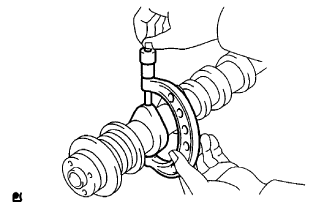
  1. Inspect the cam lobes.


      A037113E01
    1. Using a micrometer, measure the cam lobe height.

      Standard cam lobe height:
      42.261 to 42.461 mm (1.6638 to 1.6717 in.)

      Minimum cam lobe height:
      42.16 mm (1.6598 in.)

      If the cam lobe height is less than the minimum, replace the camshaft.


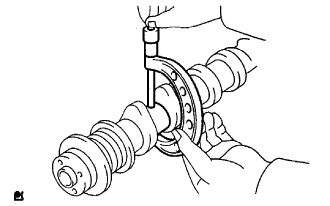
  1. Inspect the camshaft journals.


      A037114E01
    1. Using a micrometer, measure the journal diameter.

      Standard journal diameter:
      Journal
      Specified Condition
      No. 1 journal
      34.449 to 34.465 mm (1.3563 to 1.3569 in.)
      Other journals
      22.949 to 22.965 mm (0.90350 to 0.90413 in.)

      If the journal diameter is not as specified, check the oil clearance.


11. INSPECT NO. 2 CAMSHAFT


  1. Inspect the camshaft for runout.

    1. Place the camshaft on V-blocks.


    2. A088725E01
    3. Using a dial indicator, measure the circle runout at the center journal.

      Maximum circle runout:
      0.03 mm (0.00118 in.)

      If the circle runout is greater than the maximum, replace the No. 2 camshaft.


  1. Inspect the cam lobes.


      A037113E01
    1. Using a micrometer, measure the cam lobe height.

      Standard cam lobe height:
      44.046 to 44.146 (1.7341 to 1.7380 in.)

      Minimum cam lobe height:
      43.90 mm (1.7283 in.)

      If the cam lobe height is less than the minimum, replace the No. 2 camshaft.


  1. Inspect the camshaft journals.


      A037114E01
    1. Using a micrometer, measure the journal diameter.

      Standard journal diameter:
      Journal
      Specified Condition
      No. 1 journal
      34.449 to 34.465 mm (1.3563 to 1.3569 in.)
      Other journals
      22.949 to 22.965 mm (0.90350 to 0.90413 in.)

      If the journal diameter is not as specified, check the oil clearance.


12. INSPECT CAMSHAFT THRUST CLEARANCE
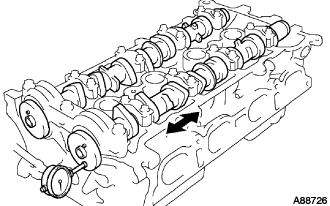
  1. Install the camshafts .


    A088726
  1. Using a dial indicator, measure the thrust clearance while moving the camshaft back and forth.

    Standard thrust clearance:
    0.040 to 0.095 mm (0.00157 to 0.00374 in.)

    Maximum thrust clearance:
    0.11 mm (0.00433 in.)

    If the thrust clearance is greater than the maximum, replace the camshaft. If necessary, replace the camshaft bearing caps and the cylinder head sub-assembly.


13. INSPECT CAMSHAFT OIL CLEARANCE

NOTICE:
Do not turn the camshafts.

  1. Clean the camshaft bearing caps and the camshaft journals.

  1. Place the camshafts on the cylinder head sub-assembly.


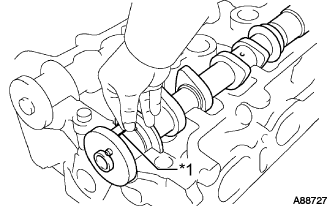
    A088727E02
  1. Lay a strip of Plastigage across each of the camshaft journals.
    Text in Illustration 
    *1
    Plastigage

  1. Install the camshaft bearing caps .

  1. Remove the camshaft bearing caps .


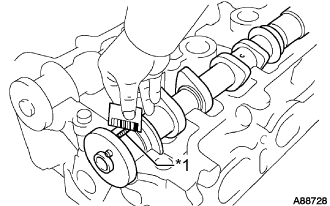
    A088728E02
  1. Measure the Plastigage at its widest point.
    Text in Illustration 
    *1
    Plastigage

    Standard oil clearance:
    0.035 to 0.072 mm (0.00138 to 0.00283 in.)

    Maximum oil clearance:
    0.115 mm (0.00453 in.)

    If the oil clearance is greater than the maximum, replace the camshaft. If necessary, replace the camshaft bearing caps and the cylinder head sub-assembly.

    NOTICE:
    Completely remove the Plastigage.