 |
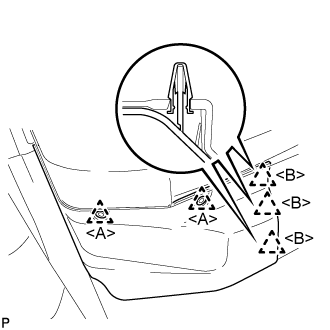
Using a clip remover, remove the 2 clips <A>.
REAR SEAT ASSEMBLY (for Bench Type Seatback) > REMOVAL |
| 1. REMOVE REAR SEAT HEADREST ASSEMBLY |
| 2. REMOVE REAR CENTER SEAT HEADREST ASSEMBLY |
| 3. REMOVE FRONT FLOOR COVER RH |
|
Using a clip remover, remove the 2 clips <A>.
Disengage the 3 clips <B>.
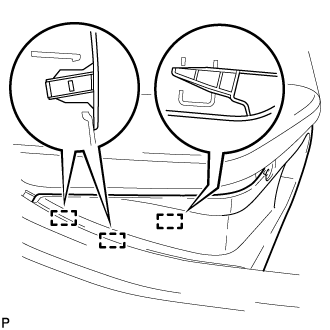 |
Disengage the 3 guides and remove the front floor cover RH.
| 4. REMOVE FRONT FLOOR COVER LH |
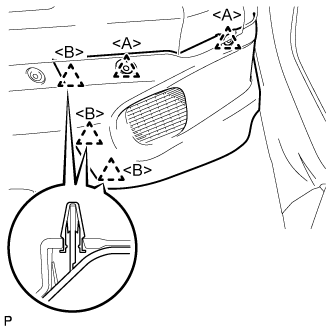 |
Using a clip remover, remove the 2 clips <A>.
Disengage the 3 clips <B>.
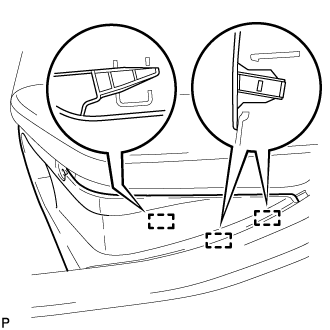 |
Disengage the 3 guides and remove the front floor cover LH.
| 5. REMOVE FRONT CENTER FLOOR COVER |
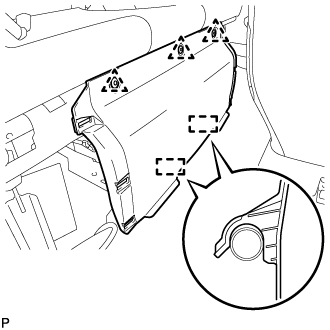 |
Using a clip remover, remove the 3 clips.
Disengage the 2 guides and remove the front center floor cover.
| 6. REMOVE REAR SEATBACK ASSEMBLY |
Fold down the rear seatback assembly.
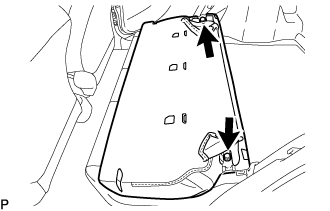 |
Remove the 2 bolts and rear seatback assembly.
| 7. REMOVE REAR SEAT CUSHION ASSEMBLY |
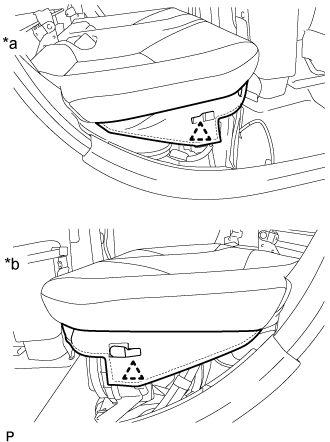 |
Using a clip remover, disengage the 2 clips.
| *a | for RH Side |
| *b | for LH Side |
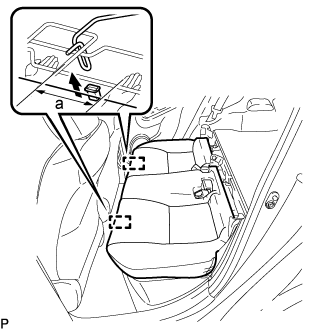 |
Disengage the 2 rear seat cushion lock hooks of the rear seat cushion assembly from the vehicle body as shown in the illustration.
| a | 100 mm (3.94 in.) or less |
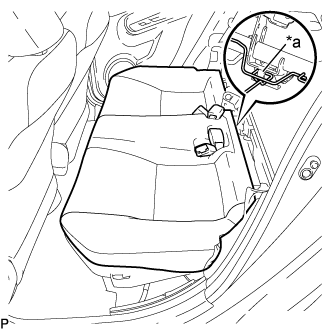 |
Choose a hook to disengage first. Place your hands near the hook as shown in the illustration. Then lift the seat cushion to disengage the hook.
| *a | Hook |
Repeat the step above for the other hook.
Remove the rear seat cushion assembly.
| 8. REMOVE REAR SEAT CUSHION LOCK HOOK |
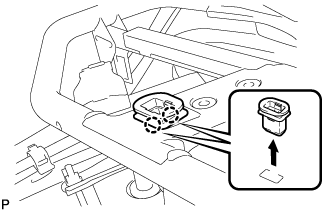 |
Disengage the 2 claws and remove the rear seat cushion lock hook as shown in the illustration.