 |
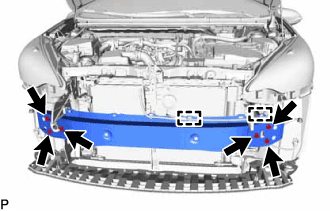
Install the front bumper reinforcement with the 6 bolts.
- Torque:
- 40 N*m{ 408 kgf*cm , 30 ft.*lbf }
FRONT BUMPER > REASSEMBLY |
| 1. INSTALL FRONT BUMPER REINFORCEMENT |
|
Install the front bumper reinforcement with the 6 bolts.
Engage the 2 clamps and install the wire harness.
| 2. INSTALL FRONT BUMPER ENERGY ABSORBER |
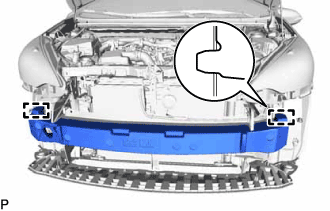 |
Engage the 2 guides to install the front bumper energy absorber.
| 3. INSTALL RADIATOR SUPPORT EXTENSION LH |
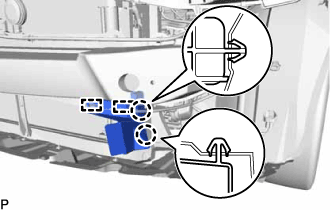 |
Engage the 2 claws and install the radiator support extension LH.
Engage the 2 clamps to install the thermistor assembly.
| 4. INSTALL RADIATOR SUPPORT EXTENSION RH |
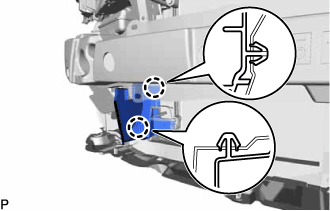 |
Engage the 2 claws and install the radiator support extension RH.
| 5. INSTALL NO. 2 RADIATOR SIDE AIR SEAL |
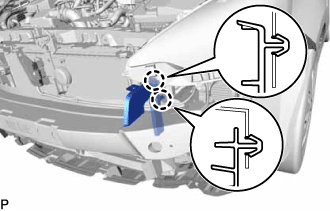 |
Engage the 2 claws and install the No. 2 radiator side air seal.
| 6. INSTALL NO. 1 RADIATOR SIDE AIR SEAL |
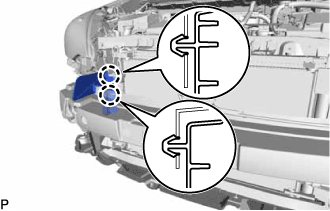 |
Engage the 2 claws and install the No. 1 radiator side air seal.
| 7. INSTALL RADIATOR SUPPORT OPENING COVER |
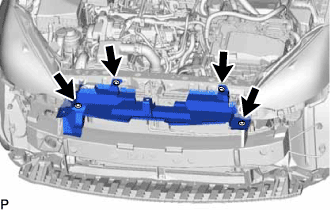 |
Install the radiator support opening cover with the 6 clips.
| 8. INSTALL FRONT BUMPER SIDE RETAINER LH |
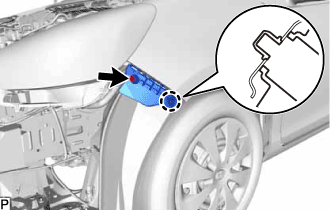 |
Engage the claw.
Install the front bumper side retainer LH with the bolt.
| 9. INSTALL FRONT BUMPER SIDE RETAINER RH |
| 10. INSTALL FRONT BUMPER HOLE COVER |
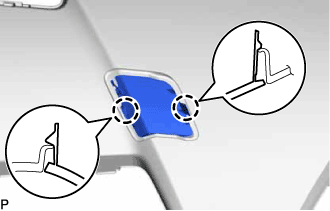 |
Engage the 2 claws and install the front bumper hole cover.
| 11. INSTALL LOWER NO. 1 RADIATOR GRILLE |
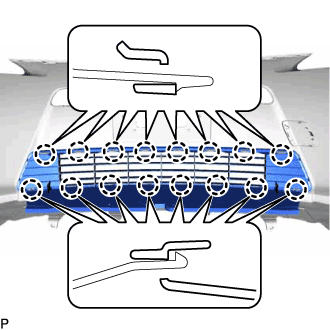 |
Engage the 16 claws and install the lower No. 1 radiator grille.
| 12. INSTALL RADIATOR GRILLE |
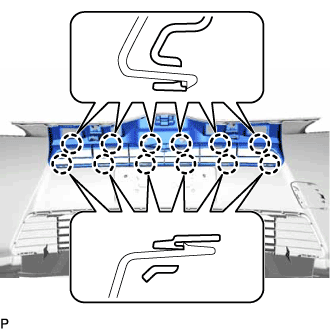 |
Engage the 12 claws and install the radiator grille.
| 13. INSTALL RADIATOR GRILLE (OR FRONT PANEL) EMBLEM |
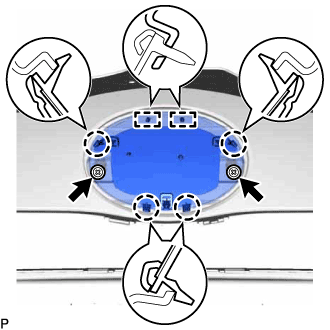 |
Engage the 2 guides and 4 claws, and install the radiator grille (or front panel) emblem.
Install the 2 screws.
| 14. INSTALL UPPER FRONT BUMPER RETAINER |
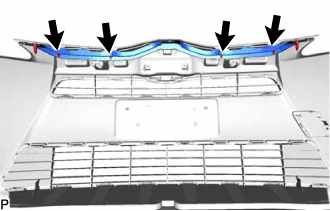 |
Install the upper front bumper retainer with the 4 clips.
| 15. INSTALL HOOD TO FRONT END PANEL SEAL |
Clean the attachment surface.
Remove the double-sided tape from the front bumper cover.
Wipe off any tape adhesive residue with cleaner.
Install the hood to front end panel seal.
Remove the release paper from the face of the hood to front end panel seal.
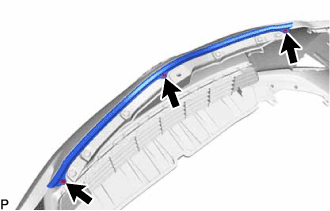 |
Install a new hood to front end panel seal as shown in the illustration.
Install the 3 clips.
| 16. INSTALL FOG LIGHT COVER LH |
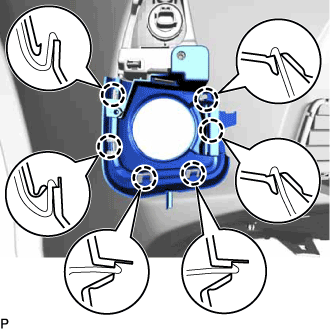 |
Engage the 6 claws and install the fog light cover LH.
| 17. INSTALL FOG LIGHT COVER RH |
| 18. INSTALL FOG LIGHT ASSEMBLY LH |
Engage the 2 guides to temporarily install the fog light assembly.
Install the fog light assembly with the screw.
| 19. INSTALL FOG LIGHT ASSEMBLY RH |
| 20. INSTALL FRONT TURN SIGNAL LIGHT ASSEMBLY LH |
Engage the 2 claws to temporarily install the front turn signal light assembly.
Install the front turn signal light assembly with the bolt.
| 21. INSTALL FRONT TURN SIGNAL LIGHT ASSEMBLY RH |
| 22. INSTALL FRONT BUMPER EXTENSION MOUNTING BRACKET |
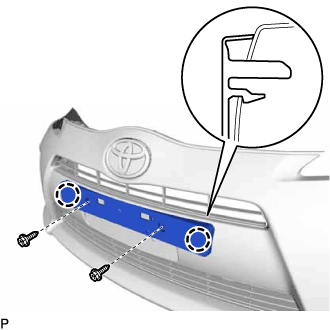 |
Engage the 2 claws.
Install the front bumper extension mounting bracket with the 2 screws.
| 23. INSTALL HEADLIGHT CLEANER HOSE (w/ Headlight Cleaner System) |
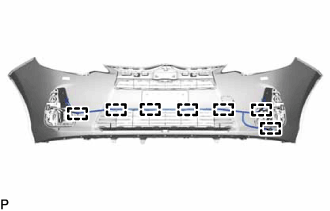 |
Engage the 7 clamps to install the headlight cleaner hose.
| 24. INSTALL HEADLIGHT WASHER ACTUATOR SUB-ASSEMBLY LH (w/ Headlight Cleaner System) |
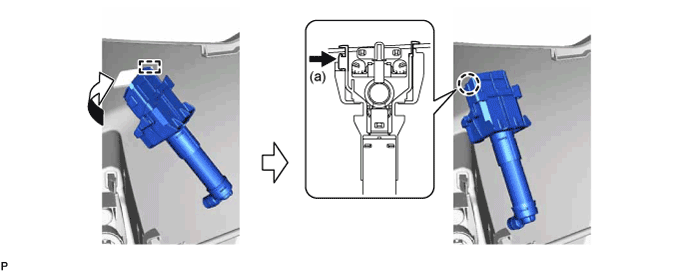
Engage the guide.
While pushing the tab shown by arrow (a), engage the claw as shown in the illustration.
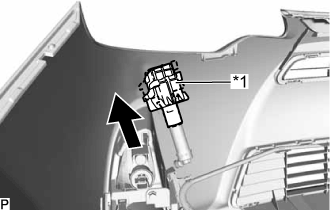 |
Push up the headlight cleaner actuator clamp as shown in the illustration.
| *1 | Headlight Cleaner Actuator Clamp |
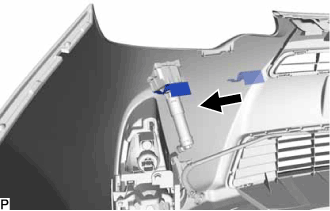 |
Install the headlight cleaner clamp.
Install the headlight cleaner hose.
| 25. INSTALL HEADLIGHT WASHER ACTUATOR SUB-ASSEMBLY RH (w/ Headlight Cleaner System) |
| 26. INSTALL HEADLIGHT CLEANER WASHER NOZZLE COVER (w/ Headlight Cleaner System) |
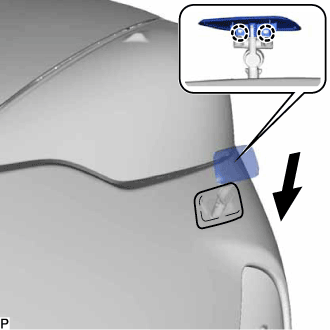 |
Engage the 2 claws to install the headlight cleaner washer nozzle cover.