 |
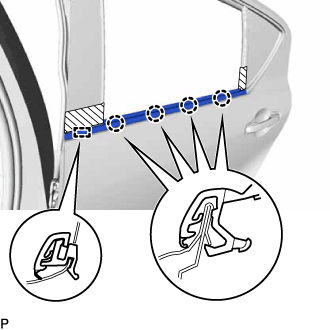
Engage the guide and 4 claws to install the rear door glass outer weatherstrip assembly.
REAR DOOR BELT MOULDING > INSTALLATION |
| 1. INSTALL REAR DOOR GLASS OUTER WEATHERSTRIP ASSEMBLY |
|
Engage the guide and 4 claws to install the rear door glass outer weatherstrip assembly.
| 2. INSTALL REAR DOOR GLASS SUB-ASSEMBLY |
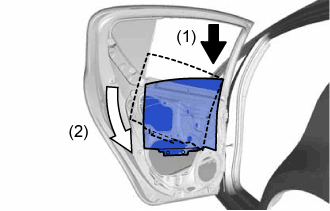 |
Insert the rear door glass as indicated by the arrows in the order shown in the illustration.
Slide the lower section of the rear door glass sub-assembly and engage the rear door glass sub-assembly to the rear door window regulator assembly.
| 3. INSTALL REAR DOOR WINDOW DIVISION BAR SUB-ASSEMBLY |
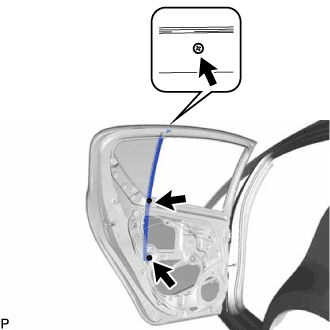 |
Temporary install the rear door window division bar sub-assembly with the 2 bolts.
Install the rear door window division bar sub-assembly with the 2 bolts and screw.
| 4. INSTALL REAR DOOR GLASS RUN |
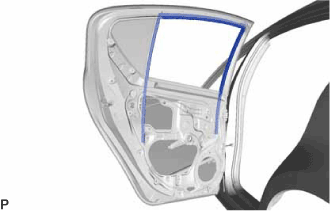 |
Install the rear door glass run.
| 5. INSTALL REAR DOOR WEATHERSTRIP |
Connect the upper part of rear door weatherstrip.
| 6. INSTALL REAR DOOR SERVICE HOLE COVER |
Apply butyl tape to the rear door panel.
Pass the rear door lock remote control cable, rear door inside locking cable and each connector through a new rear door service hole cover.
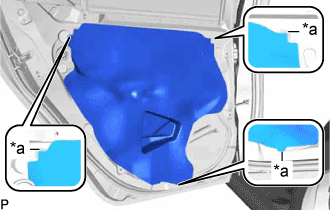 |
Attach the rear door service hole cover according to the reference points on the rear door panel.
| *a | Reference Point |
| 7. INSTALL REAR DOOR TRIM BOARD SUB-ASSEMBLY |
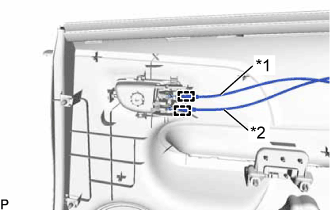 |
Connect the rear door lock remote control cable assembly and rear door inside locking cable assembly to the rear door inside handle.
| *1 | Rear Door Inside Locking Cable Assembly |
| *2 | Rear Door Lock Remote Control Cable Assembly |
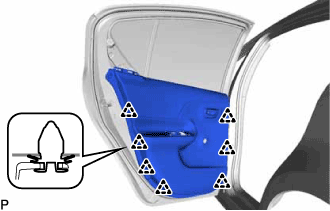 |
Engage the 7 clips.
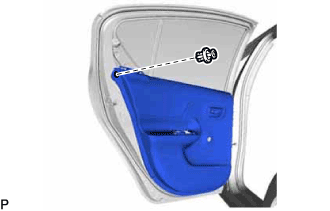 |
Engage the clip.
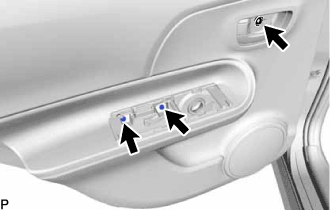 |
Install the rear door trim board sub-assembly with the 3 screws.
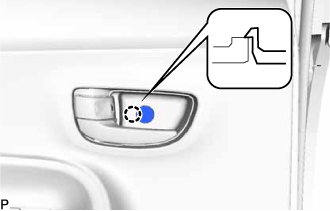 |
Engage the claw and close the cover.
| 8. INSTALL REAR POWER WINDOW REGULATOR SWITCH ASSEMBLY WITH REAR DOOR ARMREST BASE PANEL |
Connect the connector.
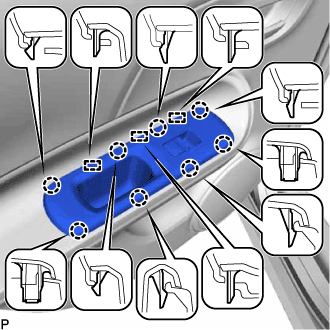 |
Engage the 3 guides and 8 claws to install the rear power window regulator switch assembly with rear door armrest base panel.
| 9. INSTALL REAR DOOR FRAME GARNISH |
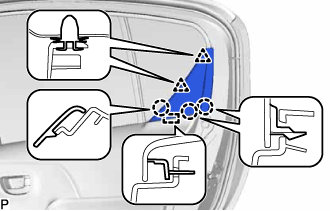 |
Engage the guide.
Engage the 2 clips and 3 claws to install the rear door frame garnish.
| 10. CONNECT CABLE FROM NEGATIVE AUXILIARY BATTERY TERMINAL |
| 11. INSTALL FRONT FLOOR COVER RH |
Engage the 3 guides.
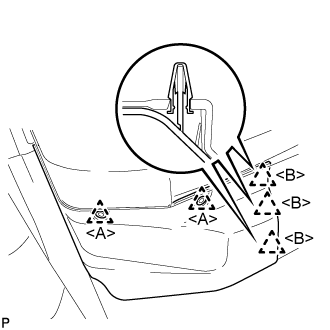 |
Engage the clip <B> to install the front floor cover RH.
Install the 2 clips <A>.
| 12. INSPECT POWER WINDOW OPERATION |