Align the positioning tape (Red) on the front part of the No. 1 roof wire with the front tab of the roof headlining.
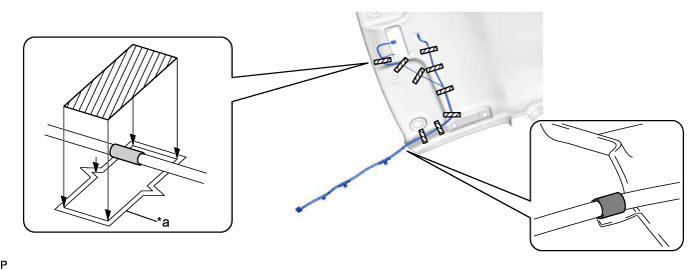
 | Positioning Tape (Red) | 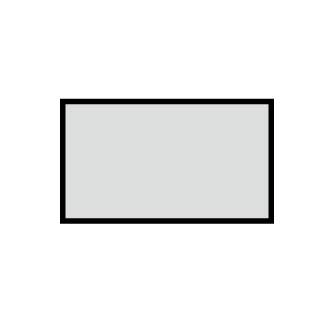 | Positioning Tape |
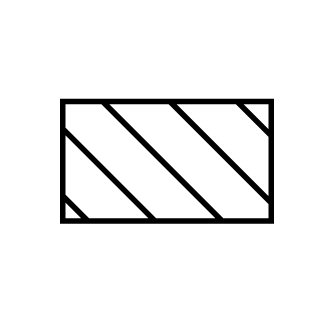 | Adhesive Tape | - | - |
| *a | Marking | - | - |
ROOF HEADLINING > REASSEMBLY |
| 1. INSTALL NO. 1 ROOF WIRE (w/o Room Light) |
Align the positioning tape (Red) on the front part of the No. 1 roof wire with the front tab of the roof headlining.
| Positioning Tape (Red) | | Positioning Tape |
| Adhesive Tape | - | - |
| *a | Marking | - | - |
Align the No. 1 roof wire positioning tape with the markings on the roof headlining.
Install the No. 1 roof wire to the roof headlining with the adhesive tape.
| 2. INSTALL NO. 1 ROOF WIRE (w/ Room Light) |
Align the positioning tape (Red) on the front part of the No. 1 roof wire with the front tab of the roof headlining.
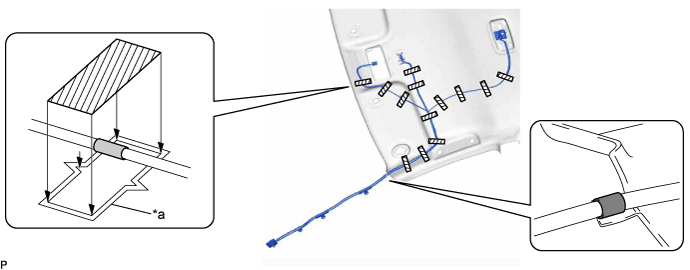
| Positioning Tape (Red) | | Positioning Tape |
| Adhesive Tape | - | - |
| *a | Marking | - | - |
Align the No. 1 roof wire positioning tape with the markings on the roof headlining.
Install the No. 1 roof wire to the roof headlining with the adhesive tape.
| 3. INSTALL ROOF HEADLINING END PAD |
Remove the release paper from 2 new roof headlining end pads.
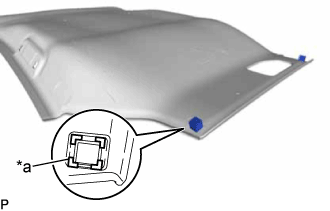 |
Align the 2 roof headlining end pads with the markings on the roof headlining and install the pads as shown in the illustration.
| *a | Marking |
| 4. INSTALL ROOF HEADLINING FORMING PAD |
Remove the release paper from 2 new roof headlining forming pads.
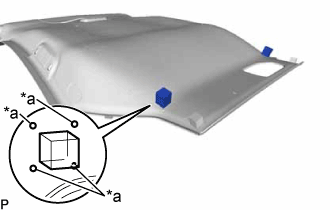 |
Align the 2 roof headlining forming pads with the markings on the roof headlining and install the pads as shown in the illustration.
| *a | Marking |
| 5. INSTALL REAR NO. 2 SIDE RAIL SPACER LH |
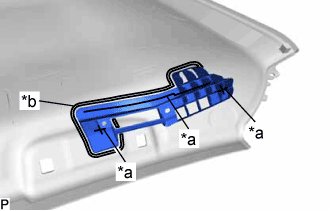 |
Align a new rear No. 2 side rail spacer LH with the markings on the roof headlining and install the spacer using hot-melt glue as shown in the illustration.
| *a | Hot-melt Glue |
| *b | Marking |
| 6. INSTALL REAR NO. 2 SIDE RAIL SPACER RH |
| 7. INSTALL NO. 3 ROOF SILENCER PAD |
Align a new No. 3 roof silencer pad with the markings on the roof headlining and install the pad using hot-melt glue as shown in the illustration.
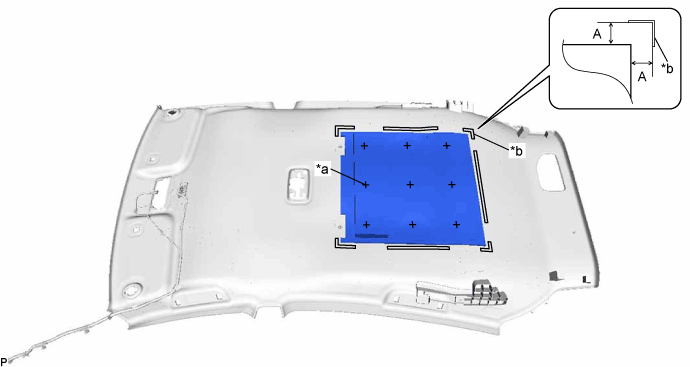
| *a | Hot-melt Glue | *b | Marking |
| Dimension | Measurement |
| A | 20 mm (0.787 in.) |
| 8. INSTALL NO. 2 ROOF SILENCER PAD (w/o Room Light) |
Align a new No. 2 roof silencer pad and with the markings on the roof headlining and install the pad using hot-melt glue as shown in the illustration.
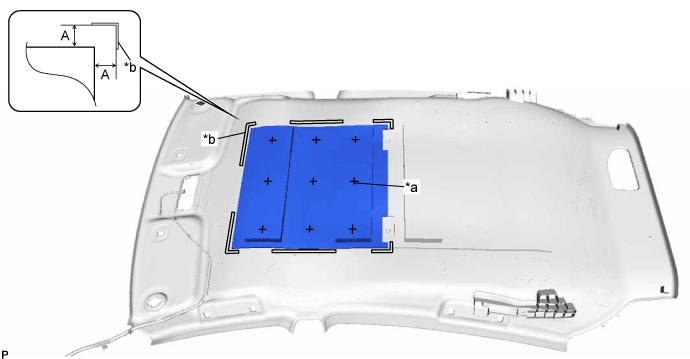
| *a | Hot-melt Glue | *b | Marking |
| Dimension | Measurement |
| A | 20 mm (0.787 in.) |
| 9. INSTALL NO. 2 ROOF SILENCER PAD (w/ Room Light) |
Align a new No. 2 roof silencer pad with the markings on the roof headlining and install the pad using hot-melt glue as shown in the illustration.
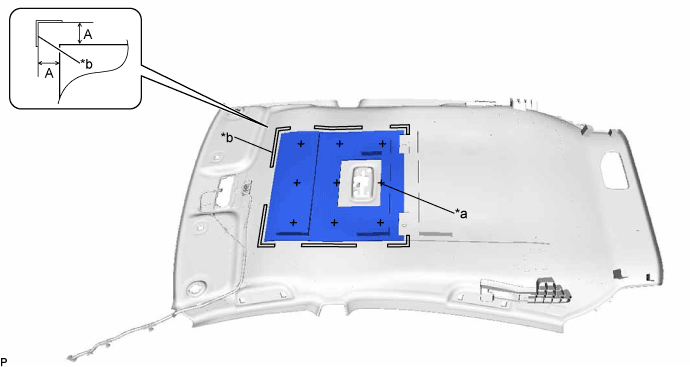
| *a | Hot-melt Glue | *b | Marking |
| Dimension | Measurement |
| A | 20 mm (0.787 in.) |
| 10. INSTALL NO. 1 ROOF SILENCER PAD |
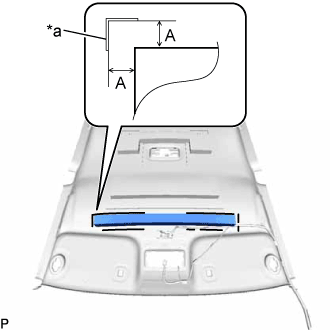 |
Align a new No. 1 roof silencer pad with the markings on the roof headlining and install the pad using hot-melt glue as shown in the illustration.
| *a | Marking |
| Dimension | Measurement |
| A | 20 mm (0.787 in.) |
| 11. INSTALL FRONT ROOF SILENCER PAD |
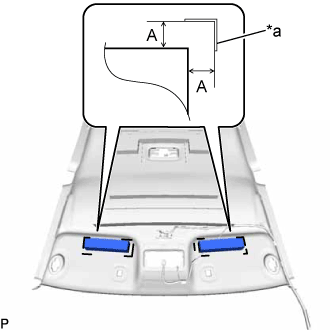 |
Align 2 new roof headlining silencer pads with the markings on the roof headlining and install the pads using hot-melt glue as shown in the illustration.
| *a | Marking |
| Dimension | Measurement |
| A | 20 mm (0.787 in.) |
| 12. INSTALL UPPER SHOULDER BELT ANCHOR COVER |
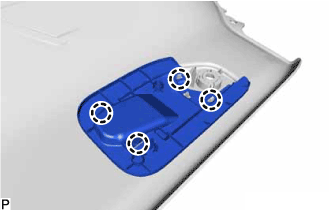 |
Install the rear seat shoulder belt cover RH to the roof headlining.
Engage the 4 claws to install the seat belt anchor cover.
| 13. INSTALL NO. 2 ANTENNA CORD SUB-ASSEMBLY |
Install the No. 2 antenna cord sub-assembly to the roof headlining assembly from the front of the vehicle.
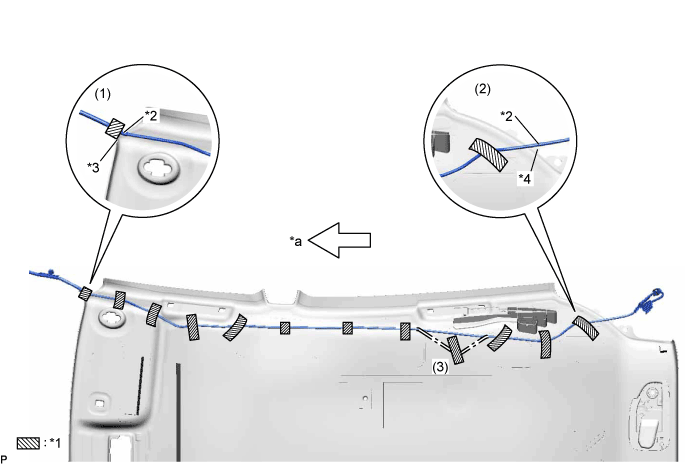
| *1 | Tape | *2 | Marking Tape |
| *3 | Protrusion A | *4 | Edge |
| *a | Front | - | - |
Put the pieces of tape back to the positions shown in the illustration in order to secure the antenna cord to the roof headlining assembly.
| 14. INSTALL AMPLIFIER MICROPHONE ASSEMBLY |
Engage the 2 claws and install the amplifier microphone assembly to roof headlining holder cover.
| 15. INSTALL ROOF HEADLINING RETAINER COVER |
Engage the 4 claws and install the roof headlining retainer cover.
Connect the connector.