for LHD:
Disengage the 3 claws, 8 clips and 3 guides, and remove the lower instrument cluster finish panel garnish as shown in the illustration.
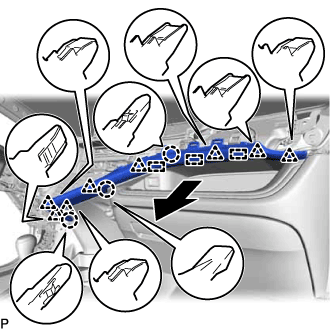 |
STEREO JACK ADAPTER ASSEMBLY > REMOVAL |
| 1. REMOVE UPPER INSTRUMENT PANEL ASSEMBLY |
| 2. REMOVE LOWER INSTRUMENT CLUSTER FINISH PANEL GARNISH |
for LHD:
|
Disengage the 3 claws, 8 clips and 3 guides, and remove the lower instrument cluster finish panel garnish as shown in the illustration.
for RHD:
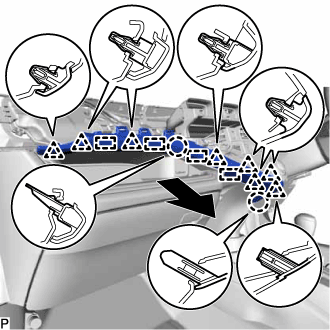 |
Disengage the 2 claws, 8 clips and 4 guides, and remove the lower instrument cluster finish panel garnish as shown in the illustration.
| 3. REMOVE INSTRUMENT PANEL BOX ASSEMBLY |
for LHD:
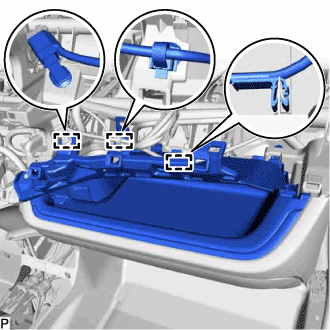 |
Disengage the 3 clamps.
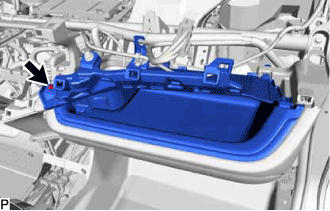 |
Remove the screw <D>.
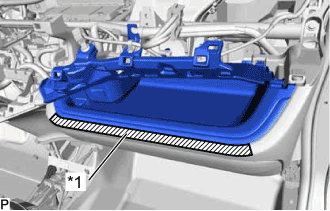 |
Apply protective tape to the area shown in the illustration.
| *1 | Protective Tape |
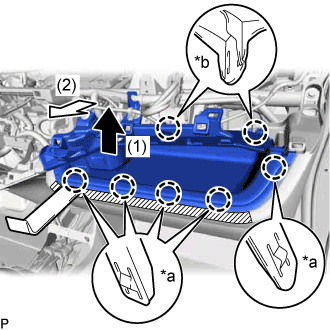 |
Using a moulding remover, pull the instrument panel box in the direction indicated by the arrow (1) to disengage the 5 claws (A).
| *a | Claw (A) |
| *b | Claw (B) |
Pull the instrument panel box in the direction indicated by the arrow (2) to disengage the 2 claws (B) and remove the instrument panel box assembly.
| 4. REMOVE NO. 1 STEREO JACK ADAPTER ASSEMBLY |
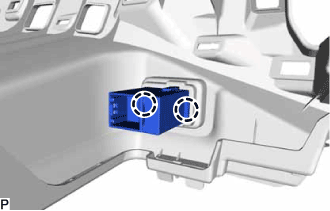 |
Disengage the 2 claws and remove the No. 1 stereo jack adapter assembly.