 |
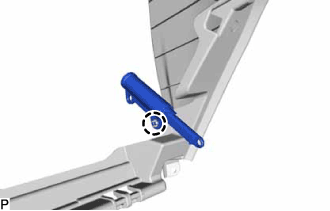
Disengage the claw and remove the glove compartment door stopper sub-assembly.
LOWER INSTRUMENT PANEL > DISASSEMBLY |
| 1. REMOVE GLOVE COMPARTMENT DOOR STOPPER SUB-ASSEMBLY |
|
Disengage the claw and remove the glove compartment door stopper sub-assembly.
| 2. REMOVE NO. 1 POWER OUTLET SOCKET ASSEMBLY |
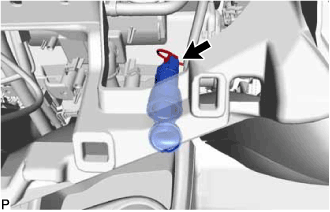 |
Disconnect the connector.
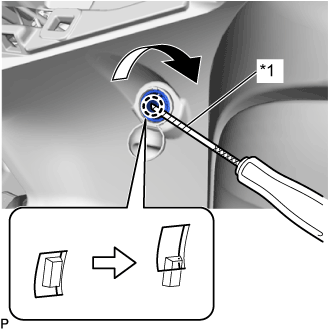 |
Using a screwdriver with its tip wrapped with protective tape, disengage the claw, then turn the No. 1 power outlet socket assembly clockwise and pull the No. 1 power outlet socket assembly half way out.
| *1 | Protective Tape |
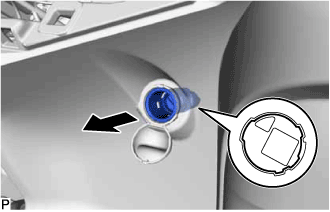 |
Align the protrusion of the No. 1 power outlet socket assembly with the cutout of the No. 1 power outlet socket cover and then pull the No. 1 power outlet socket assembly out.
Remove the No. 1 power outlet socket assembly.
| 3. REMOVE NO. 1 POWER OUTLET SOCKET COVER |
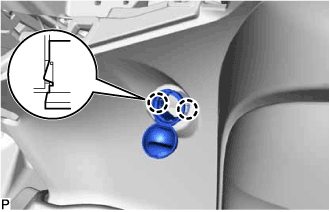 |
Disengage the 2 claws and remove the No. 1 power outlet socket cover.
| 4. REMOVE POWER SWITCH (for LHD) |
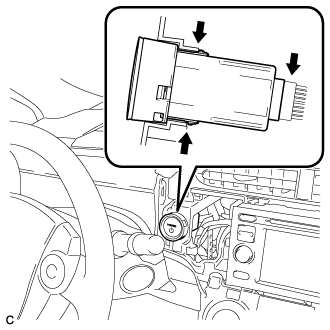 |
Disengage the 2 claws and remove the power switch.
Disconnect the power switch connector.
| 5. REMOVE SPARE SWITCH HOLE COVER (for RHD) |
Disengage the 2 claws and remove the spare switch hole cover.
| 6. REMOVE NO. 1 INSTRUMENT CLUSTER FINISH PANEL SEAL |
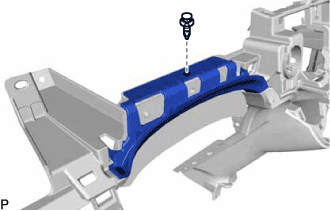 |
Using a clip remover, remove the clip.
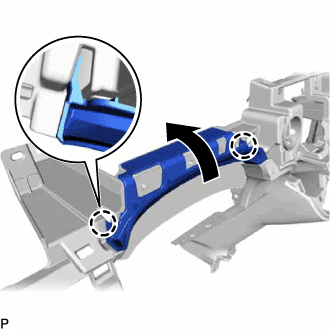 |
Disengage the 2 claws as shown in the illustration.
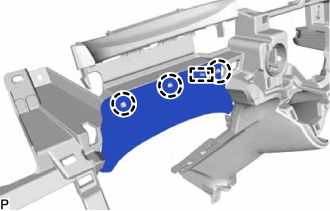 |
Disengage the 3 claws and guide and remove the No. 1 instrument cluster finish panel seal.