SEAT REAR SEAT ASSEMBLY REASSEMBLY
CAUTION / NOTICE / HINT
- CAUTION:
-
Wear protective gloves. Sharp areas on the parts may injure your hands.
PROCEDURE

 71075B
1.INSTALL BENCH TYPE REAR SEAT CUSHION COVER
- HINT:
-
When installing a bench type rear seat cushion cover, refer to Precaution in order to prevent wrinkles from forming.
-
Click hereVehicle Interior>SEAT>FRONT SEAT ASSEMBLY(for Manual Seat)>PRECAUTION
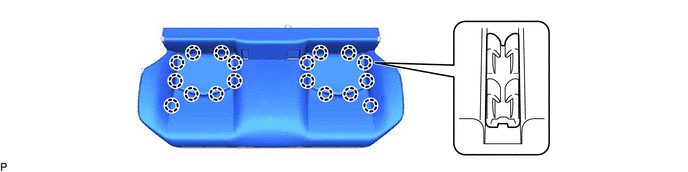
Engage the 18 claws.
- NOTICE:
-
Be careful not to damage the bench type rear seat cushion cover.
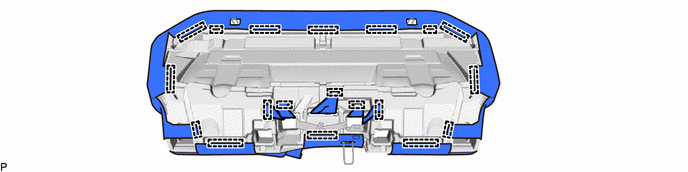
Engage the 19 hooks.
- NOTICE:
-
Be careful not to damage the bench type rear seat cushion cover.
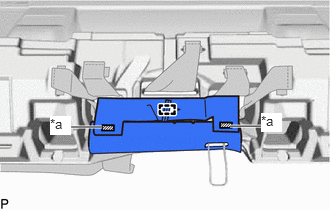
| *a | Fastener |
Engage the 2 fasteners and hook to install the bench type rear seat cushion cover to the rear seat cushion pad.
- NOTICE:
-
Be careful not to damage the bench type rear seat cushion cover.
73735
2.INSTALL CHILD RESTRAINT SEAT GUIDE CUP (w/ Cover)
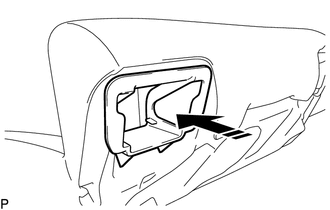

|
Install in this Direction |
Install the child restraint seat guide cup as shown in the illustration.
- HINT:
-
Use the same procedure for all child restraint seat guide cups.
73731C
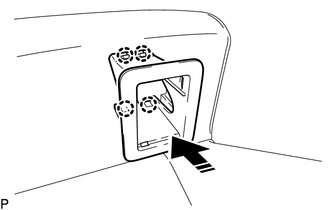
3.INSTALL NO. 2 CHILD RESTRAINT SEAT COVER (w/ Cover)
|
|
Install in this Direction |
Engage the 4 claws to install the No. 2 child restraint seat cover as shown in the illustration.
- HINT:
-
Use the same procedure for all No. 2 child restraint seat covers.
73731B
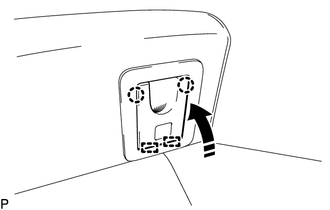
4.INSTALL NO. 1 CHILD RESTRAINT SEAT COVER (w/ Cover)
|
|
Install in this Direction |
Engage the 2 guides and 2 claws to install the No. 1 child restraint seat cover as shown in the illustration.
- HINT:
-
Use the same procedure for all No. 1 child restraint seat covers.
72640A
5.INSTALL REAR SEATBACK LOCK ASSEMBLY LH (for LH Side)
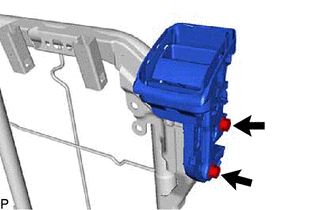
Install the rear seatback lock assembly LH to the rear seatback frame sub-assembly LH with the 2 bolts.
- Torque:
- 30 N*m (306 kgf*cm, 22 ft.*lbf)
71078S
6.INSTALL SEPARATE TYPE REAR SEATBACK COVER (for LH Side)
- HINT:
-
When installing a separate type rear seatback cover, refer to Precaution in order to prevent wrinkles from forming.
-
Click hereVehicle Interior>SEAT>FRONT SEAT ASSEMBLY(for Manual Seat)>PRECAUTION
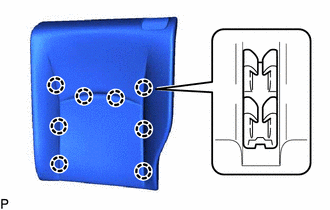
Engage the 8 claws to install the separate type rear seatback cover to the separate type rear seatback pad LH.
- NOTICE:
-
Be careful not to damage the separate type rear seatback cover.
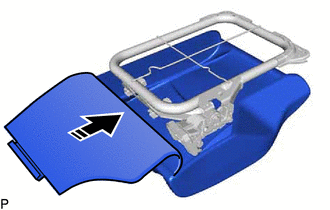
7.INSTALL SEPARATE TYPE REAR SEATBACK COVER WITH PAD (for LH Side)
|
|
Install in this Direction |
Install the separate type rear seatback cover with pad to the rear seatback frame sub-assembly LH as shown in the illustration.
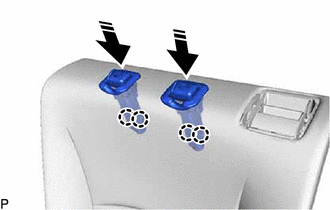
|
|
Install in this Direction |
Engage the 4 claws to install the 2 rear seat headrest supports as shown in the illustration.
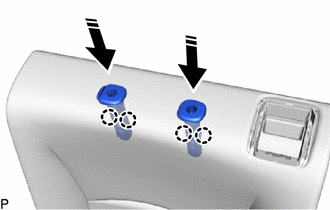
|
|
Install in this Direction |
for Type A:
Engage the 4 claws to install the 2 rear seat headrest supports as shown in the illustration.
|
|
Install in this Direction |
for Type B:
Engage the 4 claws to install the 2 rear seat headrest supports as shown in the illustration.
71702C
8.INSTALL REAR SEATBACK BOARD SUB-ASSEMBLY LH (for LH Side)
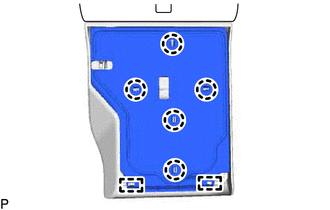
Engage the 2 guides.
Engage the 5 claws to install the rear seatback board sub-assembly LH.
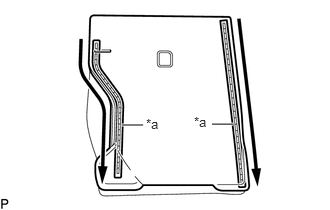
| *a | Fastener |
Close the 2 fasteners as shown in the illustration.
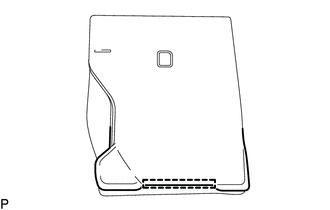
Engage the hook.
72679
9.INSTALL REAR SEATBACK LOCK CONTROL BEZEL (for LH Side)
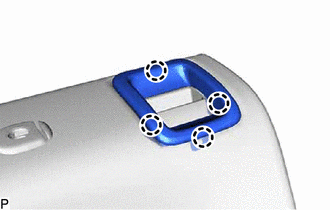
Engage the 4 claws to install a new rear seatback lock control bezel.
72630C
10.INSTALL REAR SEATBACK LOCK ASSEMBLY RH (for RH Side)
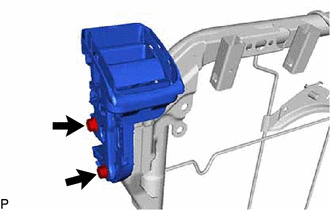
Install the rear seatback lock assembly RH to the rear seatback frame sub-assembly RH with the 2 bolts.
- Torque:
- 30 N*m (306 kgf*cm, 22 ft.*lbf)
73350C
11.INSTALL REAR CENTER SEAT OUTER BELT ASSEMBLY (for RH Side)
71077S
12.INSTALL SEPARATE TYPE REAR SEATBACK COVER (for RH Side)
- HINT:
-
When installing a separate type rear seatback cover, refer to Precaution in order to prevent wrinkles from forming.
-
Click hereVehicle Interior>SEAT>FRONT SEAT ASSEMBLY(for Manual Seat)>PRECAUTION
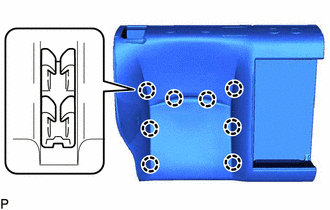
Engage the 8 claws to install the separate type rear seatback cover to the separate type rear seatback pad RH.
- NOTICE:
-
Be careful not to damage the separate type rear seatback cover.
13.INSTALL SEPARATE TYPE REAR SEATBACK COVER WITH PAD (for RH Side)
|
|
Install in this Direction |
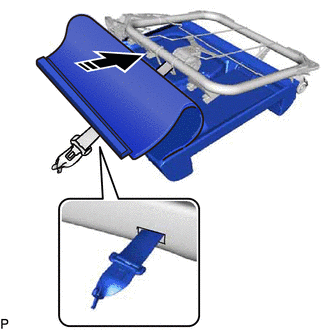
Pass the rear center seat outer belt assembly through the separate type rear seatback cover with pad and temporarily install the separate type rear seatback cover with pad to the rear seatback frame sub-assembly RH as shown in the illustration.
|
|
Install in this Direction |
for RH Side:
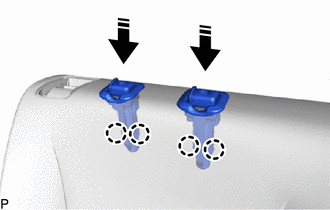
Engage the 4 claws to install the 2 rear seat headrest supports as shown in the illustration.
for RH Side:
|
|
Install in this Direction |
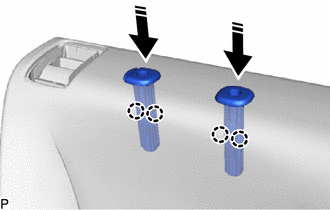
for Type A:
Engage the 4 claws to install the 2 rear seat headrest supports as shown in the illustration.
|
|
Install in this Direction |
for Type B:
Engage the 4 claws to install the 2 rear seat headrest supports as shown in the illustration.
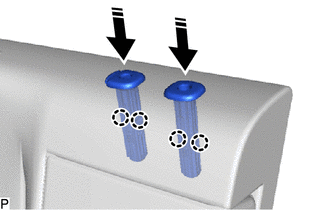
|
|
Install in this Direction |
for Center:
Engage the 4 claws to install the 2 rear seat headrest supports as shown in the illustration.
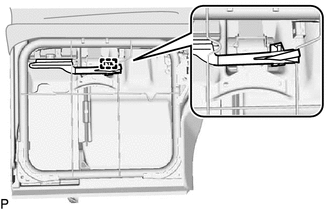
Engage the hook to install the separate type rear seatback cover with pad to the rear seatback frame sub-assembly RH.
71701C
14.INSTALL REAR SEATBACK BOARD SUB-ASSEMBLY RH (for RH Side)
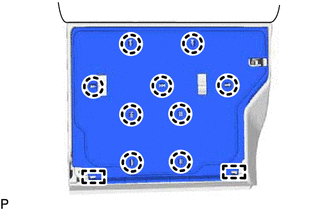
Engage the 2 guides.
Engage the 9 claws to install the rear seatback board sub-assembly RH.
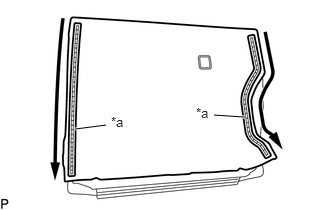
| *a | Fastener |
Close the 2 fasteners as shown in the illustration.
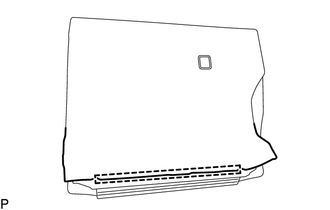
Engage the hook.
72679
15.INSTALL REAR SEATBACK LOCK CONTROL BEZEL (for RH Side)
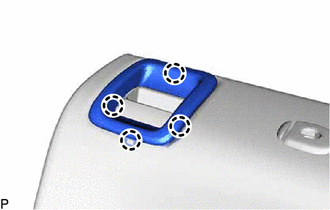
Engage the 4 claws to install a new rear seatback lock control bezel.
73373
16.INSTALL REAR SEAT SHOULDER BELT COVER (for RH Side)
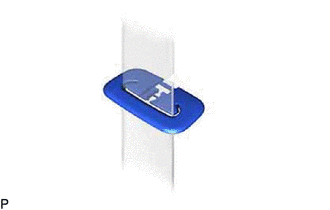
Install the rear seat shoulder belt cover.
73178A
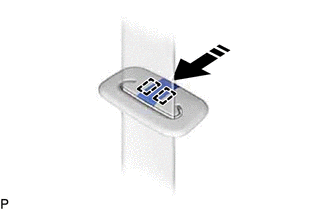
17.INSTALL SEAT BELT ANCHOR COVER CAP (for RH Side)
|
|
Install in this Direction |
Engage the 2 guides to install the seat belt anchor cover cap as shown in the illustration.
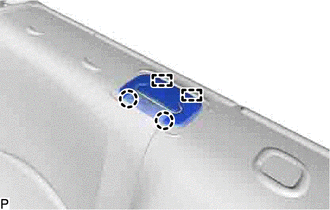
Engage the 2 guides and 2 claws to connect the rear seat shoulder belt cover with seat belt anchor cover cap.
72830
18.INSTALL REAR SEAT CENTER ARMREST ASSEMBLY (for RH Side)
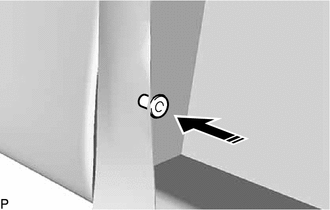
|
|
Install in this Direction |
Install the bush as shown in the illustration.
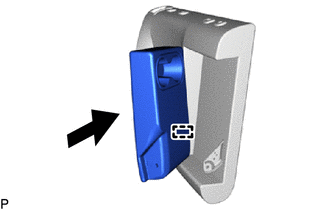
Engage the pin as shown in the illustration.
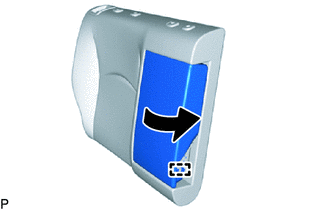
Engage the guide as shown in the illustration.
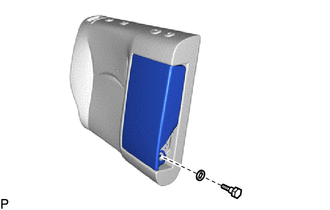
Install the rear seat center armrest assembly with the bolt and washer.
- Torque:
- 21 N*m (214 kgf*cm, 15 ft.*lbf)
72868B
19.INSTALL CENTER ARMREST HINGE COVER (for RH Side)
|
|
Install in this Direction |
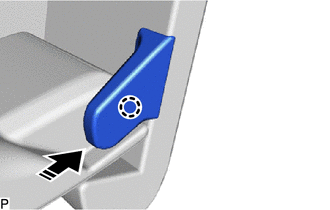
Engage the claw to install the center armrest hinge cover as shown in the illustration.