INSTALLATION
Removal / installation · Vehicles built Jan 2007 – Jul 2007
Versions by build date: Nov 2005 – Dec 2006 Jan 2007 – Jul 2007 from Aug 2007
| 1.
INSTALL TIMING CHAIN COVER SUB-ASSEMBLY (w/ Oil Pump) |
 |
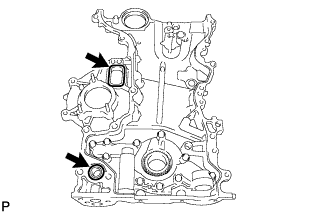
- Install a new gasket and O-ring to the timing chain cover as shown in the illustration.
Apply seal packing to the timing chain cover as shown in the illustration.
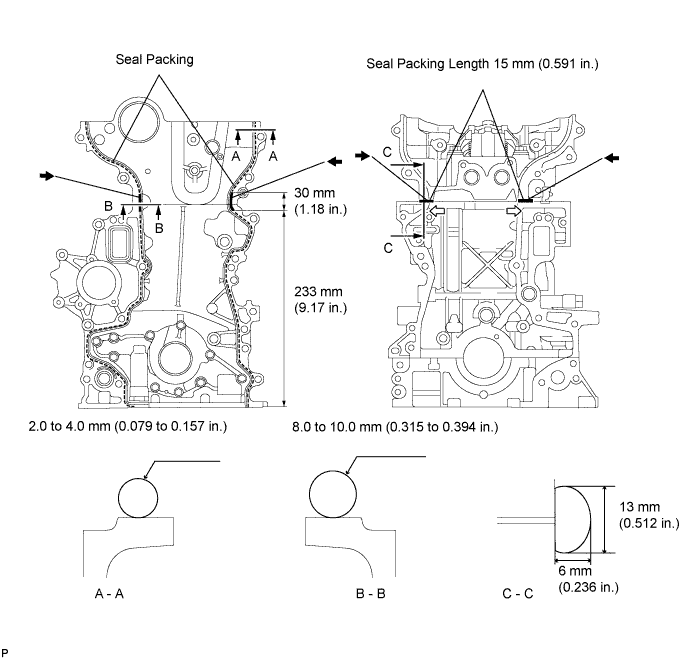

- Seal packing:
- Toyota genuine seal packing black, three bond 1207B or equivalent
- Standard seal diameter:
Position
|
Specified Condition
|
A - A
|
2.0 to 4.0 mm (0.079 to 0.157 in.)
|
B - B
|
8.0 to 10.0 mm (0.315 to 0.394 in.)
|
C - C
|
Width: 13 mm (0.512 in.)
Height: 6 mm (0.236 in.)
|
- NOTICE:
- Be sure to clean and degrease the contact surfaces, especially 4 areas indicated by the arrows in the illustration.
- When the contact surfaces are wet, wipe them off with an oil-free cloth before applying seal packing.
- When applying seal packing to area C - C, apply it in the direction of the white arrows in the illustration.
- Install the crankcase within 3 minutes and tighten the bolts within 15 minutes after applying seal packing.
- Do not start the engine for at least 4 hours after installing.
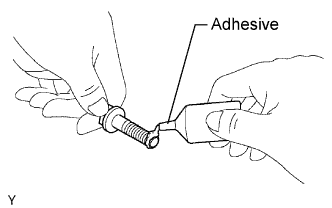
- Apply adhesive to the 4 bolts.
- Adhesive:
- Toyota genuine adhesive 1324, three bond 1324 or equivalent
- HINT:
- Bolt length: 37.5 mm (1.476 in.)
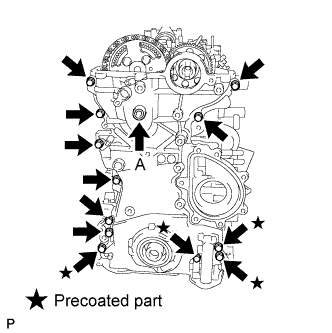
- Temporarily install the timing chain cover with the 4 bolts.
Temporarily install a new seal washer and bolt A.
- HINT:
- Bolt length: 67.5 mm (2.657 in.)
Temporarily install the 8 bolts.
- HINT:
- Bolt length: 37.5 mm (1.476 in.)
Using several steps, install the 13 bolts.
-
Torque:
- 31.5 N*m{
321 kgf*cm
, 23 ft.*lbf
}
for except bolt A
- 21 N*m{
214 kgf*cm
, 15 ft.*lbf
}
for bolt A
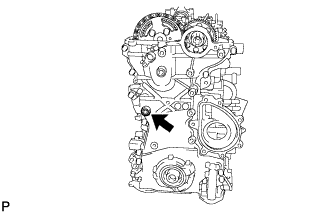
- Using a 10 mm socket hexagon wrench, install a new gasket and the timing chain cover tight plug.
-
Torque:
- 19 N*m{
194 kgf*cm
, 14 ft.*lbf
}
| 2.
INSTALL WATER PUMP ASSEMBLY
|
|
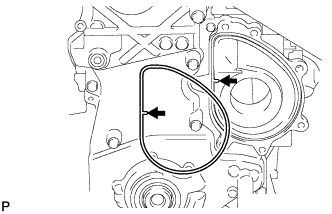
- Install a new gasket onto the timing chain cover as shown in the illustration.
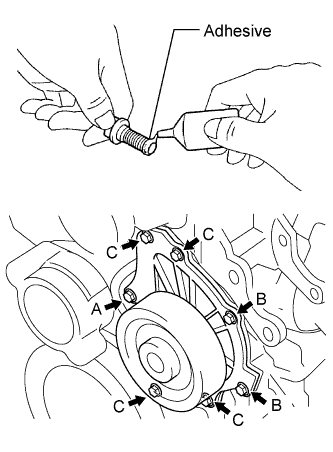
Clean the 7 bolts and 7 bolt holes.
- Temporarily install the water pump.
- Standard bolt length:
Item
|
Specified Condition
|
Bolt A and C
|
45 mm (1.77 in.)
|
Bolt B
|
30 mm (1.18 in.)
|
Apply adhesive to 2 or 3 threads of the bolt labeled A.
- Adhesive:
- Toyota genuine adhesive 1324, three bond 1324 or equivalent.
Temporarily install the water pump with the 7 bolts.
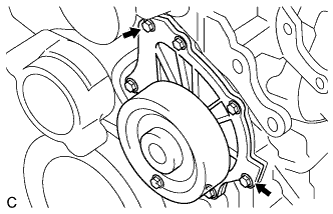
- Tighten the 2 bolts indicated by the arrows in the illustration. Then tighten the other bolts.
-
Torque:
- 32 N*m{
326 kgf*cm
, 24 ft.*lbf
}
| 3.
INSTALL CRANKSHAFT PULLEY
|
|
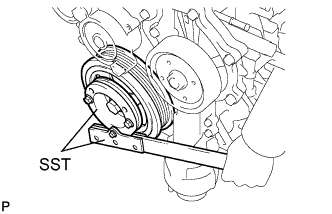
Align the keyway of the pulley with the key located on the crankshaft, then slide the pulley into place.
- Using SST, install the pulley bolt.
- SST
- 09213-58013
09330-00021
-
Torque:
- 250 N*m{
2,550 kgf*cm
, 184 ft.*lbf
}
| 4.
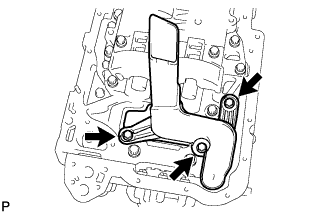
INSTALL OIL STRAINER SUB-ASSEMBLY |
|
- Install a new O-ring and the oil strainer with the 3 bolts.
-
Torque:
- 9.0 N*m{
92 kgf*cm
, 80 in.*lbf
}
| 5.
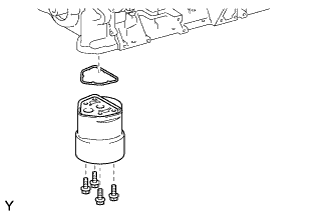
INSTALL OIL FILTER BRACKET |
|
- Install a new gasket and the oil filter bracket with the 4 bolts.
-
Torque:
- 9.0 N*m{
92 kgf*cm
, 80 in.*lbf
}
| 6.
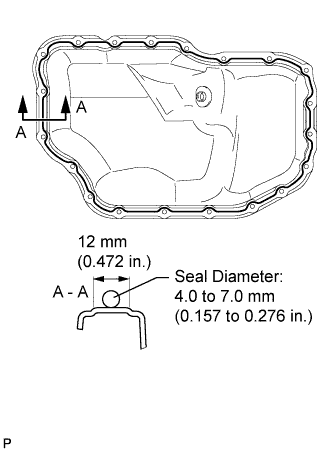
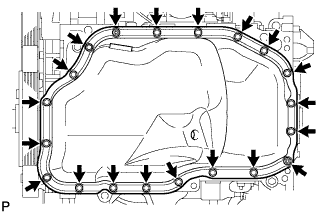
INSTALL NO. 2 OIL PAN SUB-ASSEMBLY |
|
- Apply seal packing in a continuous bead as shown in the illustration.
- Seal packing:
- Toyota genuine seal packing black, three bond 1207B or equivalent
- Standard seal diameter:
- 4.0 to 7.0 mm (0.157 to 0.276 in.)
- NOTICE:
- Remove any oil from the contact surface.
- Install the oil pan within 3 minutes and tighten the bolts within 10 minutes after applying seal packing.
- Do not start the engine for at least 4 hours after installing.
- Install the oil pan with the 18 bolts and 2 nuts.
-
Torque:
- 10.5 N*m{
107 kgf*cm
, 8 ft.*lbf
}
Install a new gasket and the drain plug.
-
Torque:
- 38 N*m{
387 kgf*cm
, 28 ft.*lbf
}
| 7.
INSTALL OIL FILTER ELEMENT
|
|
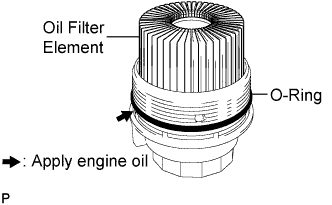
Clean the oil filter cap threads and O-ring groove.
- Apply a small amount of engine oil to a new O-ring and install it to the oil filter cap.
Set a new oil filter element in the oil filter cap.
| 8.
INSTALL OIL FILTER CAP ASSEMBLY
|
|
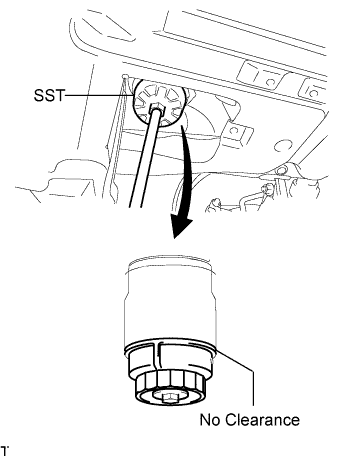
Remove any dirt or foreign matter from the installation surface and inside of the engine.
Apply a small amount of engine oil to the O-ring again and install the oil filter cap.
- NOTICE:
- Be careful that the O-ring does not get caught between the parts.
- Using SST, tighten the oil filter cap.
- SST
- 09228-06501
-
Torque:
- 40 N*m{
408 kgf*cm
, 30 ft.*lbf
}
- NOTICE:
- Make sure that the oil filter is installed securely as shown in the illustration.
- Be careful that the O-ring does not get caught between the parts.
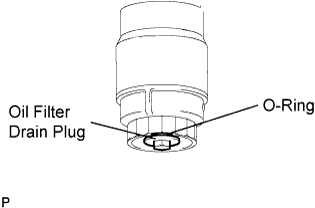
- Apply a small amount of engine oil to a new drain plug O-ring, and install it to the oil filter cap.
- NOTICE:
- Before installing the O-ring, remove any dirt or foreign matter from the installation surface of the oil filter cap.
Install the oil filter drain plug to the filter cap.
-
Torque:
- 12.5 N*m{
127 kgf*cm
, 9 ft.*lbf
}
- NOTICE:
- Be careful that the O-ring does not get caught between the parts.
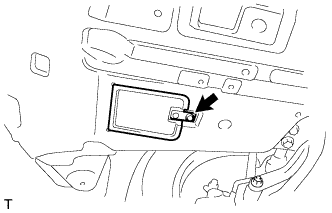
- Close the oil filter element service cover and install the clip.
| 9.
INSTALL CYLINDER HEAD COVER SUB-ASSEMBLY
|
|
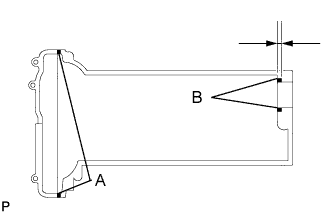
Remove any old packing (FIPG) material.
- Apply seal packing to the cylinder head as shown in the illustration.
- Seal packing:
- Toyota genuine seal packing block, three bond 1207B or equivalent.
- Standard seal diameter:
- 6 mm (0.23 in.)
Install the gasket to the cylinder head cover.
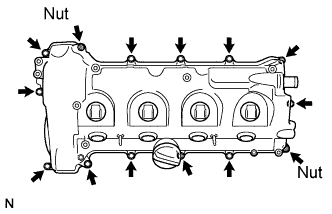
- Install the cylinder head cover with the 12 bolts, 2 nuts and 2 washers.
Uniformly tighten the bolts and nuts in several passes.
-
Torque:
- 11 N*m{
112 kgf*cm
, 8 ft.*lbf
}
| 10.
REMOVE ENGINE FROM STAND |
|
| 11.
INSTALL ENGINE |
|
Install the engine to the vehicle (Click here).
| 12.
CONNECT CABLE TO NEGATIVE BATTERY TERMINAL |
|