INSTALLATION
Removal / installation · Vehicles built from Aug 2007
Versions by build date: Nov 2005 – Dec 2006 Jan 2007 – Jul 2007 from Aug 2007
| 1. INSTALL CLUTCH PEDAL ASSEMBLY |

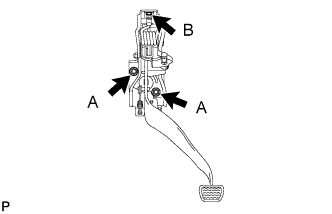  |
Install the clutch pedal.
Install the bolt and 2 nuts.
- Torque:
- 13 N*m{ 133 kgf*cm , 10 ft.*lbf } for nut A
- 24 N*m{ 245 kgf*cm , 18 ft.*lbf } for bolt B
| 2. INSTALL PUSH ROD CLEVIS PIN |
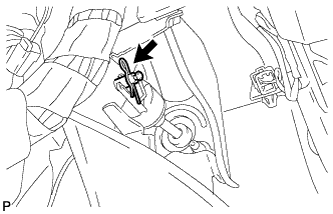 |
Install the pin and a new clip.
| 3. CONNECT CLUTCH START SWITCH CONNECTOR (w/ Entry and Start System) |
Install the clutch start switch with the nut.
- Torque:
- 16 N*m{ 160 kgf*cm , 12 ft.*lbf }
Connect the clutch start switch connector.
| 4. CONNECT CLUTCH START CANCEL SWITCH CONNECTOR (w/ Cruise Control System) |
Connect the switch connector.
For 1AZ-FE, 2AZ-FE, refer to the following procedures (Click here).
For 2AD-FTV, 2AD-FHV, refer to the following procedures (Click here).
| 5. INSTALL INSTRUMENT PANEL SAFETY PAD COVER |
Install the instrument panel (Click here).
| 6. INSTALL DRIVER SIDE KNEE AIRBAG ASSEMBLY (w/ Knee Airbag) |
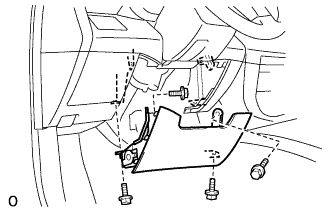 |
Connect the connector.
- NOTICE:
- When handling the airbag connector, take care not to damage the airbag wire harness.
Install the driver side knee airbag with the 4 bolts.
- Torque:
- 10 N*m{ 101 kgf*cm , 7 ft.*lbf }
| 7. INSTALL NO. 1 INSTRUMENT PANEL UNDER COVER SUB-ASSEMBLY |
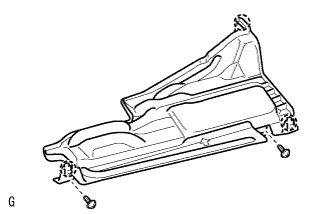 |
Attach the 2 claws to install the instrument panel under cover.
Install the 2 screws.
| 8. INSTALL LOWER INSTRUMENT PANEL FINISH PANEL (w/o Knee Airbag) |
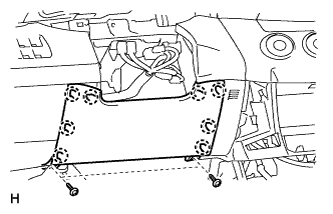 |
Attach the 8 claws to install the lower instrument panel finish panel.
Install the 2 screws.
| 9. CHECK FLUID LEVEL IN RESERVOIR |
Check the fluid level in the reservoir (Click here).