INSTALLATION
Removal / installation · Vehicles built Jan 2007 – Jul 2007
Versions by build date: Nov 2005 – Dec 2006 Jan 2007 – Jul 2007 from Aug 2007
| 1.
INSTALL RADIO RECEIVER ASSEMBLY WITH BRACKET (w/ Cassette Tape Player) |
 |
- w/ Stereo Opening Cover:
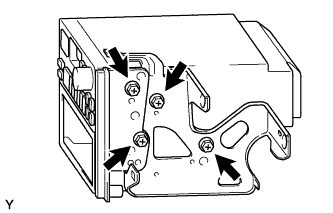
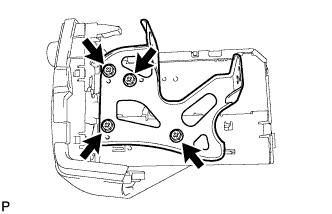
Install the No. 1 radio bracket and radio receiver panel RH to the radio receiver with the 4 bolts.
- w/ Stereo Opening Cover:
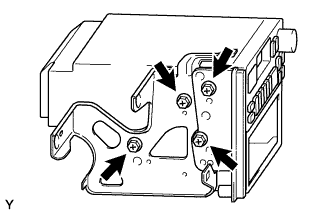
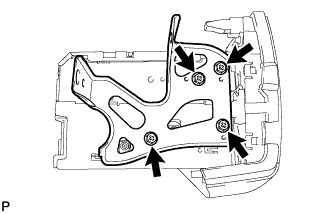
Install the No. 2 radio bracket and radio receiver panel LH to the radio receiver with the 4 bolts.
- w/o Stereo Opening Cover:
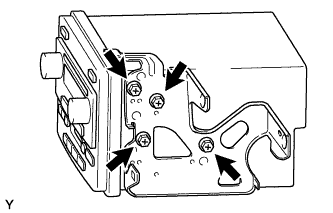
Install the No. 1 radio bracket to the radio receiver with the 4 bolts.
- w/o Stereo Opening Cover:
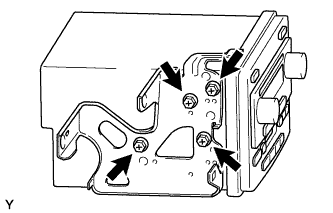
Install the No. 2 radio bracket to the radio receiver with the 4 bolts.
Connect all the connectors and install the radio receiver.
Install the 4 bolts.
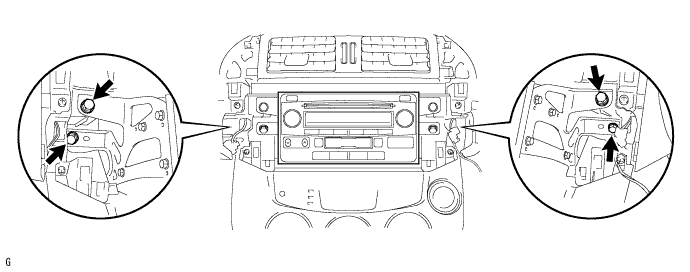

| 2.
INSTALL RADIO RECEIVER ASSEMBLY WITH BRACKET |
|
- Install the No. 1 radio bracket to the radio receiver with the 4 bolts.
- Install the No. 2 radio bracket to the radio receiver with the 4 bolts.
Connect all the connectors.
Attach the 4 claws to install the radio receiver..
Install the 4 bolts.
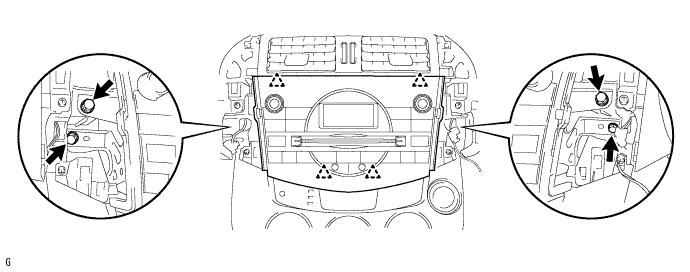
| 3.
INSTALL INSTRUMENT CLUSTER FINISH PANEL ASSEMBLY (w/ Cassette Tape Player) |
|
Attach the 4 claws to install the instrument cluster finish panel.
| 4.
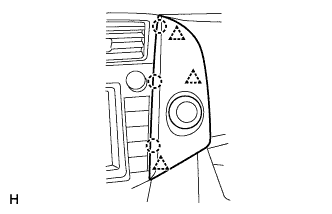
INSTALL NO. 1 INSTRUMENT CLUSTER FINISH PANEL CENTER
|
|
Connect the connector.
Attach the 3 clips and 3 claws to install the cluster finish panel.
| 5.
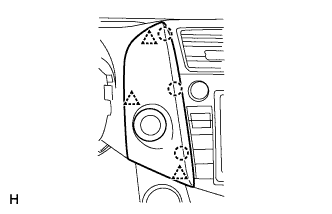
INSTALL NO. 2 INSTRUMENT CLUSTER FINISH PANEL CENTER
|
|
Connect the connector.
Attach the 3 clips and 3 claws to install the cluster finish panel.
| 6.
CONNECT CABLE TO NEGATIVE BATTERY TERMINAL |
|