REMOVAL
Removal / installation · Vehicles built Nov 2005 – Dec 2006
Versions by build date: Nov 2005 – Dec 2006 from Jan 2007
- HINT:
- Use the same procedures for the LH side and RH side.
- The procedures listed below are for the LH side.
| 1.
DISCONNECT CABLE FROM NEGATIVE BATTERY TERMINAL |
 |
- CAUTION:
- Wait at least 90 seconds after disconnecting the cable from the negative (-) battery terminal to prevent airbag and seat belt pretensioner activation.
| 2.
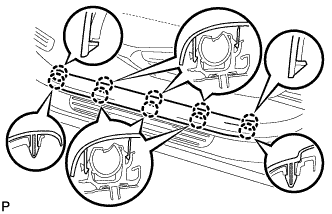
REMOVE FRONT DOOR SCUFF PLATE LH
|
|
- Using a screwdriver, detach the 10 claws and remove the scuff plate.
- HINT:
- Tape the screwdriver tip before use.
| 3.
REMOVE FRONT DOOR OPENING TRIM WEATHERSTRIP LH |
|
| 4.
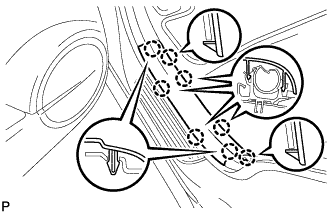
REMOVE REAR DOOR SCUFF PLATE LH (for Short Body)
|
|
- Using a screwdriver, detach the 8 claws and remove the scuff plate.
- HINT:
- Tape the screwdriver tip before use.
| 5.
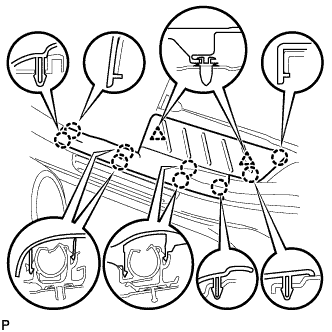
REMOVE REAR DOOR SCUFF PLATE LH (for Long Body)
|
|
Using a screwdriver, detach the 9 claws.
- HINT:
- Tape the screwdriver tip before use.
Using a clip remover, detach the 2 clips and remove the garnish.
| 6.
REMOVE REAR DOOR OPENING TRIM WEATHERSTRIP LH |
|
| 7.
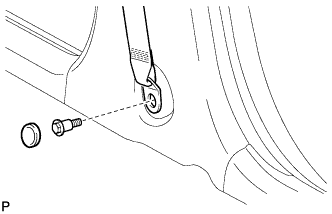
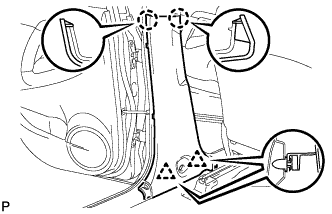
REMOVE CENTER PILLAR GARNISH LOWER LH |
|
- Remove the lap belt outer anchor cover.
Remove the anchor's built-in bolt from the pillar and disconnect the outer belt.
- Using a screwdriver, detach the 2 claws.
- HINT:
- Tape the screwdriver tip before use.
Using a clip remover, detach the 2 clips and remove the garnish.
| 8.
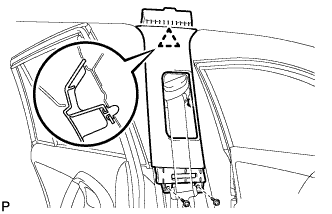
REMOVE CENTER PILLAR GARNISH LH |
|
Using a screwdriver, remove the 2 screws.
Using a clip remover, detach the clip, then remove the garnish.
Pull out the outer belt anchor from the center pillar garnish.
| 9.
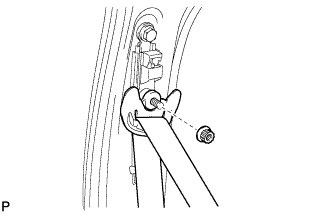
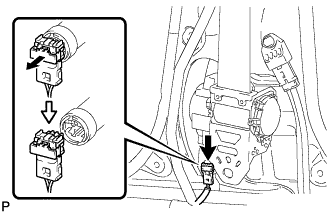
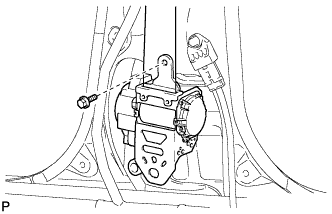
REMOVE FRONT SEAT OUTER BELT ASSEMBLY LH |
|
Remove the nut and disconnect the shoulder anchor.
- Disconnect the pretensioner connector as shown in the illustration.
- Remove the bolt and outer belt.
| 10.
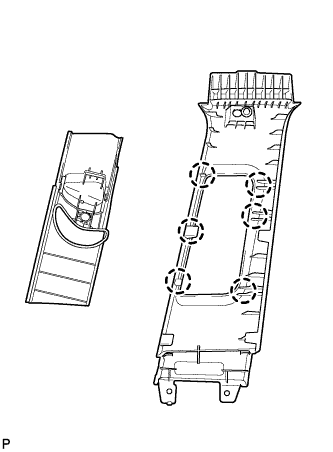
REMOVE FRONT SHOULDER BELT ANCHOR PLATE SUB-ASSEMBLY LH |
|
Using a screwdriver, detach the 6 claws.
Remove the anchor plate from the garnish.
- HINT:
- Tape the screwdriver tip before use.
| 11.
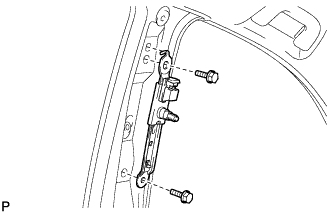
REMOVE FRONT SHOULDER BELT ANCHOR ADJUSTER ASSEMBLY |
|
Remove the 2 bolts and anchor.