INSTALLATION
Removal / installation · Vehicles built from Aug 2007
Versions by build date: Nov 2005 – Dec 2006 Jan 2007 – Jul 2007 from Aug 2007
| 1.
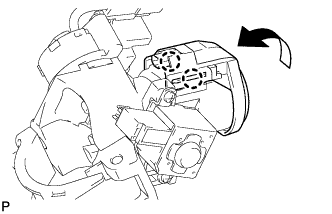
INSTALL TRANSPONDER KEY AMPLIFIER
|
 |
Attach the 2 claws and install the transponder key amplifier onto the steering column upper with the switch bracket.
| 2.
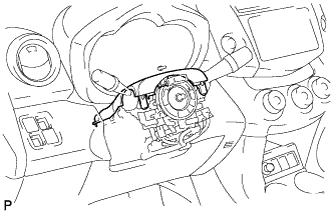
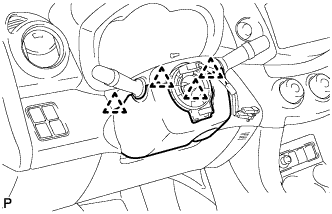
INSTALL STEERING COLUMN COVER
|
|
- Attach the claw to install the upper steering column cover.
- Attach the 4 claws to install the lower steering column cover.
| 3.
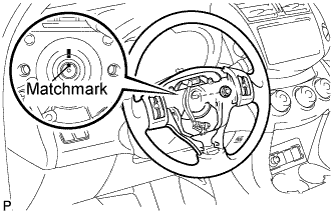
INSTALL STEERING WHEEL ASSEMBLY
|
|
- Align the matchmarks and install the steering wheel onto the steering column.
Install the nut.
-
Torque:
- 50 N*m{
510 kgf*cm
, 37 ft.*lbf
}
Connect all the connectors to the spiral cable.
| 4.
PLACE FRONT WHEELS FACING STRAIGHT AHEAD |
|
| 5.
INSPECT STEERING WHEEL CENTER POINT |
|
| 6.
INSTALL STEERING PAD ASSEMBLY
|
|
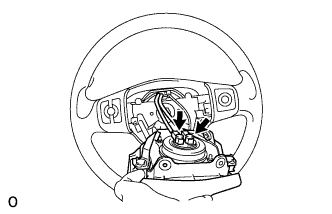
Support the steering pad with one hand as shown in the illustration.
Connect the 2 airbag connectors.
- NOTICE:
- When handling the airbag connector, do not damage the airbag wire harness.
Connect the horn connector.
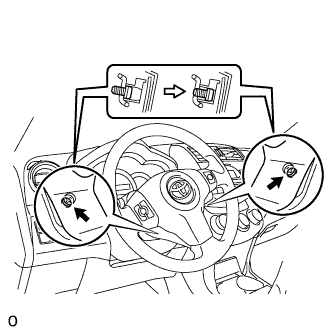
Install the steering pad after confirming that the circumference grooves of the screws are caught on the screw case.
- Using a T30 "torx" driver, install the 2 screws.
-
Torque:
- 8.8 N*m{
90 kgf*cm
, 78 in.*lbf
}
| 7.
CONNECT CABLE TO NEGATIVE BATTERY TERMINAL |
|
| 8.
INSPECT STEERING PAD ASSEMBLY
|
|
Check for cuts, cracks or discoloration on the steering pad outer surface and in the grooved portion.
Check that the horn sounds.
| 9.
CHECK SRS WARNING LIGHT |
|
Check the SRS warning light (Click here).