REMOVAL
Removal / installation · Vehicles built from Nov 2005
| 1.
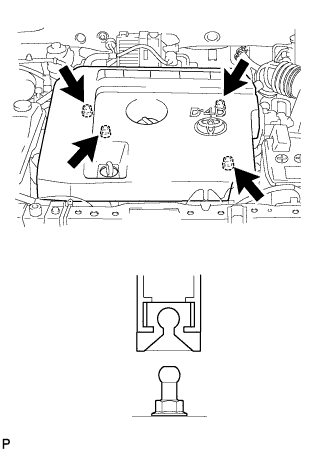
REMOVE NO. 1 ENGINE COVER
|
 |
- Detach the 4 clips and remove the engine cover.
| 2.
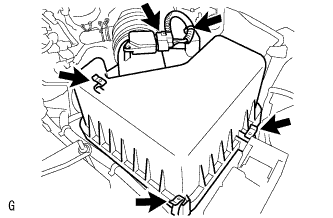
REMOVE AIR CLEANER CAP SUB-ASSEMBLY
|
|
- Disconnect the mass air flow meter connector.
Disconnect the wire harness clamp.
Unhook the 3 hook clamps, and then remove the air cleaner cap.
Remove the air cleaner filter element from the air cleaner case.
| 3.
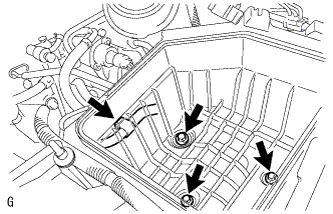
REMOVE AIR CLEANER ASSEMBLY WITH ELEMENT
|
|
- Disconnect the wire harness clamp and remove the 3 bolts and air cleaner case.
| 4.
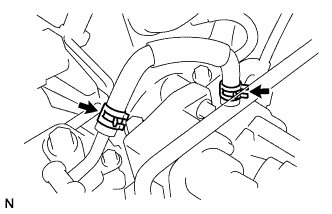
REMOVE NO. 3 FUEL HOSE |
|
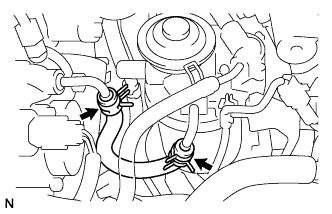
- Using pliers, grip the claws of the 2 clips and slide the 2 clips to remove the No. 3 fuel hose.
| 5.
REMOVE NO. 1 FUEL HOSE |
|
- Using pliers, grip the claws of the 2 clips and slide the 2 clips to disconnect the No. 1 fuel hose.
| 6.
REMOVE FUEL INLET PIPE SUB-ASSEMBLY |
|
- NOTICE:
- After removing the fuel inlet pipe, cover the common rail and supply pump with electrical tape to prevent dirt from entering them.
- Remove the nut and 2 fuel inlet pipe clamps.
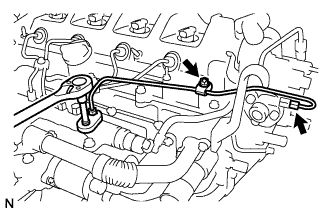
Using SST, remove the fuel inlet pipe.
- SST
- 09023-38401
| 7.
REMOVE FUEL SUPPLY PUMP ASSEMBLY |
|
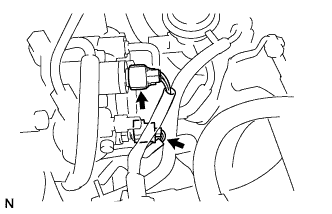
- Disconnect the fuel temperature sensor connector.
Disconnect the suction control valve connector.
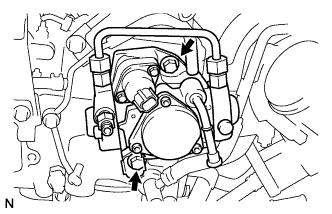
- Remove the 2 bolts to remove the supply pump, O-ring and supply pump drive coupling.