INSTALLATION
Removal / installation · Vehicles built from Aug 2008
Versions by build date: Nov 2005 – Dec 2006 Jan 2007 – Jul 2007 Aug 2007 – Jul 2008 from Aug 2008
| 1. INSTALL UPPER INSTRUMENT PANEL |

Attach the 6 clips and 5 claws to install the instrument panel.
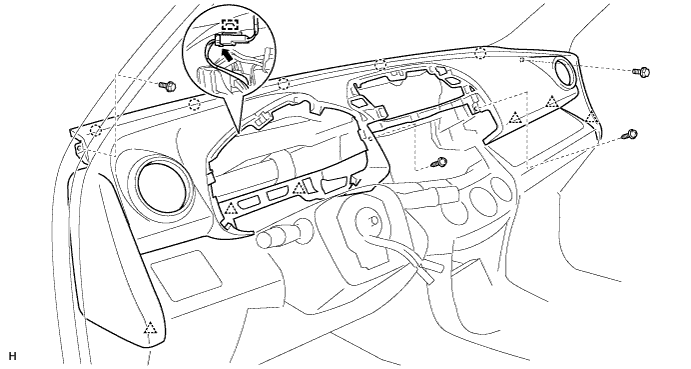

Connect the connector and attach the clamp.
Install the 2 bolts and 2 screws.
Connect the passenger airbag connector.
Install the 2 bolts to the passenger airbag.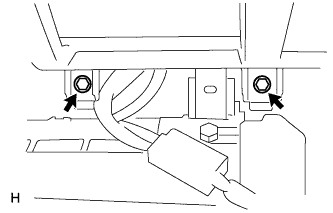
- Torque:
- 20 N*m{ 204 kgf*cm , 15 ft.*lbf }
| 2. INSTALL GLOVE COMPARTMENT DOOR ASSEMBLY |
Attach the 2 hinges to install the door.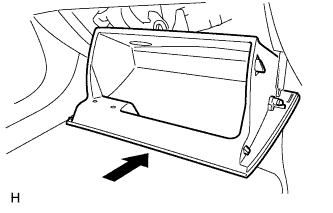
Attach the claw to the glove compartment door stopper.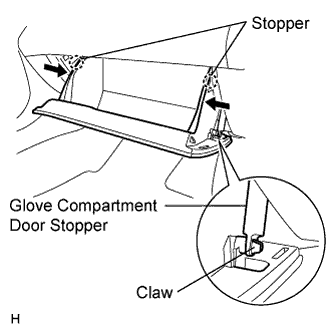
While pushing in the sides of the glove compartment door in the direction indicated by the arrows in the illustration, close the door to engage it to the 2 stoppers.
| 3. INSTALL FRONT PILLAR GARNISH LH |
for Short Body:
Install the front pillar garnish (Click here).
for Long Body:
Install the front pillar garnish (Click here).
| 4. INSTALL FRONT PILLAR GARNISH RH |
for Short Body:
Install the front pillar garnish (Click here).
for Long Body:
Install the front pillar garnish (Click here).
| 5. INSTALL INSTRUMENT PANEL REGISTER ASSEMBLY CENTER |
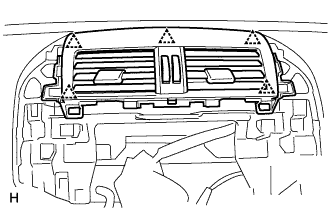 |
Attach the 5 clips to install the instrument panel register.
| 6. INSTALL NAVIGATION RECEIVER ASSEMBLY WITH BRACKET (w/ Navigation System) |
Install the No. 1 radio bracket to the radio receiver with the 4 screws.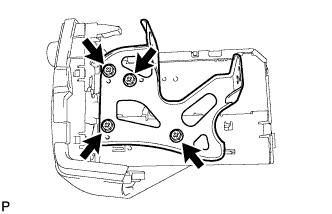
Install the No. 2 radio bracket to the radio receiver with the 4 screws.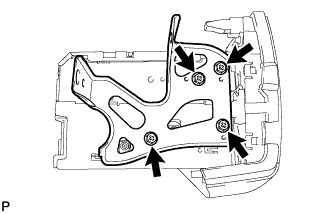
Connect all connectors to install the radio receiver.
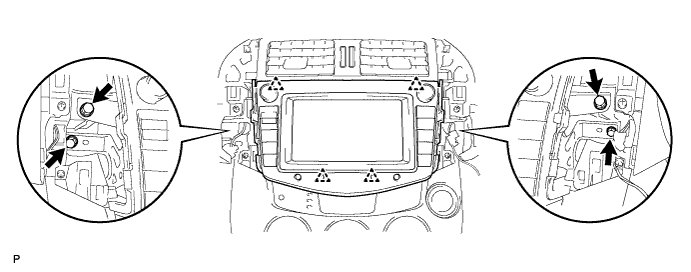
Install the radio receiver to attach the 4 claws.
Install the 4 screws.
| 7. INSTALL RADIO RECEIVER ASSEMBLY WITH BRACKET (w/ Cassette Tape Player) |
Install the radio receiver assembly with bracket (Click here).
| 8. INSTALL RADIO RECEIVER ASSEMBLY WITH BRACKET (w/ Radio Receiver) |
Install the radio receiver assembly with bracket (Click here).
| 9. INSTALL STEREO OPENING COVER (w/o Radio Receiver) |
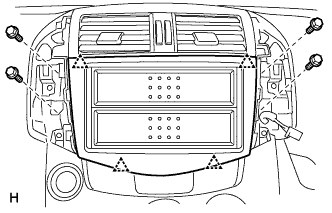 |
Attach the 4 clips to install the stereo opening cover.
Install the 4 bolts.
| 10. INSTALL NO. 1 INSTRUMENT CLUSTER FINISH PANEL CENTER |
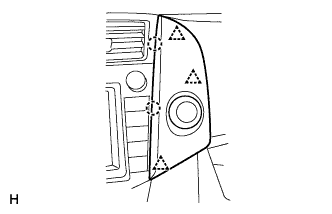 |
Connect the connector.
Attach the 3 clips and 2 claws to install the cluster finish panel.
| 11. INSTALL NO. 2 INSTRUMENT CLUSTER FINISH PANEL CENTER |
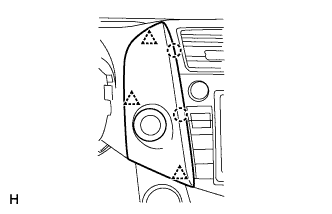 |
Connect the connector.
Attach the 3 clips and 2 claws to install the cluster finish panel.
| 12. INSTALL COMBINATION METER ASSEMBLY |
Connect the connector.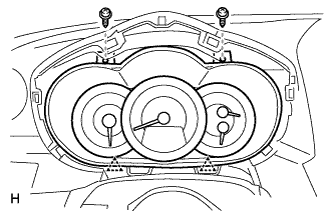
Attach the 2 clips to install the combination meter.
Install the 2 screws.
| 13. INSTALL INSTRUMENT CLUSTER FINISH PANEL SUB-ASSEMBLY |
Attach the 4 clips and 6 claws to install the instrument cluster finish panel.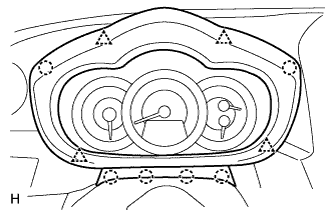
| 14. INSTALL STEERING WHEEL ASSEMBLY |
for LHD:
Install the steering wheel assembly (Click here).
for RHD:
Install the steering wheel assembly (Click here).
| 15. INSTALL STEERING WHEEL PAD ASSEMBLY |
for LHD:
Install the steering wheel pad assembly (Click here).
for RHD:
Install the steering wheel pad assembly (Click here).
| 16. CONNECT CABLE TO NEGATIVE BATTERY TERMINAL |
| 17. CHECK SRS WARNING LIGHT |
Check the SRS warning light (Click here).