REMOVAL
Removal / installation · Vehicles built Nov 2005 – Dec 2006
Versions by build date: Nov 2005 – Dec 2006 from Jan 2007
| 1.
DISCONNECT CABLE FROM NEGATIVE BATTERY TERMINAL |
 |
- CAUTION:
- Wait at least 90 seconds after disconnecting the cable from the negative (-) battery terminal to prevent airbag and seat belt pretensioner activation.
| 2.
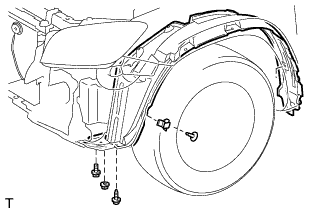
REMOVE FRONT FENDER LINER LH
|
|
- Using a screwdriver, remove the clip and fender liner retainer.
Remove the screw, nut and bolt.
w/ Splash Shield:
Remove the front fender splash shield LH.
Partially remove the fender liner.
- HINT:
- It is not necessary to fully remove the fender liner. Partially remove it so that the bumper cover can be removed later.
| 3.
REMOVE FRONT FENDER LINER RH
|
|
- HINT:
- Use the same procedures described for the LH side.
| 4.
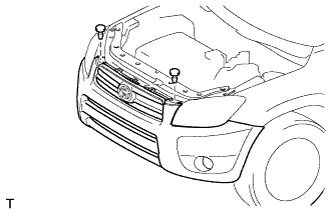
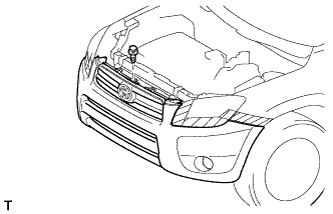
REMOVE RADIATOR SUPPORT OPENING COVER
|
|
- Remove the 2 clips.
Partially remove the radiator support opening cover.
- HINT:
- It is not necessary to fully remove the radiator support opening cover. Partially remove it so that the bumper cover can be removed later.
| 5.
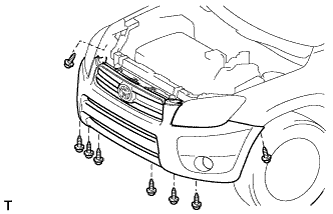
REMOVE FRONT BUMPER COVER
|
|
- Remove the 8 screws.
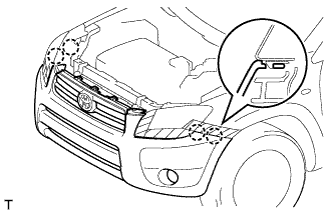
- Apply protective tape under the front fender and headlight.
Using a screwdriver, detach the 4 claws.
- HINT:
- Tape the screwdriver tip before use.
w/ Fog Light:
Disconnect the 2 fog light connectors.
w/ Headlight Cleaner:
Disconnect the headlight cleaner.
- Using a clip remover, remove the hood cushion center.
- Using a clip remover, remove the 4 clips and front bumper cover.
| 6.
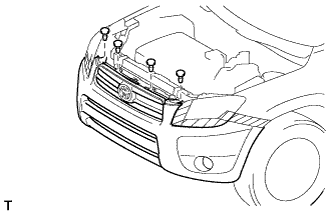
REMOVE FRONT BUMPER REINFORCEMENT SUB-ASSEMBLY UPPER
|
|
Disconnect the 2 horn connectors.
Remove the 2 bolts and reinforcement.
| 7.
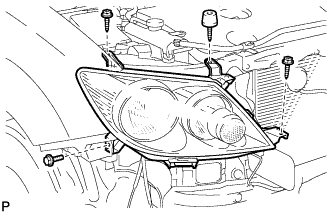
REMOVE HEADLIGHT ASSEMBLY RH |
|
- Remove the 3 screws and bolt.
Disconnect the connectors and remove the headlight.
| 8.
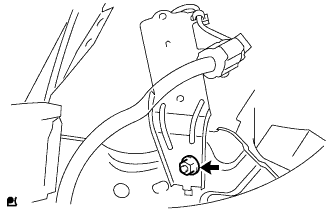
REMOVE TIRE PRESSURE WARNING ANTENNA FRONT RH |
|
Disconnect the connector.
- Remove the nut and antenna.
| 9.
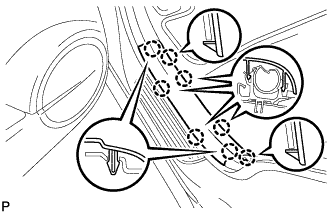
REMOVE REAR DOOR SCUFF PLATE LH
|
|
- Using a screwdriver, detach the 8 claws and remove the scuff plate.
- HINT:
- Tape the screwdriver tip before use.
| 10.
REMOVE PACKAGE TRAY TRIM POCKET SUB-ASSEMBLY |
|
| 11.
REMOVE TONNEAU COVER ASSEMBLY |
|
| 12.
REMOVE REAR FLOOR NO. 1 BOARD |
|
| 13.
REMOVE DECK BOARD ASSEMBLY |
|
| 14.
REMOVE REAR FLOOR NO. 3 BOARD |
|
| 15.
REMOVE REAR FLOOR NO. 2 BOARD |
|
| 16.
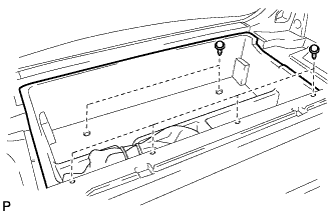
REMOVE JACK CARRIER ASSEMBLY
|
|
Using a clip remover, remove the 7 clips and remove the jack carrier.
| 17.
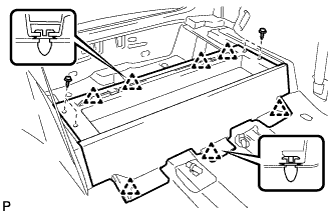
REMOVE REAR FLOOR NO. 1 MAT SUPPORT SIDE PLATE
|
|
Remove the 4 screws.
Using a clip remover, detach the 7 clips and remove the plate.
| 18.
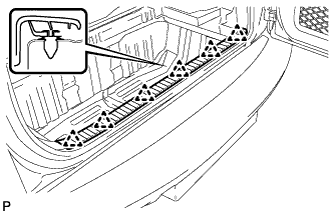
REMOVE REAR FLOOR FINISH PLATE
|
|
- Using a clip remover, detach the 6 clips and remove the finish plate.
| 19.
REMOVE RECLINING REMOTE CONTROL LEVER BEZEL LH
|
|
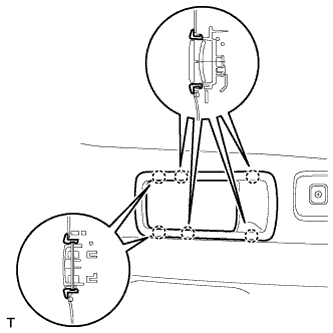
- Using a screwdriver, detach the 6 claws and remove the bezel.
- HINT:
- Tape the screwdriver tip before use.
| 20.
REMOVE CHILD RESTRAINT SEAT TETHER ANCHOR COVER
|
|
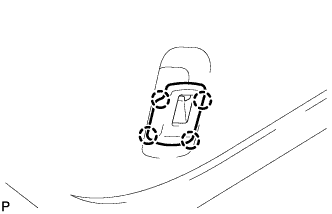
Using a screwdriver, detach the 4 claws and remove the cover.
- HINT:
- Tape the screwdriver tip before use.
| 21.
REMOVE CHILD RESTRAINT SEAT TETHER ANCHOR BRACKET
|
|
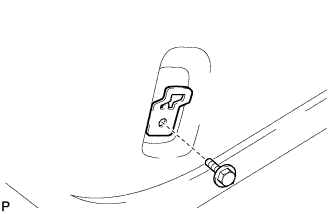
- Remove the bolt, 2 washers, collar and bracket.
| 22.
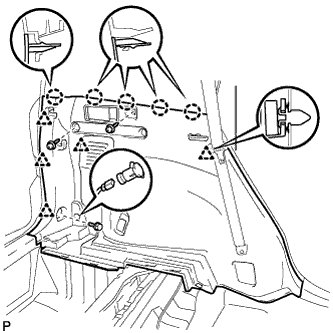
REMOVE DECK TRIM SIDE PANEL ASSEMBLY LH
|
|
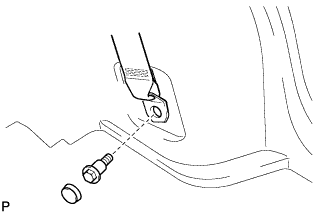
- Disconnect the rear No. 1 seat belt's floor anchor.
Remove the anchor cover.
Remove the bolt and disconnect the floor anchor.
- Remove the bolt and 2 screws.
Using a screwdriver, detach the 5 claws.
- HINT:
- Tape the screwdriver tip before use.
Using a clip remover, detach the 5 clips and remove the trim board.
Disconnect the power outlet socket connector.
Remove the belt hanger.
| 23.
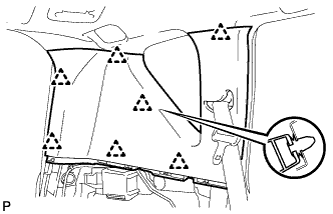
REMOVE INNER ROOF SIDE GARNISH ASSEMBLY LH
|
|
- Using a clip remover, detach the 7 clips and remove the garnish.
| 24.
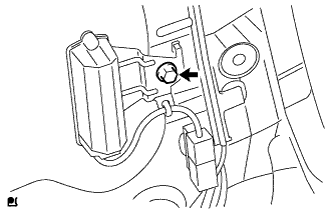
REMOVE TIRE PRESSURE WARNING ANTENNA REAR LH |
|
Disconnect the connector.
- Remove the bolt and antenna.