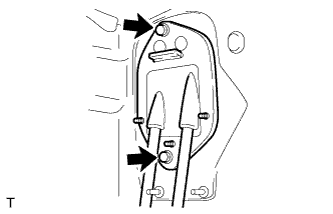
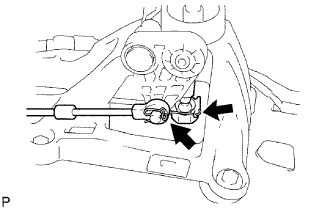
Connect the control cable to the control cable bracket, and install 2 new clips.
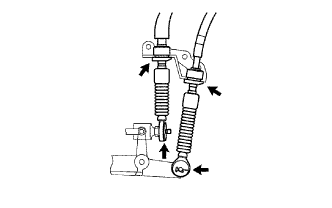
Connect the control cable to the transaxle, and install the 2 washers and 2 clips.
2.
CONNECT TRANSAXLE CONTROL CABLE ASSEMBLY
Connect the ends of the control cable and install the 2 clips to the shift lever.
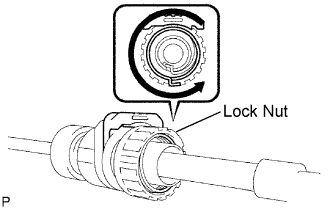
Turn the lock nuts of the shift cable 270° counterclockwise, and hold them in that position. Install the shift cable and select cable while holding the lock nuts.
Check that the cables are installed securely.
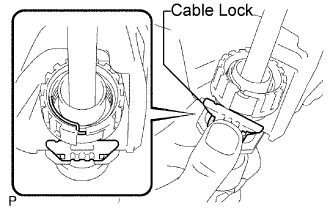
Push in the cable locks of the shift cable and select cable.
Connect the cable ends of the control cable and install the 2 clips.
3.
INSTALL REAR CONSOLE BOX SUB-ASSEMBLY
Connect the connector.
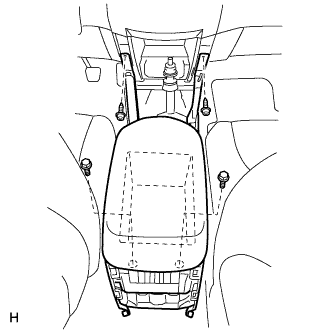
Install the rear console box with the 2 bolts and 2 screws.
Install the console box carpet.
4.
INSTALL CONSOLE REAR END PANEL
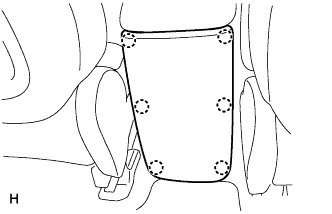
Attach the 6 claws to install the console rear end panel.
5.
INSTALL UPPER REAR CONSOLE PANEL SUB-ASSEMBLY
Connect the connector.
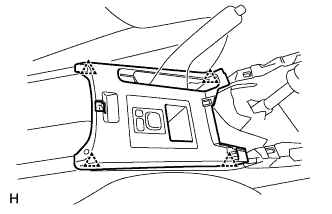
Attach the 4 clips to install the upper rear console panel.
6.
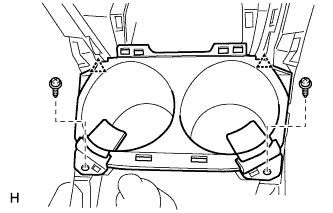
INSTALL CONSOLE CUP HOLDER BOX
Attach the 2 clips to install the cup holder box.
Install the 2 screws.
7.
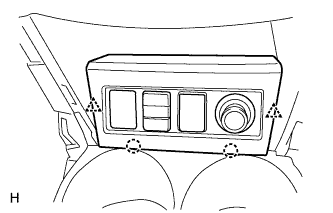
INSTALL SWITCH BASE
Connect the connectors.
Attach the 2 clips and 2 claws to install the switch base.
8.
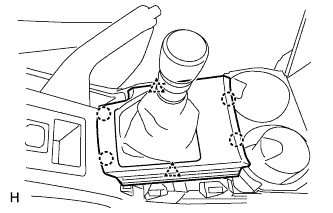
INSTALL UPPER CONSOLE PANEL SUB-ASSEMBLY
Automatic transaxle: Connect the connector.
Attach the 2 clips and 4 claws to install the upper console panel.
Install the shift lever knob.
9.
INSTALL SHIFT LEVER KNOB SUB-ASSEMBLY
10.
INSTALL NO. 2 CONSOLE UPPER PANEL GARNISH
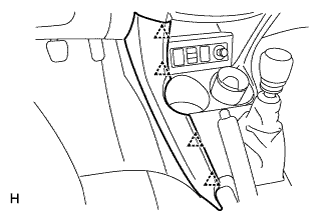
Attach the 4 clips to install the upper panel garnish.
11.
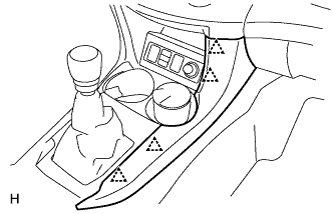
INSTALL NO. 1 CONSOLE UPPER PANEL GARNISH
Attach the 4 clips to install the upper panel garnish.