REMOVAL
Removal / installation · Vehicles built Nov 2005 – Dec 2006
Versions by build date: Nov 2005 – Dec 2006 from Jan 2007
| 1.
DISCONNECT CABLE FROM NEGATIVE BATTERY TERMINAL |
 |
- CAUTION:
- Wait at least 90 seconds after disconnecting the cable from the negative (-) battery terminal to prevent airbag and seat belt pretensioner activation.
| 2.
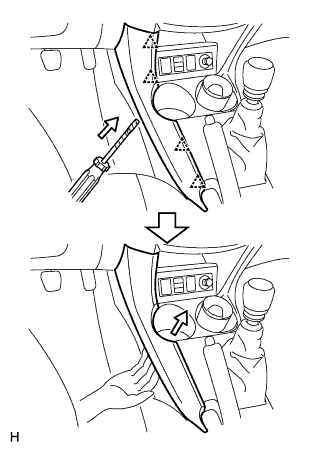
REMOVE NO. 1 CONSOLE UPPER PANEL GARNISH
|
|
Using a screwdriver, detach the 4 clips and upper panel garnish.
- HINT:
- Tape the screwdriver tip before use.
| 3.
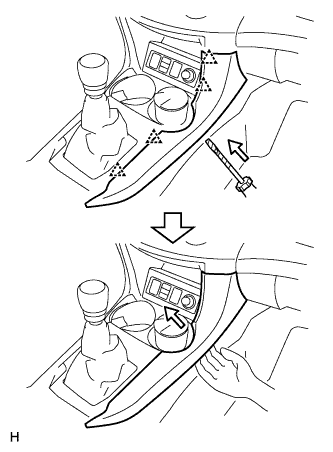
REMOVE NO. 2 CONSOLE UPPER PANEL GARNISH
|
|
Using a screwdriver, detach the 4 clips and upper panel garnish.
- HINT:
- Tape the screwdriver tip before use.
| 4.
REMOVE SHIFT LEVER KNOB SUB-ASSEMBLY |
|
| 5.
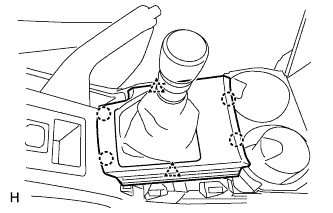
REMOVE UPPER CONSOLE PANEL SUB-ASSEMBLY
|
|
Remove the shift lever knob.
for Manual Transaxle:
Using a screwdriver, detach the 2 clips, 4 claws and remove the upper console panel.
- HINT:
- Tape the screwdriver tip before use.
for Automatic Transaxle:
Using a screwdriver, detach the 2 clips, 4 claws and remove the upper console panel then disconnect the connector.
- HINT:
- Tape the screwdriver tip before use.
| 6.
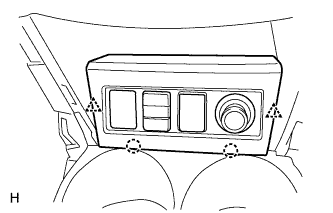
REMOVE SWITCH BASE
|
|
Detach the 2 clips and 2 claws.
Disconnect the connectors and remove the switch base.
| 7.
REMOVE CONSOLE CUP HOLDER BOX
|
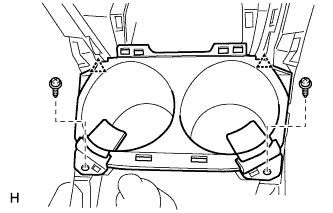
|
Remove the 2 screws.
Detach the 2 clips and remove the cup holder box.
| 8.
REMOVE UPPER REAR CONSOLE PANEL SUB-ASSEMBLY
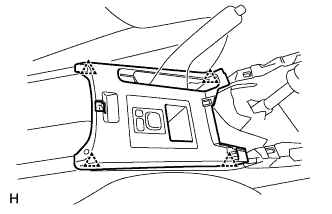
|
|
Using a screwdriver, detach the 4 clips.
- HINT:
- Tape the screwdriver tip before use.
Disconnect the connector and remove the upper rear console panel.
| 9.
REMOVE CONSOLE REAR END PANEL
|
|
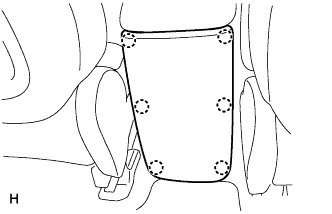
Using a screwdriver, detach the 6 claws and remove the console rear end panel.
- HINT:
- Tape the screwdriver tip before use.
| 10.
REMOVE REAR CONSOLE BOX SUB-ASSEMBLY
|
|
Using a screwdriver, detach the 6 claws and remove the console rear end panel.
- HINT:
- Tape the screwdriver tip before use.
| 11.
DISCONNECT TRANSAXLE CONTROL CABLE ASSEMBLY |
|
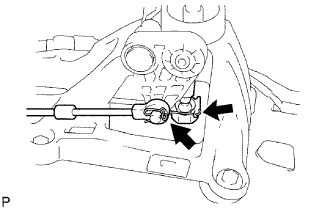
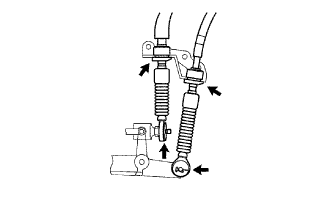
Remove the 2 clips and disconnect the cable ends of the control cable.
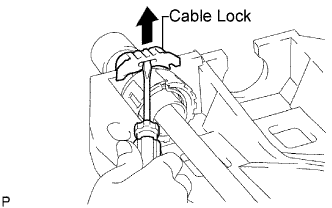
- Using a screwdriver, release the cable locks of the shift cable and select cable.
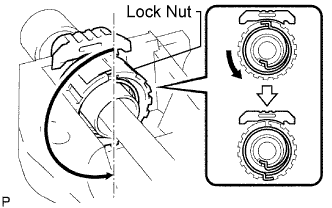
- Turn the lock nuts 180° counterclockwise and hold them in that position. Remove the shift cable and select cable while holding them.
Remove the shift cable from the floor shift shift lever assembly while holding the lock nut.
Repeat the step above for the select cable.
- NOTICE:
- Do not push in the cable locks.
| 12.
REMOVE TRANSAXLE CONTROL CABLE ASSEMBLY |
|
Removal the 2 clips and washers, and disconnect the top ends of the control cable from the transaxle.
Remove the 2 clips and disconnect the control cable bracket.
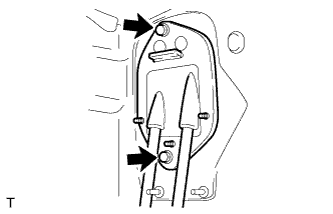
- Remove the 2 bolts from the retainer.
Pull out the control cable from the floor.