REMOVAL
Removal / installation · Vehicles built Nov 2005 – Dec 2006
Versions by build date: Nov 2005 – Dec 2006 from Jan 2007
| 1. DISCONNECT CABLE FROM NEGATIVE BATTERY TERMINAL |

- CAUTION:
- Wait at least 90 seconds after disconnecting the cable from the negative (-) battery terminal to prevent airbag and seat belt pretensioner activation.
| 2. REMOVE INSTRUMENT CLUSTER FINISH PANEL SUB-ASSEMBLY |
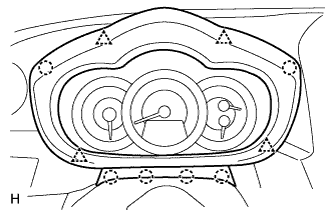  |
Using a screwdriver, detach the 4 clips, 6 claws and remove the instrument cluster finish panel.
- HINT:
- Tape the screwdriver tip before use.
| 3. REMOVE COMBINATION METER ASSEMBLY |
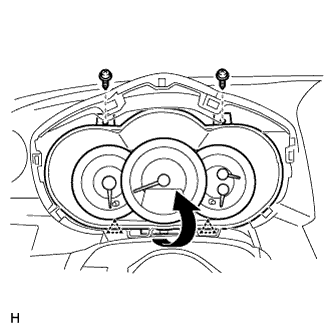 |
Remove the 2 screws.
Pull the combination meter as indicated by the arrow in the illustration to detach the 2 clips.
Disconnect the connector and remove the combination meter.
| 4. REMOVE NO. 2 INSTRUMENT CLUSTER FINISH PANEL CENTER |
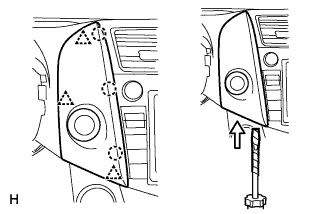 |
Using a screwdriver, detach the 3 clips, 3 claws and remove the cluster finish panel, then disconnect the connector.
- HINT:
- Tape the screwdriver tip before use.
| 5. REMOVE NO. 1 INSTRUMENT CLUSTER FINISH PANEL CENTER |
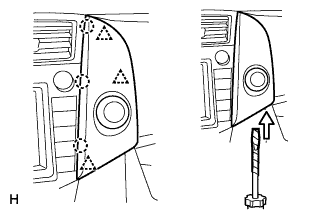 |
Using a screwdriver, detach the 3 clips, 3 claws and remove the cluster finish panel, then disconnect the connector.
- HINT:
- Tape the screwdriver tip before use.
| 6. REMOVE NAVIGATION RECEIVER ASSEMBLY |
Remove the 4 bolts.
Detach the 4 claws.
Disconnect the all connectors and remove the radio receiver with bracket.
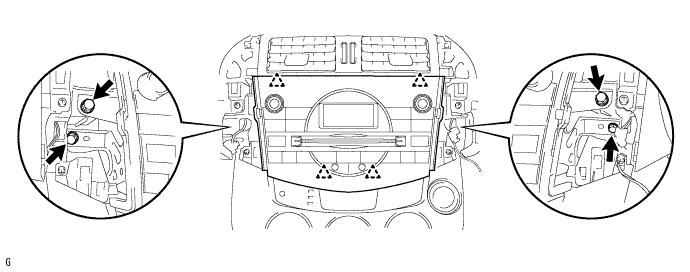
Remove the 4 bolts and No. 1 radio bracket from the radio receiver.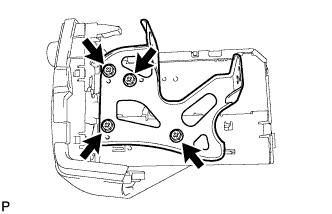
Remove the 4 bolts and No. 2 radio bracket from the radio receiver.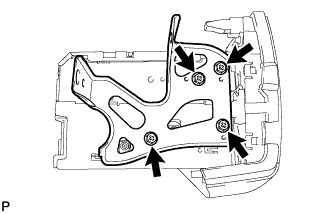
| 7. REMOVE INSTRUMENT PANEL REGISTER ASSEMBLY CENTER |
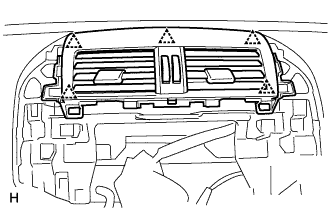 |
Using a screwdriver, detach the 5 clips and remove the instrument panel register.
- HINT:
- Tape the screwdriver tip before use.
| 8. REMOVE GLOVE COMPARTMENT DOOR ASSEMBLY |
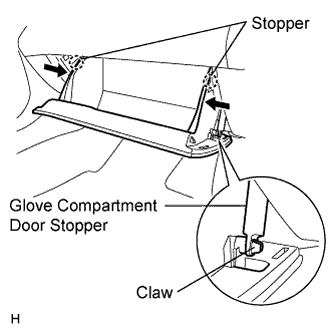 |
Open the glove compartment door.
Detach the claw from the glove compartment door stopper.
While pushing in the sides of the glove compartment door as indicated by the arrows in the illustration, open the door to release it from the 2 stoppers.
Open the door until it is horizontal.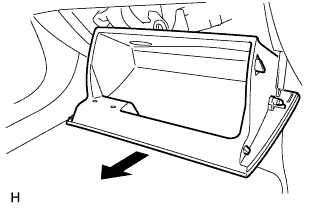
Pull the glove compartment door toward the rear of the vehicle to detach the 2 hinges and remove the glove compartment door.
| 9. REMOVE FRONT PILLAR GARNISH LH |
w/o Curtain Shield Airbag: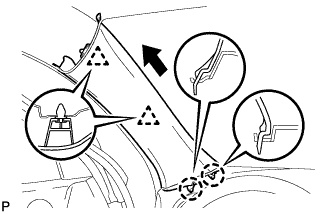
Using a clip remover, detach the 2 clips.
Pull the garnish in the direction indicated by the arrow in the illustration to detach the 2 claws. Then remove the garnish.
w/ Curtain Shield Airbag: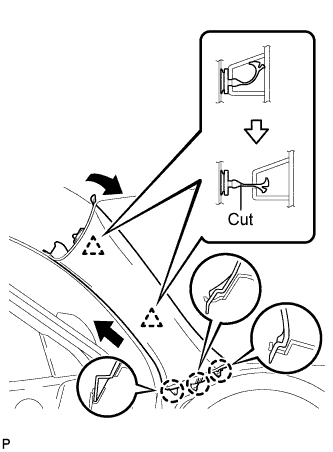
Detach the 2 clips.
Cut off the 2 clips.
Detach the 3 claws and remove the garnish.
Remove the 2 clips from the vehicle body.
- NOTICE:
- As the clips are cut, be sure to install new clips when installing the garnish.
Using a clip remover, remove the 4 wiring harness clamps.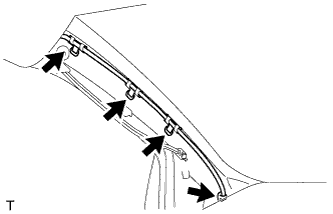
w/ Curtain Shield Airbag: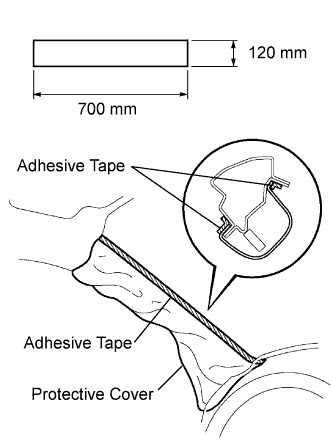
Thoroughly cover the airbag with cloth or nylon of 700 mm (27.56 in.) x 120 mm (4.72 in.) and fix the ends of the cover with adhesive tape, as shown in the illustration.
- NOTICE:
- Cover the curtain shield airbag with a protective cover as soon as the front pillar garnish is removed.
| 10. REMOVE FRONT PILLAR GARNISH RH |
for Long Body (Click here)
| 11. REMOVE UPPER INSTRUMENT PANEL |
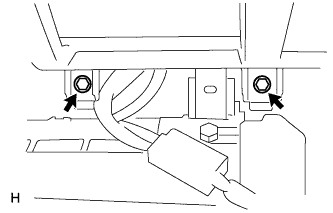 |
Remove the 2 bolts from the passenger airbag.
Disconnect the passenger airbag connector.
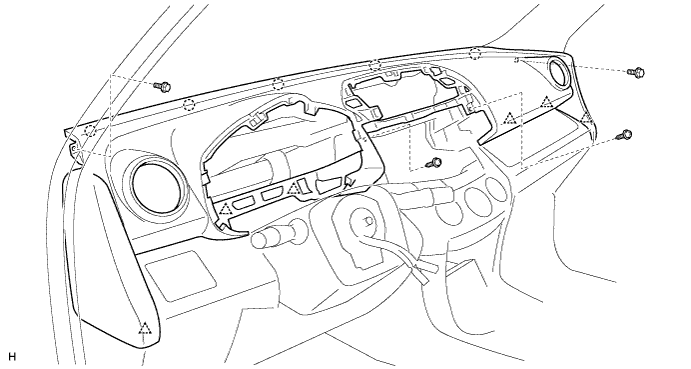
Remove the 2 bolts and 2 screws.
Disconnect the connectors and clamps.
Detach the 6 clips and 5 claws and remove the instrument panel.
| 12. REMOVE NAVIGATION ANTENNA ASSEMBLY |
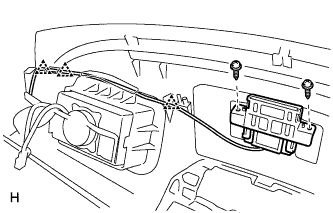 |
Detach the 3 clamps.
Remove the 2 screws and navigation antenna.