Use the same procedures for the RH side and LH side.
The procedures listed below are for the LH side.
1.
REMOVE REAR WHEEL
2.
DISCONNECT CABLE FROM NEGATIVE BATTERY TERMINAL
CAUTION:
Wait at least 90 seconds after disconnecting the cable from the negative (-) battery terminal to prevent airbag and seat belt pretensioner activation.
3.
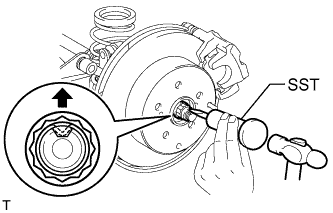
REMOVE REAR AXLE SHAFT LH NUT (for 4WD)
Using SST and hammer, unstake the staked part of the nut.
SST
09930-00010
NOTICE:
Loosen the staked part of the nut completely, otherwise the screw of the drive shaft may be damaged.
While applying the brake, remove the lock axle hub nut.
4.
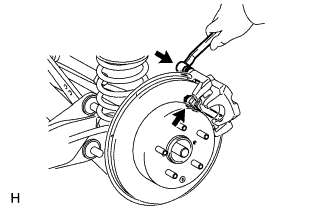
REMOVE REAR DISC BRAKE CYLINDER ASSEMBLY LH
Remove the 2 bolts and cylinder.
5.
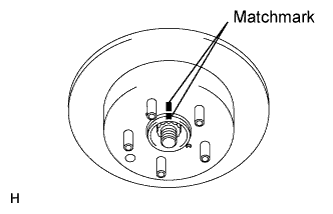
REMOVE REAR DISC
Put matchmarks on the disc and axle hub.
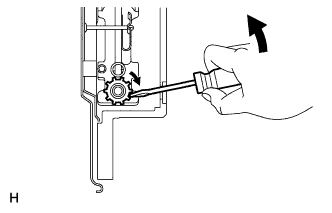
Release the parking brake.
Turn the shoe adjuster until the disc turns freely, and then remove the disc.
Install the shoe adjusting hole plug to the rear disc.
6.
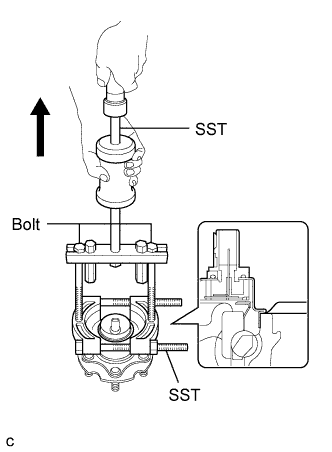
REMOVE SKID CONTROL SENSOR WIRE (for 2WD)
Mount the front axle hub in a soft jaw vise.
NOTICE:
Replace the hub and bearing if it is dropped or receives a strong shock.
Using a pin punch and hammer, tap out the 2 pins and remove the 2 attachments from SST.
Using SST and the 2 bolts (diameter: 12 mm; pitch: 1.
SST
09520-00031
(09520-00040)
09521-00020 09950-00020
NOTICE:
If the sensor rotor is damaged, replace the axle hub.
Do not scratch the contacting surface of the hub and bearing and skid control sensor.
7.
REMOVE REAR SPEED SENSOR LH (for 4WD)
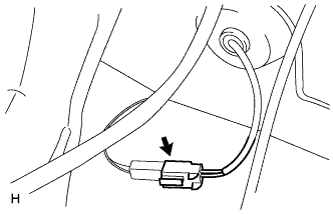
Disconnect the speed sensor connector.
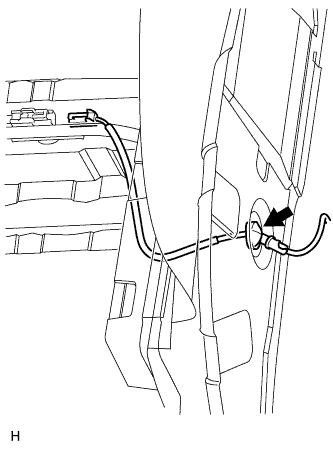
Disconnect the grommet of the speed sensor wire from the hole of the wheel house.
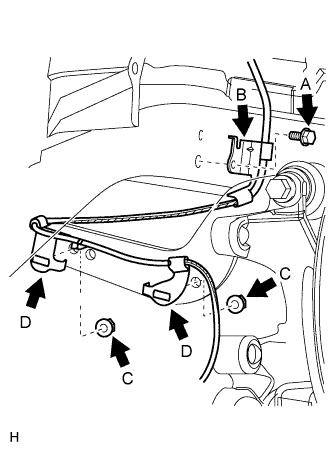
Remove the bolt (labeled A) and sensor clamp (labeled B) from the side member.
Remove the 2 nuts (labeled C) and sensor clamps (labeled D) from the upper arm.
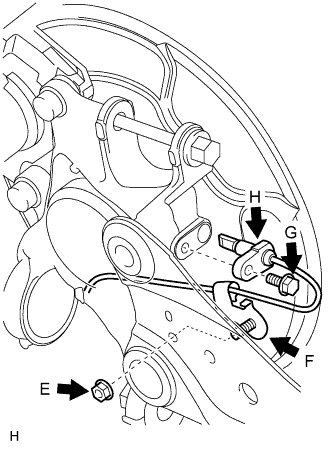
Remove the nut (labeled E) and sensor clamp (labeled F) from the trailing arm.
Remove the bolt (labeled G) and sensor body (labeled H) from the carrier.
NOTICE:
Keep the sensor tip and sensor installation hole free from foreign matter.
8.
DISCONNECT REAR SUSPENSION NO. 1 ARM ASSEMBLY LH
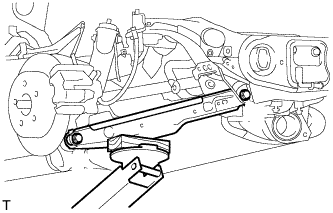
Support the No. 2 suspension arm LH.
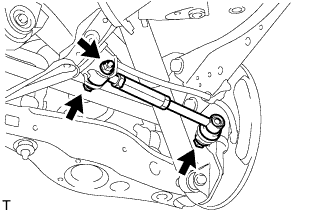
Remove the bolt and 2 nuts from the suspension member and axle carrier.
HINT:
While fixing the nut in place, loosen and remove the bolt from the suspension member side.
Using SST, disconnect the suspension arm from the axle carrier.
SST
09610-20012
NOTICE:
Do not damage the dust cover.
9.
DISCONNECT REAR SHOCK ABSORBER ASSEMBLY LH
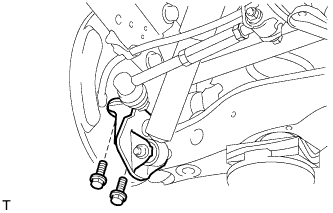
Remove the 2 bolts and disconnect the shock absorber with bracket from the axle carrier.
10.
REMOVE REAR AXLE HUB AND BEARING ASSEMBLY LH
for 2WD:
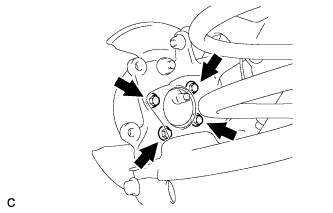
Remove the 4 bolts, and axle hub and bearing from the axle carrier.
NOTICE:
Do not place the hub and bearing's magnet rotor side so that it is facing downward, and do not allow the magnet rotor side to become damaged or contact foreign matter.
for 4WD:
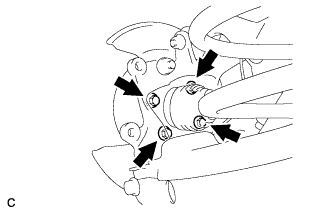
Put matchmarks on the drive shaft and the axle hub and bearing.
Remove the 4 blots, and axle hub and bearing from the axle carrier.
NOTICE:
Do not place the hub and bearing's magnet rotor side so that it is facing downward, and do not allow the magnet rotor side to become damaged or contact foreign matter.