REMOVAL
Removal / installation · Vehicles built Nov 2005 – Dec 2006
Versions by build date: Nov 2005 – Dec 2006 Jan 2007 – Jul 2007 from Aug 2007
| 2.
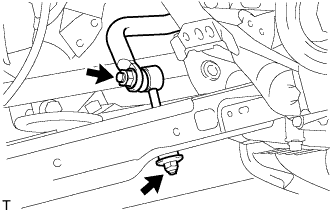
REMOVE REAR STABILIZER LINK ASSEMBLY LH |
 |
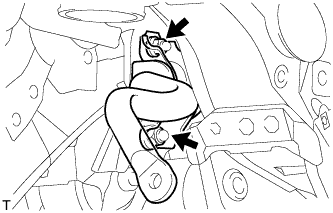
- Remove the nut and disconnect the link from the suspension No. 2 arm.
Remove the nut and link from the stabilizer bar.
| 3.
REMOVE REAR STABILIZER LINK ASSEMBLY RH |
|
- HINT:
- Use the same procedures described for the LH side.
| 4.
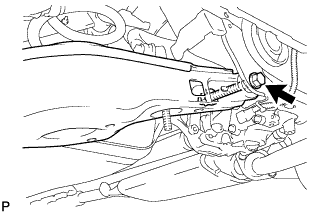
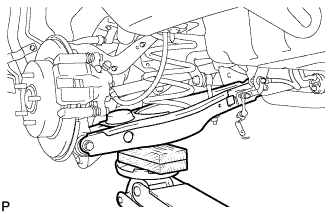
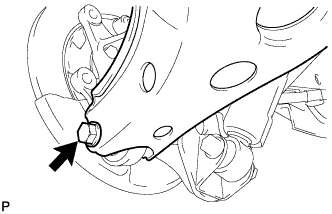
REMOVE REAR NO. 2 SUSPENSION ARM ASSEMBLY LH
|
|
Loosen the bolt from the suspension member side.
- NOTICE:
- Do not remove the bolt and nut. Only loosen them.
- Support the No. 2 suspension arm LH with a jack.
- NOTICE:
- Place a wooden or rubber block between the jack and the arm.
- Remove the bolt and nut from the axle carrier side.
Slowly lower the jack, and disconnect the No. 2 suspension arm from the axle carrier.
| 5.
REMOVE REAR NO. 2 SUSPENSION ARM ASSEMBLY RH |
|
- HINT:
- Use the same procedures described for the LH side.
| 6.
REMOVE REAR COIL SPRING INSULATOR UPPER LH
|
|
Remove the insulator upper from the coil spring.
| 7.
REMOVE REAR COIL SPRING LH
|
|
Remove the coil spring from the suspension No. 2 arm.
| 8.
REMOVE REAR COIL SPRING INSULATOR LOWER LH
|
|
Remove the insulator lower from the suspension No. 2 arm.
| 9.
REMOVE REAR COIL SPRING INSULATOR UPPER RH |
|
- HINT:
- Use the same procedures described for the LH side.
| 10.
REMOVE REAR COIL SPRING RH |
|
- HINT:
- Use the same procedures described for the LH side.
| 11.
REMOVE REAR COIL SPRING INSULATOR LOWER RH |
|
- HINT:
- Use the same procedures described for the LH side.
| 12.
REMOVE REAR NO. 1 STABILIZER BAR BRACKET |
|
- Remove the 2 nuts and bracket.
- HINT:
- Use the same procedures for the other side.
| 13.
REMOVE REAR STABILIZER BAR |
|
Remove the stabilizer bar from the vehicle.
- NOTICE:
- When removing the stabilizer bar from the vehicle, make sure not to damage the sensor wire, brake hose, etc.
| 14.
REMOVE REAR STABILIZER BUSH |
|
Remove the 2 stabilizer bushes from the stabilizer bar.