RADIATOR > REMOVAL |
| 1. RECOVER REFRIGERANT FROM REFRIGERATION SYSTEM (w/ Air Conditioning System) |
Start the engine.
Turn the A/C switch on.
Operate the cooler compressor while the engine speed is approximately 1000 rpm for 5 to 6 minutes to circulate the refrigerant and collect the compressor oil remaining in each component into the cooler compressor.
Stop the engine.
Recover the refrigerant from the A/C system using a refrigerant recovery unit.
| 2. DISCONNECT CABLE FROM NEGATIVE BATTERY TERMINAL |
| 3. DISCONNECT CABLE FROM POSITIVE BATTERY TERMINAL |
| 4. REMOVE FRONT BUMPER COVER |
w/ Under Guard:
Remove the front bumper cover .
w/o Under Guard:
Remove the front bumper cover .
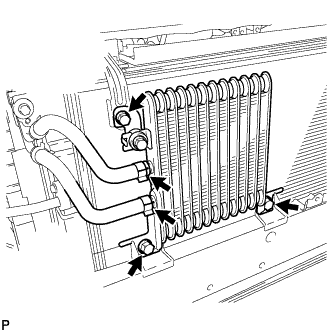
| 5. REMOVE OIL COOLER ASSEMBLY (for Automatic Transaxle) |
|
Disconnect the No. 3 oil cooler inlet and outlet hoses from the oil cooler.
Remove the 3 bolts and oil cooler.
| 6. REMOVE FRONT NO. 2 BUMPER ENERGY ABSORBER |
Remove the energy absorber.
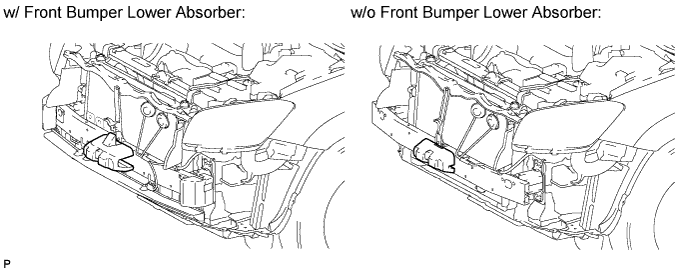
| 7. REMOVE FRONT BUMPER ENERGY ABSORBER (w/ Front Bumper Lower Absorber) |
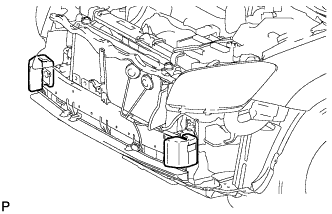 |
Remove the 2 energy absorbers.
| 8. REMOVE FRONT BUMPER LOWER ABSORBER (w/ Front Bumper Lower Absorber) |
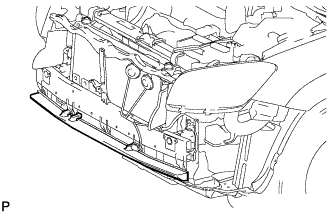 |
Remove the lower absorber.
| 9. REMOVE FRONT BUMPER CENTER STAY SUB-ASSEMBLY |
Remove the 2 bolts and stay.
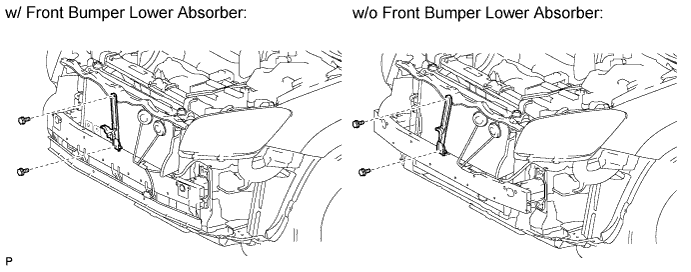
| 10. REMOVE LOW PITCHED HORN ASSEMBLY |
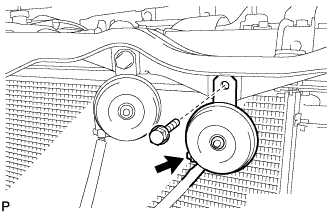 |
Disconnect the horn connector.
Remove the bolt and horn.
| 11. REMOVE HIGH PITCHED HORN ASSEMBLY |
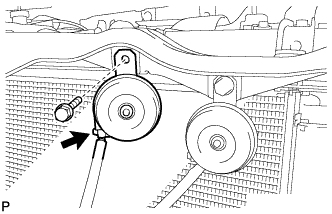 |
Disconnect the horn connector.
Remove the bolt and horn.
| 12. REMOVE FRONT BUMPER UPPER REINFORCEMENT SUB-ASSEMBLY |
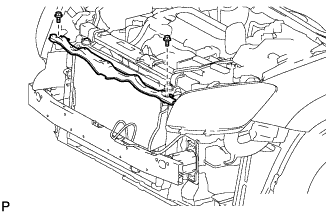 |
Remove the 2 bolts and reinforcement.
| 13. REMOVE FRONT BUMPER REINFORCEMENT |
for Manual Transaxle:
Detach the 3 clamps and remove the wire harness.
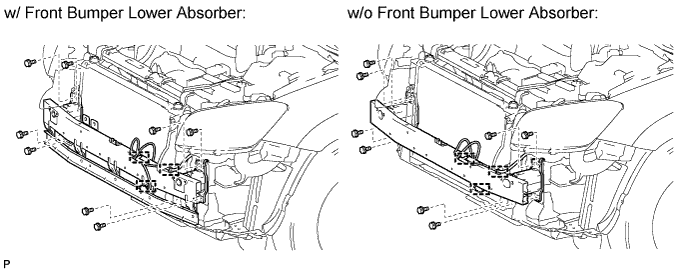
Remove the 8 bolts and reinforcement.
for Automatic Transaxle:
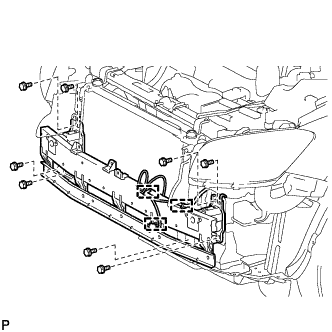 |
Detach the 3 clamps and remove the wire harness.
Remove the 8 bolts and reinforcement.
| 14. DISCONNECT NO. 1 COOLER REFRIGERANT DISCHARGE HOSE (w/ Air Conditioning System) |
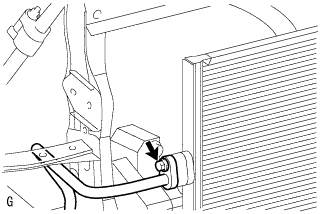 |
Remove the bolt and disconnect the cooler refrigerant discharge hose from the cooler condenser.
Remove the O-ring from the cooler refrigerant discharge hose.
| 15. DISCONNECT COOLER REFRIGERANT LIQUID PIPE (w/ Air Conditioning System) |
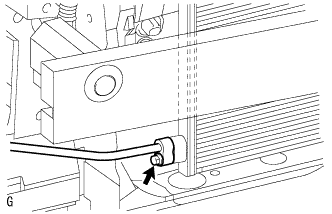 |
Remove the bolt and disconnect the cooler refrigerant liquid pipe from the cooler condenser.
Remove the O-ring from the cooler refrigerant liquid pipe.
| 16. REMOVE UPPER RADIATOR SUPPORT BRACKET |
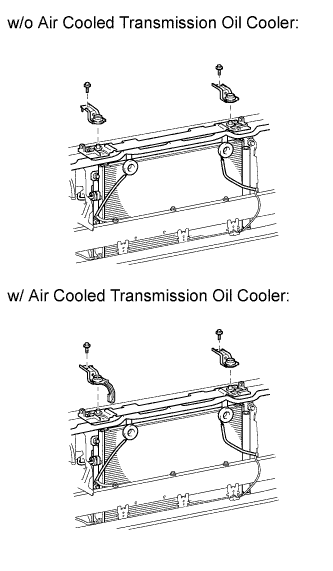 |
Remove the 2 bolts and 2 brackets.
| 17. REMOVE NO. 1 RADIATOR SUPPORT |
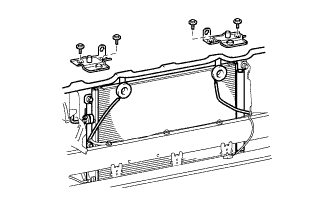 |
Remove the 4 bolts and 2 radiator supports.
| 18. REMOVE COOLER CONDENSER ASSEMBLY (w/ Air Conditioning System) |
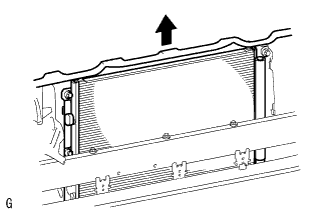 |
Remove the cooler condenser.
| 19. REMOVE NO. 1 ENGINE COVER |
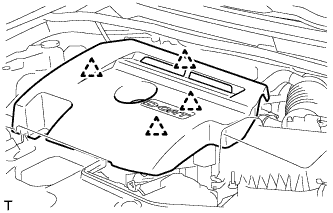 |
Detach the 4 clips and remove the engine cover.
| 20. REMOVE NO. 1 ENGINE UNDER COVER |
Remove the 6 bolts, 10 clips and engine under cover.
| 21. REMOVE REAR ENGINE UNDER COVER LH |
Remove the 2 clips and under cover.
| 22. REMOVE REAR ENGINE UNDER COVER RH |
Remove the 2 clips and under cover.
| 23. DRAIN ENGINE COOLANT |
Loosen the radiator drain cock plug.
Remove the radiator reservoir cap.
Loosen the cylinder block drain cock plug.
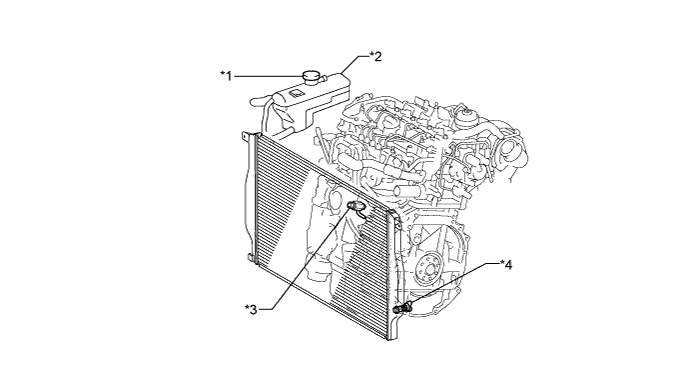
| *1 | Radiator Reservoir Cap | *2 | Radiator Reservoir |
| *3 | Cylinder Block Drain Cock | *4 | Radiator Drain Cock Plug |
| 24. REMOVE BATTERY CLAMP SUB-ASSEMBLY |
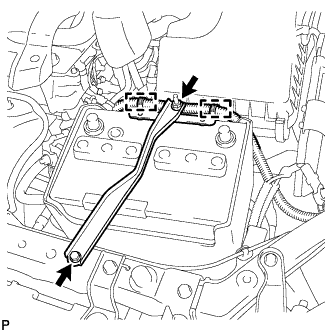 |
Remove the bolt and loosen the nut.
Detach the 2 wire harness clamps.
Detach the hook of the battery clamp from the front battery bracket, and then remove the battery clamp.
| 25. REMOVE BATTERY |
| 26. REMOVE BATTERY TRAY |
| 27. REMOVE FRONT BATTERY BRACKET |
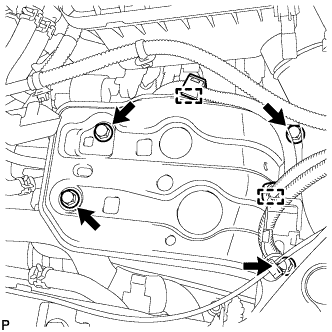 |
Detach the 2 wire harness clamps.
Remove the 4 bolts and front battery bracket.
| 28. REMOVE BATTERY BRACKET REINFORCEMENT |
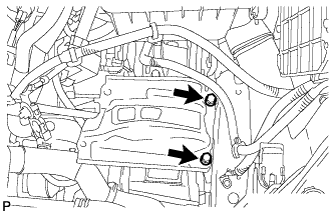 |
Remove the 2 bolts and battery bracket reinforcement.
| 29. REMOVE WATER BY-PASS HOSE |
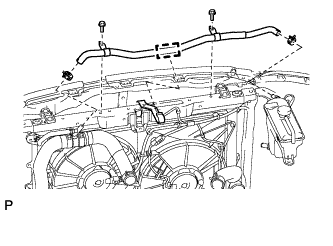 |
Detach the water by-pass hose from the hose clamp.
Disconnect the water by-pass hose from the radiator reservoir and radiator.
Remove the 2 bolts and water by-pass hose.
| 30. REMOVE HOOD LOCK ASSEMBLY (for LHD) |
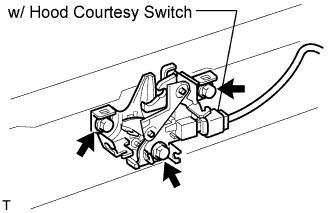 |
w/ Hood courtesy switch:
Disconnect the connector.
Remove the 3 bolts.
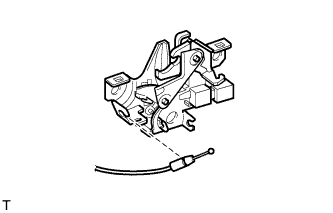 |
Disconnect the cable and remove the lock.
| 31. REMOVE HOOD LOCK ASSEMBLY (for RHD) |
|
w/ Hood courtesy switch:
Disconnect the connector.
Remove the 3 bolts.
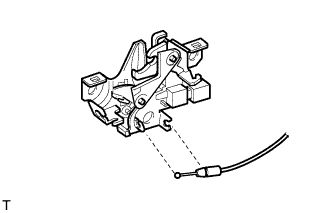 |
Disconnect the cable and remove the lock.
| 32. REMOVE UPPER RADIATOR SUPPORT |
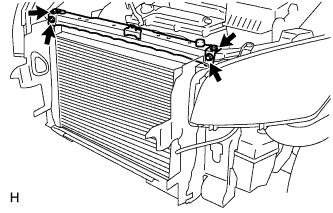 |
Remove the 4 bolts and upper radiator support.
| 33. REMOVE INLET RADIATOR HOSE |
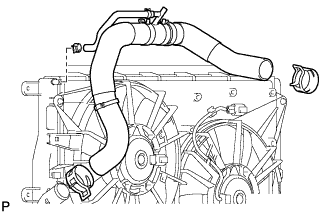 |
Detach the 2 hose clamps from the fan shroud.
Remove the inlet radiator hose and disconnect the No. 5 water by-pass hose from the radiator.
| 34. REMOVE OUTLET RADIATOR HOSE |
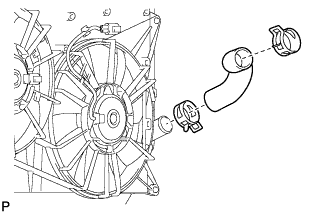 |
Remove the outlet radiator hose.
| 35. REMOVE RADIATOR AND INTERCOOLER |
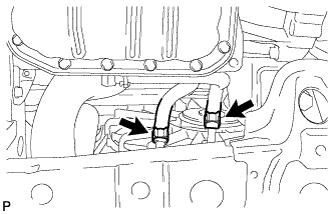 |
for Automatic Transaxle:
Disconnect the 2 oil cooler hoses.
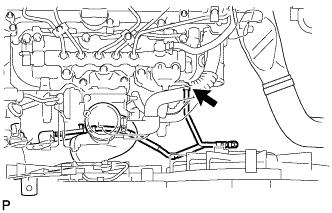 |
Disconnect the vacuum hose from the intake manifold.
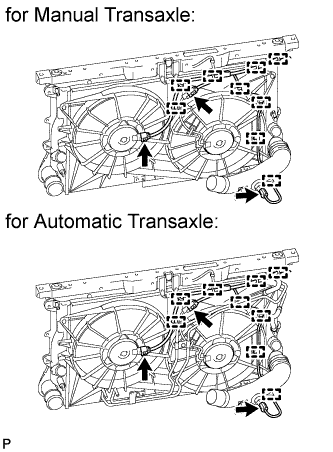 |
Disconnect the 3 connectors and detach the 9 wire harness clamps.
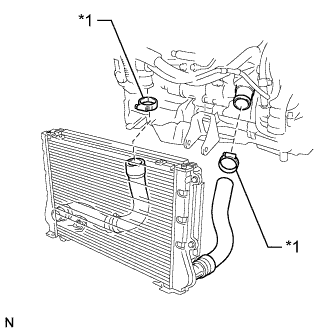 |
Loosen the 2 clamps.
| *1 | Clamp |
Disconnect the No. 2 and No. 3 air hoses from the engine.
Remove the radiator and intercooler assembly.
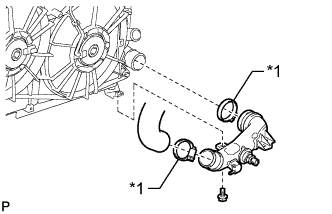 |
Loosen the 2 clamps.
| *1 | Clamp |
Remove the bolt.
Remove the No. 2 air tube from the intercooler and No. 3 air hose.
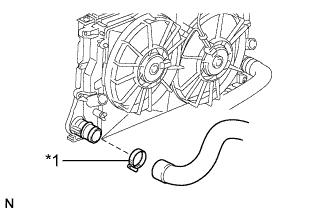 |
Loosen the clamp.
| *1 | Clamp |
Remove the No. 2 air hose from the intercooler.
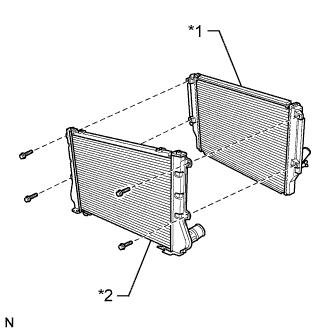 |
Remove the 4 bolts and intercooler.
| *1 | Radiator |
| *2 | Intercooler |
| 36. REMOVE NO. 2 RADIATOR SUPPORT |
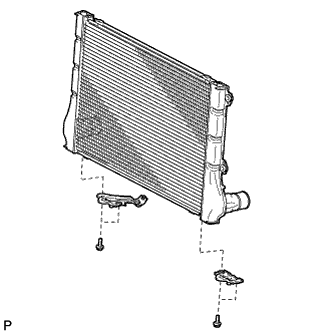 |
Remove the 4 bolts and 2 radiator supports.
| 37. REMOVE OIL COOLER TUBE SUB-ASSEMBLY (for Automatic Transaxle) |
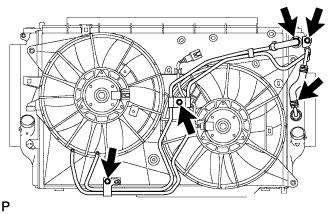 |
Remove the 3 bolts.
Using pliers, grip the claws of the clips and slide the 2 clips.
Disconnect the oil cooler hoses from the radiator.
| 38. REMOVE FAN SHROUD |
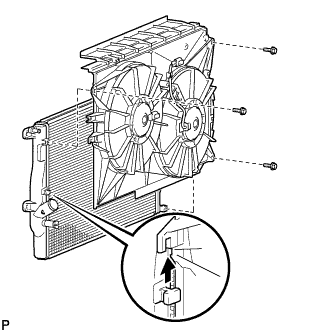 |
Remove the 3 bolts.
Detach the hooks and remove the fan shroud.