FRONT SEAT ASSEMBLY (for Manual Seat) > REASSEMBLY |
| 1. INSTALL FRONT OUTER SEAT TRACK ASSEMBLY LH |
| 2. INSTALL FRONT INNER SEAT TRACK ASSEMBLY LH |
|
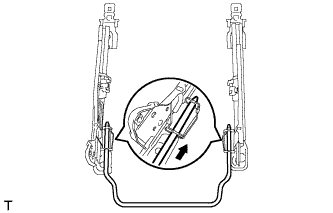
Attach the 2 springs to install the seat track adjusting handle as shown in the illustration.
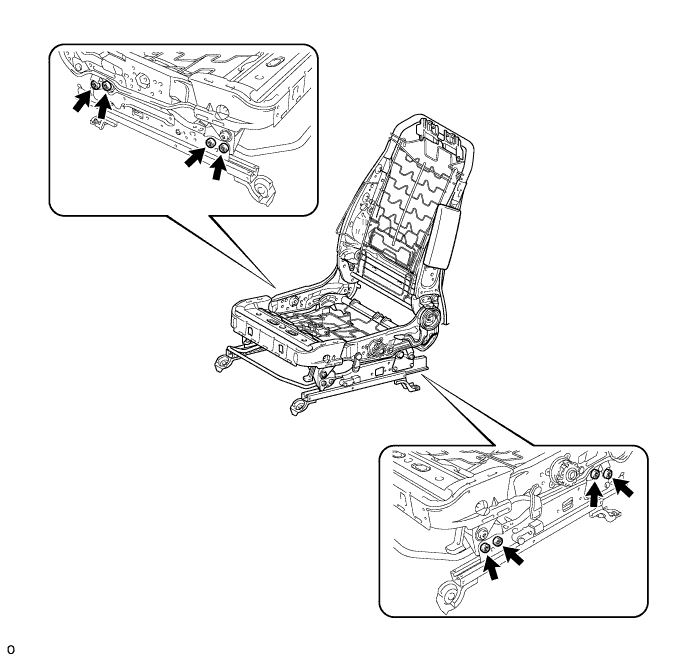
Temporarily install the front seat frame (w/ adjuster) with the 8 bolts.
Using a T40 "TORX" socket, tighten the 8 bolts.
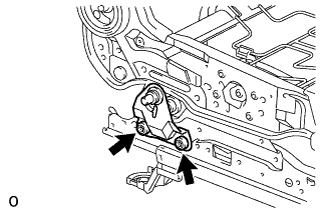 |
Using a T50 "TORX" socket, install the inner seat track bracket with the 2 bolts.
| 3. INSTALL SEAT POSITION AIRBAG SENSOR (for Driver Side) |
Using a 1 mm (0.039 in.) feeler gauge, install the seat position sensor.
Using a T30 "torx" socket, tighten the "torx" screw to install the seat position sensor.
Make sure that the clearance between the seat position sensor and the seat rail is within 0.6 mm to 1.4 mm (0.023 to 0.055 in.).
Connect the connector.
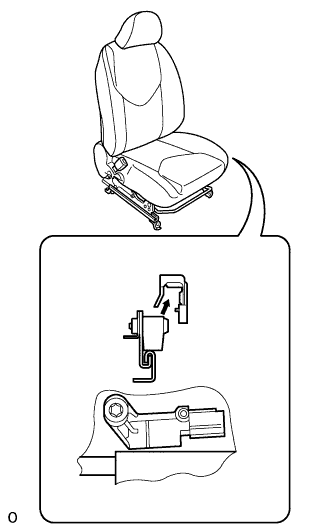 |
Install the seat slide position sensor protector to the seat position sensor.
| 4. INSTALL FRONT SEAT CUSHION LOWER SHIELD LH |
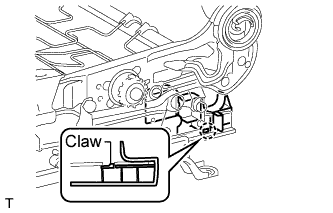 |
Attach the claw to install the lower shield.
| 5. INSTALL FRONT SEAT CUSHION LOWER SHIELD RH |
| 6. INSTALL RECLINING ADJUSTER UPPER INSIDE COVER LH |
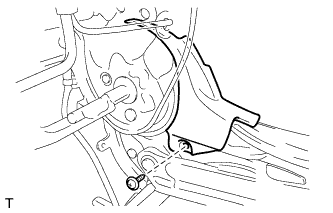 |
Install the inside cover with the screw.
| 7. INSTALL RECLINING ADJUSTER UPPER INSIDE COVER RH |
Install the inside cover with the screw.
| 8. INSTALL RECLINING ADJUSTER LOWER INSIDE COVER LH |
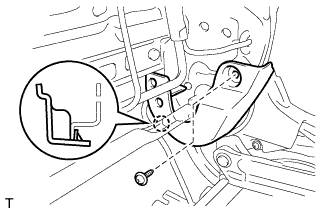 |
Attach the claw to install the inside cover.
Install the screw.
| 9. INSTALL RECLINING ADJUSTER LOWER INSIDE COVER RH |
| 10. INSTALL UPPER ACTIVE HEADREST UNIT (w/ Active Headrest) |
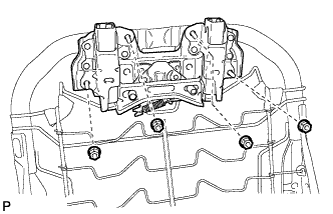 |
Install the upper active headrest unit with the 4 nuts.
| 11. INSTALL LOWER ACTIVE HEADREST UNIT (w/ Active Headrest) |
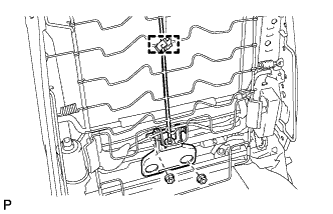 |
Install the lower active headrest unit with the 2 nuts.
Attach the clamp.
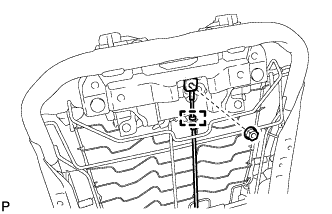 |
Attach the clamp.
Install the nut.
| 12. INSTALL FRONT SEATBACK COVER |
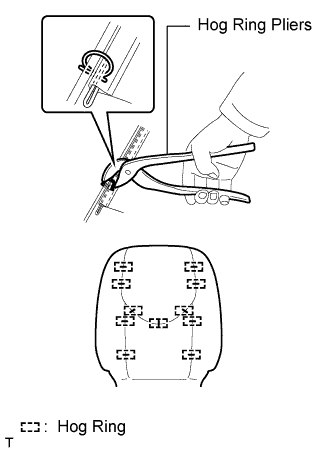
Using hog ring pliers, install the seatback cover to the seatback pad with 11 new hog rings.
Install the seatback cover (with pad) to the front seat frame (w/ adjuster).
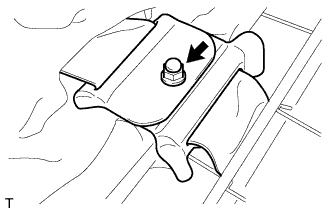 |
w/ Front Seat Side Airbag:
Fully cover the airbag with the 2 seatback cover brackets and install the nut.
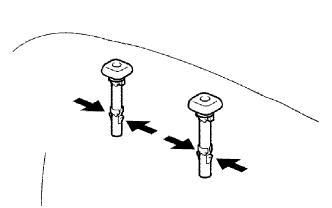 |
Attach the 4 claws to install the 2 headrest supports.
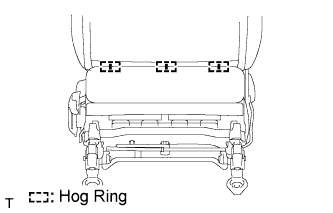 |
Using hog ring pliers, install 3 new hog rings.
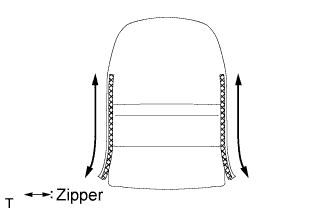 |
Close the 2 zippers.
| 13. INSTALL FRONT SEAT CUSHION COVER |
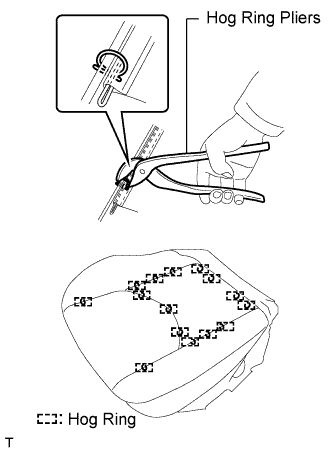 |
Using hog ring pliers, install the seat cushion cover to the seat cushion pad with 15 new hog rings.
Install the seat cushion cover (with pad) to the front seat frame (w/ adjuster).
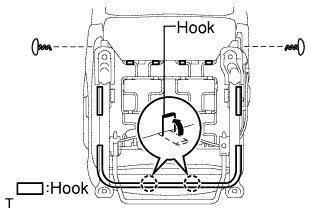 |
Attach the hooks and install the 2 clips.
| 14. INSTALL FRONT SEAT INNER BELT ASSEMBLY |
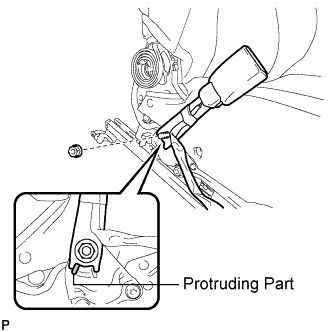 |
Install the front seat inner belt with the nut.
for Driver Seat:
Attach the 2 clamps and connect the 2 connectors.
for Passenger Seat:
Attach the 3 clamps and connect the 2 connectors.
| 15. INSTALL FRONT SEAT CUSHION INNER SHIELD LH |
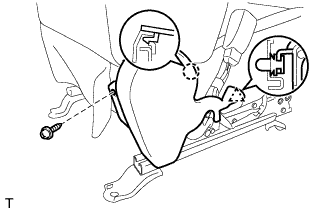 |
Attach the clip and claw to install the inner shield.
Install the screw.
| 16. INSTALL FRONT SEAT CUSHION SHIELD LH (for Driver Side) |
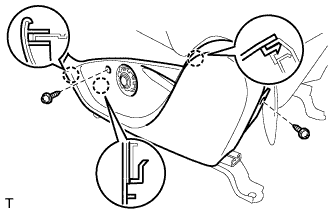 |
Attach the 3 claws to install the cushion shield.
Install the 2 screws.
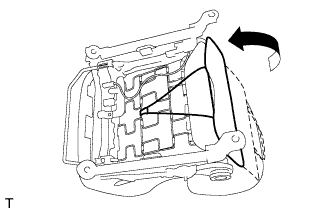 |
Connect the rubber band of the front seatback board or front seatback cover to the front seat frame (w/ adjuster).
| 17. INSTALL FRONT SEAT CUSHION SHIELD RH (for Front Passenger Side) |
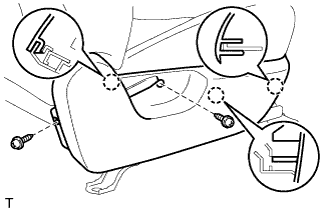 |
Attach the 3 claws to install the cushion shield.
Install the 2 screws.
|
Connect the rubber band of the front seatback board or front seatback cover to the front seat frame (w/ adjuster).
| 18. INSTALL RECLINING ADJUSTER RELEASE HANDLE LH (for Driver Side) |
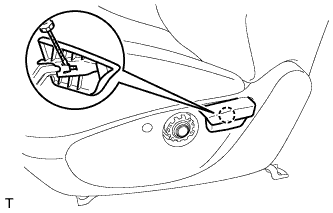 |
Attach the claw to install the release handle.
| 19. INSTALL RECLINING ADJUSTER RELEASE HANDLE RH (for Front Passenger Side) |
| 20. INSTALL VERTICAL ADJUSTING HANDLE (for Driver Side) |
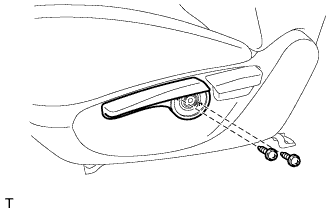 |
Install the handle with the 2 screws.
| 21. INSTALL VERTICAL ADJUSTER COVER LH (for Driver Side) |
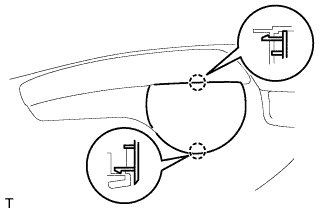 |
Attach the 2 claws to install the cover.