LICENSE PLATE LIGHT ASSEMBLY > INSTALLATION |
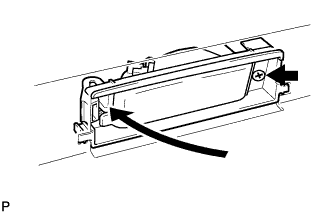
| 1. INSTALL LICENSE PLATE LIGHT ASSEMBLY (w/o Tire Carrier) |
|
Install the light as shown in the illustration.
Install the screw.
Connect the connector.
| 2. INSTALL LICENSE PLATE LIGHT ASSEMBLY |
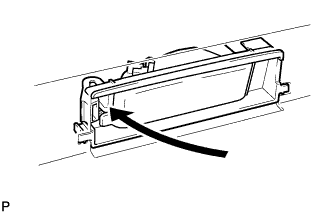 |
Install the light as shown in the illustration.
Connect the connector.
| 3. INSTALL REAR BUMPER COVER (for Bumper Attached Type) |
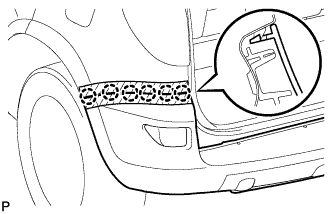 |
w/ Licence Plate Light:
Connect the licence plate light connector.
Connect the rear fog light connector.
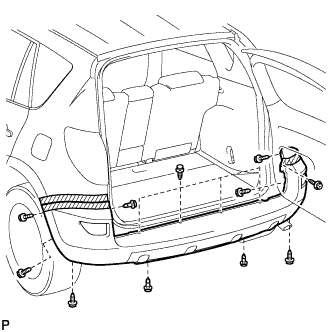
Attach the 12 claws to install the rear bumper cover.
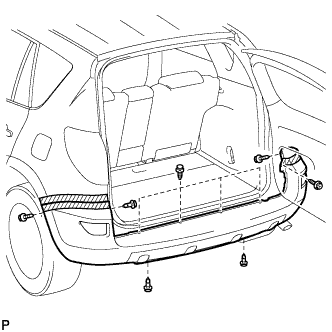 |
w/ Rear Fender Mudguard
Install the 3 screws and 7 clips.
 |
w/o Rear Fender Mudguard
Install the 7 screws and 7 clips.
| 4. INSTALL BACK DOOR LOWER OUT SIDE GARNISH SUB-ASSEMBLY (w/ Tire Carrier) |
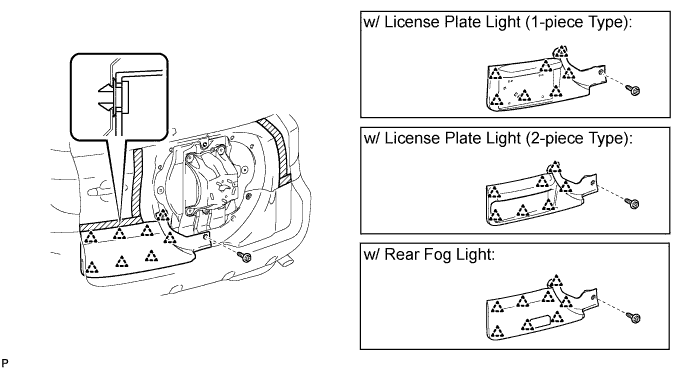
Install new clips to the back door outside garnish.
w/ License Plate Light:
Connect the license plate light connector.
w/ Rear Fog Light:
Connect the rear fog light connector.
Install the back door outside garnish.
Attach the clips to install the back door outside garnish.
Install the screw.
| 5. INSTALL BACK DOOR OUT SIDE GARNISH (w/o Tire Carrier) |
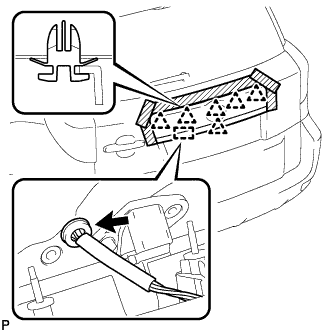 |
Install the grommet to the back door panel.
Attach the 6 clips to install the back door outside garnish.
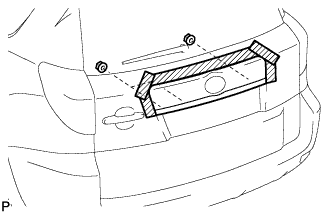 |
Install the 3 nuts.
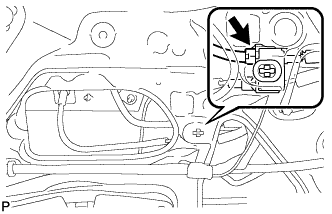 |
Connect the connector.
| 6. INSTALL BACK DOOR TRIM BOARD (for Back Door Attached Type) |
Install the back door trim pocket with the 5 screws.
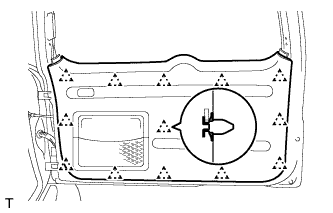 |
Attach the 13 clips to install the trim board.
| 7. INSTALL BACK DOOR SIDE GARNISH RH (for Back Door Attached Type) |
| 8. INSTALL BACK DOOR SIDE GARNISH LH (for Back Door Attached Type) |
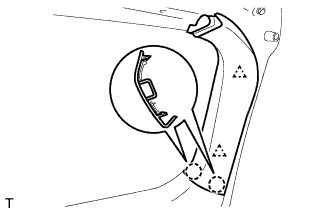 |
Attach the 2 claws and 2 clips to install the garnish.
| 9. INSTALL BACK DOOR CENTER GARNISH (for Back Door Attached Type) |
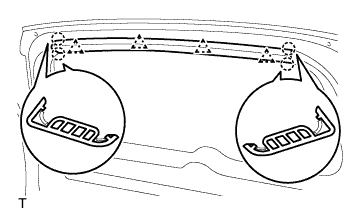 |
Attach the 4 claws and 4 clips to install the garnish.
| 10. CONNECT CABLE TO NEGATIVE BATTERY TERMINAL |