FUEL LID LOCK CONTROL (for LHD) > INSTALLATION |
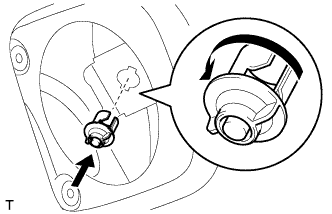
| 1. INSTALL FUEL FILLER OPENING LID LOCK RETAINER |
|
Install the lock retainer and turn it counterclockwise as shown in the illustration.
| 2. INSTALL FUEL LID LOCK CONTROL CABLE SUB-ASSEMBLY |
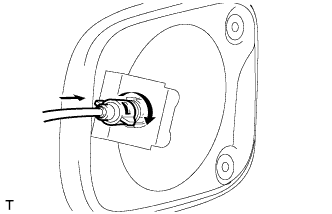 |
Install the cable and turn it clockwise as shown in the illustration.
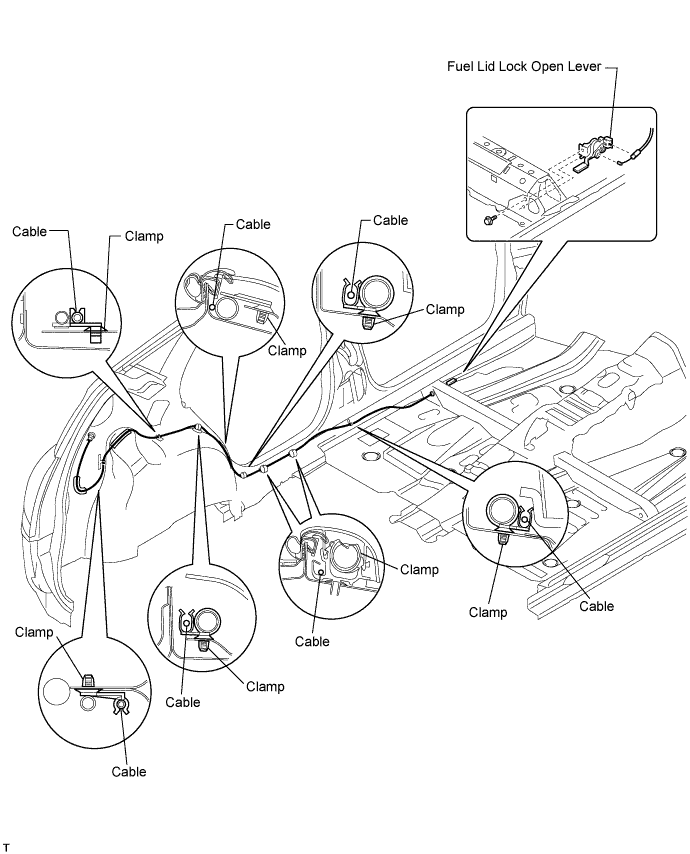
Install the fuel lid lock open lever with the bolt.
Install the cable to the clamps as shown in the illustration.
| 3. INSTALL FRONT FLOOR CARPET ASSEMBLY |
Install the front floor carpet.
| 4. INSTALL DECK TRIM SIDE PANEL ASSEMBLY LH |
for Short Body:
Install the deck trim side panel .
for Long Body:
Install the deck trim side panel .
| 5. INSTALL DECK TRIM SIDE PANEL ASSEMBLY RH |
for Short Body:
Install the deck trim side panel .
for Long Body:
Install the deck trim side panel .
| 6. INSTALL CHILD RESTRAINT SEAT TETHER ANCHOR BRACKET |
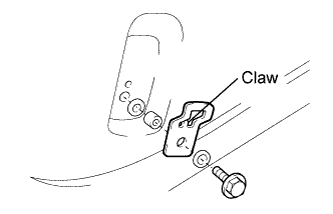 |
Align the bracket positioning hole with the claws and install the bracket with the bolt, 2 washers and collar.
| 7. INSTALL CHILD RESTRAINT SEAT TETHER ANCHOR COVER |
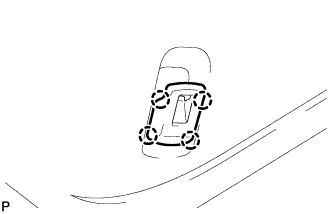 |
Attach the 4 claws to install the cover.
| 8. INSTALL TETHER ANCHOR BRACKET SUB-ASSEMBLY (for Long Body) |
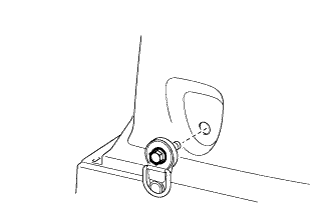 |
Install the tether anchor bracket with the bolt.
| 9. INSTALL RECLINING REMOTE CONTROL LEVER BEZEL LH |
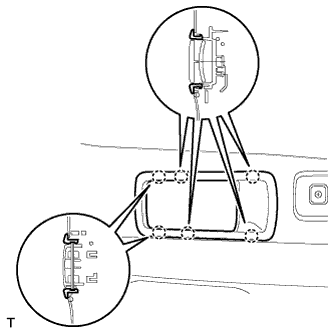 |
Attach the 6 claws to install the bezel.
| 10. INSTALL RECLINING REMOTE CONTROL LEVER BEZEL RH |
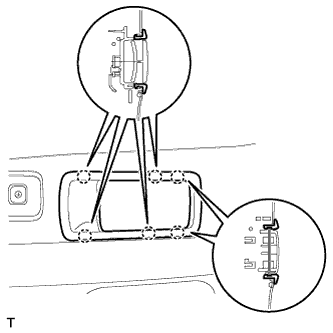 |
Attach the 6 claws to install the bezel.
| 11. INSTALL REAR FLOOR FINISH PLATE |
for Short Body:
Install the rear floor finish plate .
for Long Body:
Install the rear floor finish plate .
| 12. INSTALL BACK DOOR WEATHERSTRIP |
Install the back door weatherstrip.
| 13. INSTALL REAR FLOOR NO. 1 MAT SUPPORT SIDE PLATE |
for Short Body:
Install the rear floor No. 1 mat support side plate .
for Long Body:
Install the rear floor No. 1 mat support side plate .
| 14. INSTALL JACK CARRIER ASSEMBLY (for Short Body) |
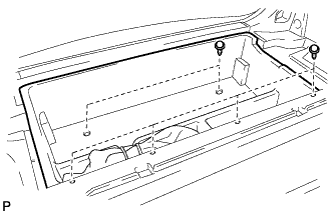 |
Install the jack carrier with the 7 clips.
| 15. INSTALL REAR FLOOR NO. 2 BOARD |
Install the rear floor No. 2 board.
| 16. INSTALL REAR FLOOR NO. 3 BOARD |
Install the rear floor No. 3 board.
| 17. INSTALL DECK BOARD ASSEMBLY |
Install the deck board.
| 18. INSTALL REAR FLOOR NO. 1 BOARD |
Install the rear floor No. 1 board.
| 19. INSTALL TONNEAU COVER ASSEMBLY |
Install the tonneau cover.
| 20. INSTALL PACKAGE TRAY TRIM POCKET SUB-ASSEMBLY |
Install the package tray trim pocket.
| 21. INSTALL LOWER CENTER PILLAR GARNISH LH |
for Short Body:
Install the lower center pillar garnish .
for Long Body:
Install the lower center pillar garnish .
| 22. INSTALL LOWER CENTER PILLAR GARNISH RH |
| 23. INSTALL REAR DOOR OPENING TRIM WEATHERSTRIP LH |
Install the rear door opening trim weatherstrip.
| 24. INSTALL REAR DOOR OPENING TRIM WEATHERSTRIP RH |
Install the rear door opening trim weatherstrip.
| 25. INSTALL REAR DOOR SCUFF PLATE LH |
for Short Body:
Install the rear door scuff plate .
for Long Body:
Install the rear door scuff plate .
| 26. INSTALL REAR DOOR SCUFF PLATE RH |
| 27. INSTALL FRONT DOOR OPENING TRIM WEATHERSTRIP LH |
Install the front door opening trim weatherstrip.
| 28. INSTALL FRONT DOOR OPENING TRIM WEATHERSTRIP RH |
Install the front door opening trim weatherstrip.
| 29. INSTALL COWL SIDE TRIM BOARD LH |
for Short Body:
Install the cowl side trim board .
for Long Body:
Install the cowl side trim board .
| 30. INSTALL COWL SIDE TRIM BOARD RH |
| 31. INSTALL FRONT DOOR SCUFF PLATE LH |
for Short Body:
Install the front door scuff plate .
for Long Body:
Install the front door scuff plate .
| 32. INSTALL FRONT DOOR SCUFF PLATE RH |
| 33. INSTALL REAR CONSOLE BOX SUB-ASSEMBLY |
Connect the connector.
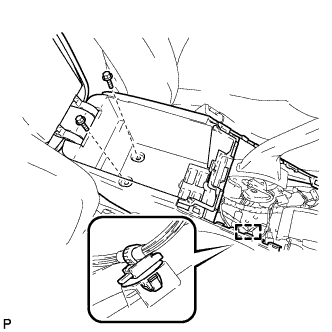 |
Install the rear console box with the 2 bolts and attach the wire harness clamp.
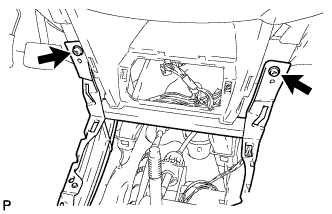 |
Install the 2 screws.
| 34. INSTALL CONSOLE BOX CARPET |
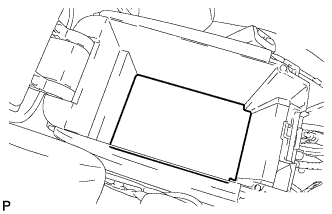 |
Install the console box carpet.
| 35. INSTALL NO. 1 INSTRUMENT PANEL BRACKET COVER INNER LH |
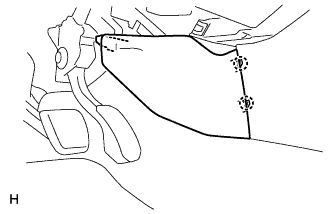 |
Attach the 2 claws to install the instrument panel bracket cover.
| 36. INSTALL NO. 1 INSTRUMENT PANEL BRACKET COVER INNER RH |
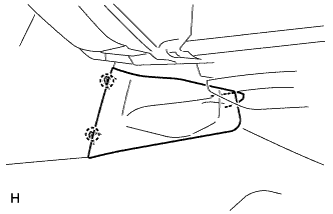 |
Attach the 2 claws to install the instrument panel bracket cover.
| 37. INSTALL CONSOLE REAR END PANEL |
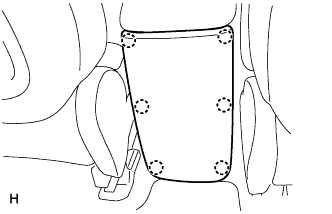 |
Attach the 6 claws to install the console rear end panel.
| 38. INSTALL UPPER REAR CONSOLE PANEL SUB-ASSEMBLY |
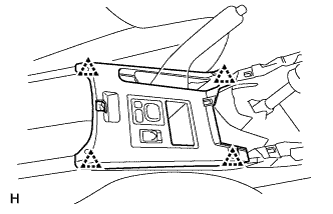 |
Connect the connector.
Attach the 4 clips to install the upper rear console panel.
| 39. INSTALL CONSOLE CUP HOLDER BOX |
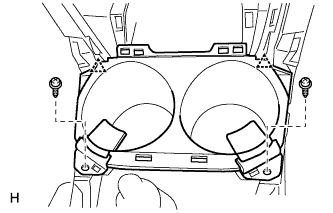 |
Attach the 2 clips to install the cup holder box.
Install the 2 screws.
| 40. INSTALL SWITCH BASE |
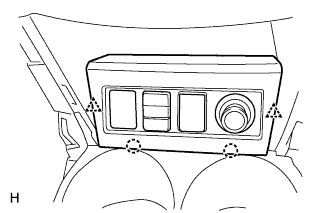 |
Connect the connectors.
Attach the 2 clips and 2 claws to install the switch base.
| 41. INSTALL FLOOR SHIFT POSITION INDICATOR HOUSING SUB-ASSEMBLY (for Automatic Transaxle) |
Connect the connector.
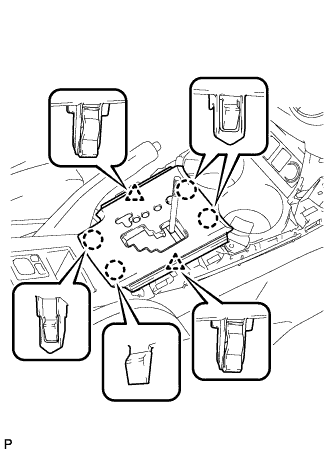 |
Attach the 2 clips and 4 claws to install the floor shift position indicator housing.
| 42. INSTALL UPPER CONSOLE PANEL SUB-ASSEMBLY (for Manual Transaxle) |
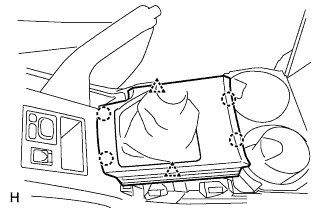 |
Attach the 2 clips and 4 claws to install the upper console panel.
| 43. INSTALL NO. 2 CONSOLE UPPER PANEL GARNISH |
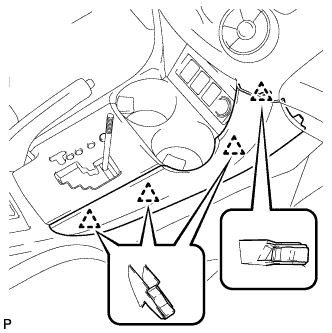 |
Attach the 4 clips to install the upper panel garnish.
| 44. INSTALL NO. 1 CONSOLE UPPER PANEL GARNISH |
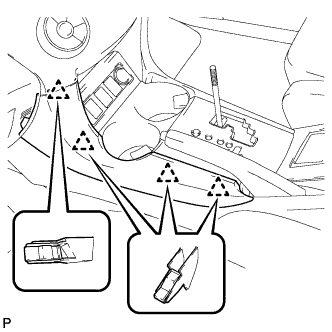 |
Attach the 4 clips to install the upper panel garnish.
| 45. INSTALL SHIFT LEVER KNOB SUB-ASSEMBLY |
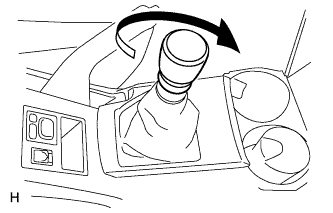 |
for Manual Transaxle:
Twist the shift lever knob in the direction indicated by the arrow to install it.
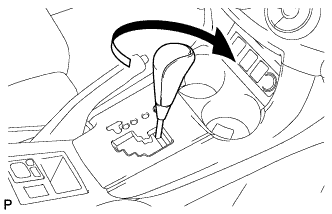 |
for Automatic Transaxle:
Twist the shift lever knob in the direction indicated by the arrow to install it.
| 46. INSTALL REAR NO. 1 SEAT ASSEMBLY LH |
Install the rear No. 1 seat (Click here).
| 47. INSTALL REAR NO. 1 SEAT ASSEMBLY RH |
Install the rear No. 1 seat (Click here).
| 48. INSTALL FRONT SEAT ASSEMBLY LH |
for Manual Seat:
Install the front seat (Click here).
for Power Seat:
Install the front seat (Click here).
| 49. INSTALL FRONT SEAT ASSEMBLY RH |
| 50. CONNECT CABLE TO NEGATIVE BATTERY TERMINAL |
| 51. CHECK SRS WARNING LIGHT |
Check the SRS warning light (Click here).