 |
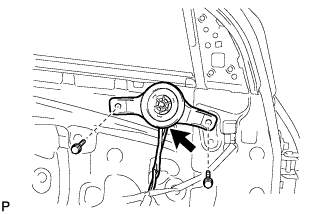
Install the speaker with the 2 screws.
FRONT DOOR SPEAKER > INSTALLATION |
| 1. INSTALL FRONT NO. 2 SPEAKER ASSEMBLY |
|
Install the speaker with the 2 screws.
Connect the connector.
| 2. INSTALL FRONT NO. 1 SPEAKER ASSEMBLY |
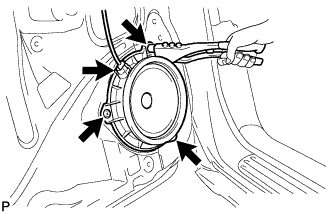 |
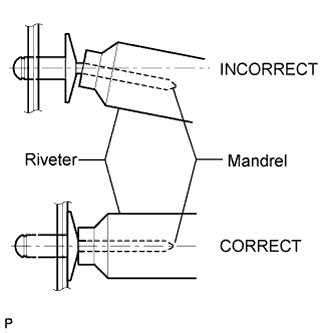
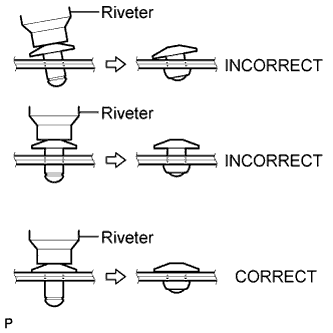
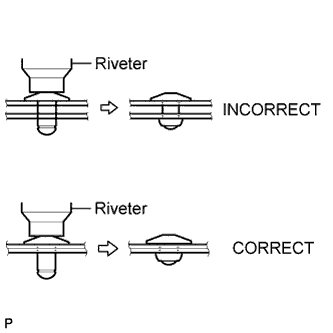
Using an air riveter or hand riveter, install the speaker with 3 new rivets.
 |
 |
 |
Connect the connector.
| 3. INSTALL FRONT DOOR TRIM BOARD SUB-ASSEMBLY LH |
Attach the 4 claws to install the speaker door grille.
Attach the 7 claws to install the weatherstrip inner.
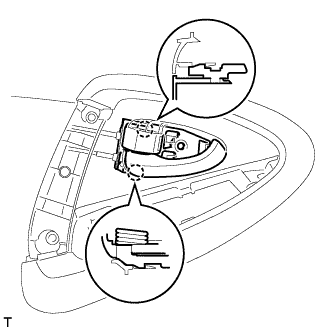 |
Attach the 2 claws to install the inside handle.
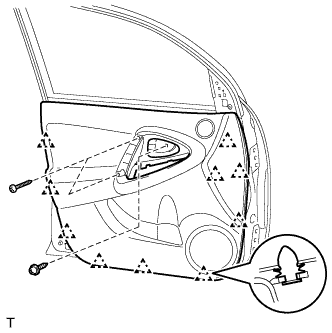 |
Attach the 10 clips to install the trim board.
Install the 3 screws.
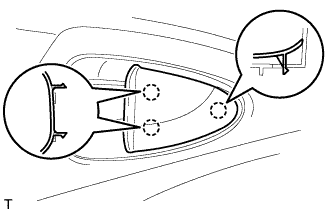 |
Attach the 3 claws to install the door inside handle bezel plug.
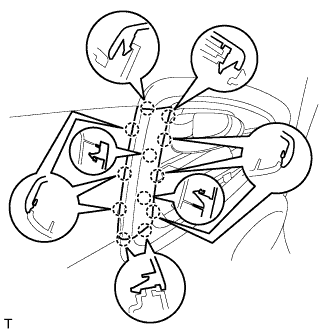 |
Attach the 12 claws to install the door assist grip.
| 4. INSTALL FRONT ARMREST BASE UPPER PANEL LH |
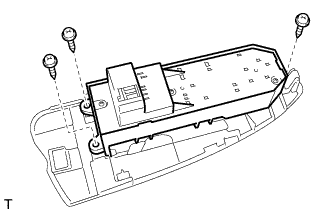 |
for Driver Side:
Install the power window regulator master switch to the panel with the 3 screws.
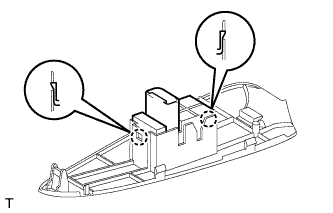 |
for Passenger Side:
Attach the 2 claws and install the power window regulator switch to the panel.
Connect the switch connectors.
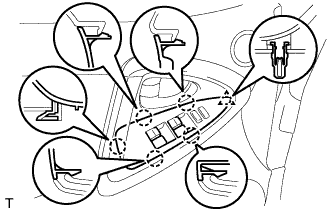 |
Attach the clip and 5 claws to install the panel (with the switch).
| 5. INSTALL FRONT DOOR LOWER FRAME BRACKET GARNISH LH |
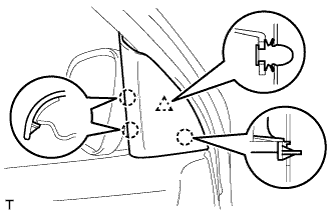 |
Attach the clip and 3 claws to install the garnish.
| 6. CONNECT CABLE TO NEGATIVE BATTERY TERMINAL |