 |
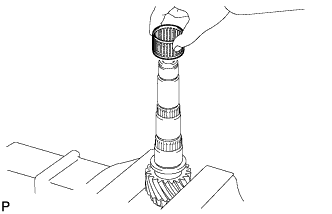
Coat the needle roller bearing with gear oil, and install it into the No. 2 output shaft.
OUTPUT SHAFT > REASSEMBLY |
| 1. INSTALL NEEDLE ROLLER BEARING |
|
Coat the needle roller bearing with gear oil, and install it into the No. 2 output shaft.
| 2. INSTALL REVERSE DRIVEN GEAR |
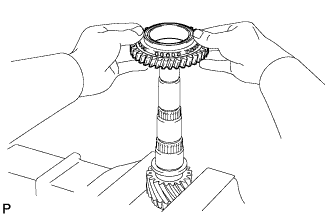 |
Coat the reverse driven gear with gear oil, and install it into the No. 2 output shaft.
| 3. INSTALL NO. 4 TRANSMISSION CLUTCH HUB |
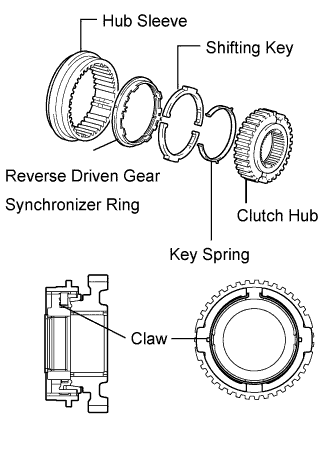 |
Install the key spring and 2 shifting keys to the clutch hub.
Install the hub sleeve to the reverse driven gear as shown in the illustration.
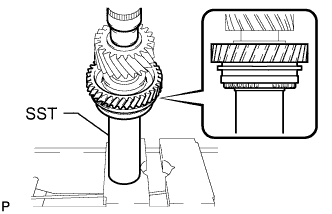 |
Coat the No. 4 transmission clutch hub with gear oil, and install it into the No. 2 output shaft.
Using SST and a press, press in the reverse gear and No. 4 transmission clutch hub into the No. 2 output shaft.
| 4. INSTALL SHAFT SNAP RING |
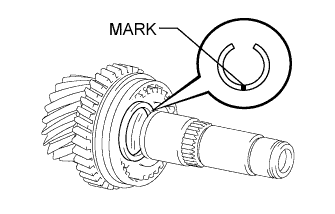 |
Select a new snap ring, using the table below, that makes the thrust clearance of the No. 4 transmission clutch hub less than 0.1 mm (0.00394 in.).
| Mark | Specified Condition | Mark | Specified Condition |
| A | 2.25 to 2.30 mm (0.0886 to 0.0906 in.) | E | 2.45 to 2.50 mm (0.0965 to 0.0984 in.) |
| B | 2.30 to 2.35 mm (0.0906 to 0.0925 in.) | F | 2.50 to 2.55 mm (0.0984 to 0.100 in.) |
| C | 2.35 to 2.40 mm (0.0925 to 0.0945 in.) | G | 2.55 to 2.60 mm (0.100 to 0.102 in.) |
| D | 2.40 to 2.45 mm (0.0945 to 0.0965 in.) | H | 2.60 to 2.65 mm (0.102 to 0.104 in.) |
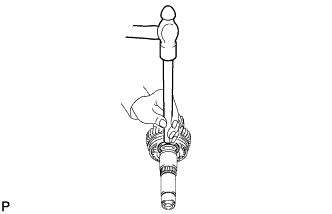 |
Using a brass bar and hammer, tap the snap ring onto the No. 2 output shaft.
| 5. INSPECT REVERSE DRIVEN GEAR THRUST CLEARANCE |
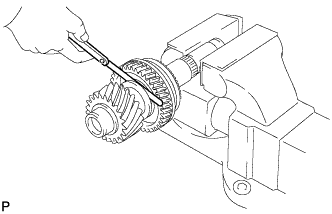 |
Using a feeler gauge, measure the reverse driven gear thrust clearance.
| 6. INSPECT REVERSE DRIVEN GEAR RADIAL CLEARANCE |
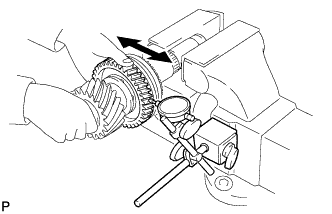 |
Using a dial indicator, measure the reverse driven gear radial clearance.
| 7. INSTALL 5TH DRIVEN GEAR |
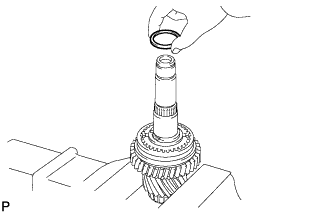 |
Install the output shaft spacer into the No. 2 output shaft.
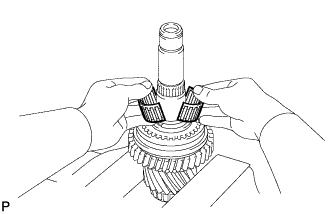 |
Coat the 2 pieces of the needle roller bearing with gear oil, and install them into the No. 2 output shaft.
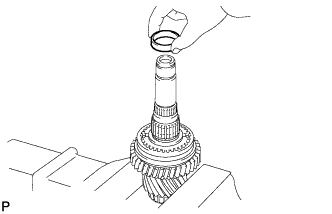 |
Install the output shaft spacer into the No. 2 output shaft.
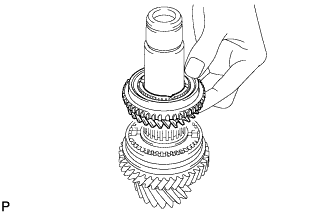 |
Coat the 5th driven gear with gear oil, and install it into the No. 2 output shaft.
| 8. INSTALL NO. 3 TRANSMISSION CLUTCH HUB |
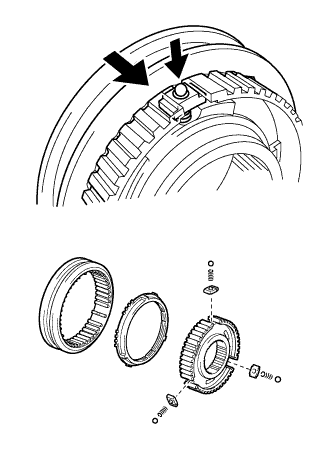 |
Apply of gear oil to the sleeve and hub.
Install the hub sleeve to the clutch hub.
Install the 3 shifting keys to the clutch hub.
Install the 3 shifting key springs to the clutch hub.
Place the 3 balls in the holes of the shifting keys, and install the hub sleeve while pushing in the balls.
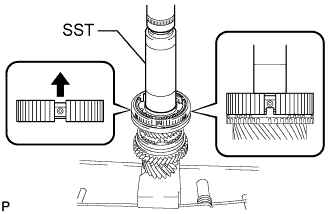 |
Coat the 5th driven gear synchronizer ring with gear oil, and install it to the 5th driven gear.
Using SST and a press, press in the No. 3 transmission clutch hub to the No. 2 output shaft.
| 9. INSTALL SHAFT SNAP RING |
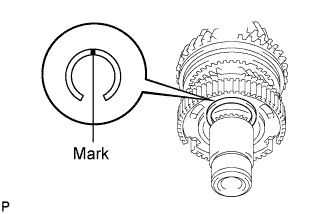 |
Select a new snap ring, using the table below, that makes the thrust clearance of the No. 3 transmission clutch hub less than 0.1 mm (0.00394 in.).
| Mark | Specified Condition | Mark | Specified Condition |
| 1 | 2.25 to 2.30 mm (0.0886 to 0.0906 in.) | 4 | 2.40 to 2.45 mm (0.0945 to 0.0965 in.) |
| 2 | 2.30 to 2.35 mm (0.0906 to 0.0925 in.) | 5 | 2.45 to 2.50 mm (0.0965 to 0.0984 in.) |
| 3 | 2.35 to 2.40 mm (0.0925 to 0.0945 in.) | 6 | 2.50 to 2.55 mm (0.0984 to 0.100 in.) |
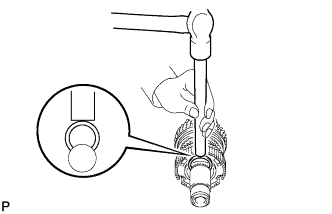 |
Using a brass bar and hammer, tap the snap ring onto the No. 2 output shaft.
| 10. INSPECT 5TH DRIVEN GEAR THRUST CLEARANCE |
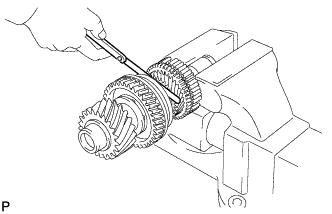 |
Using a feeler gauge, measure the 5th driven gear thrust clearance.
| 11. INSPECT 5TH DRIVEN GEAR RADIAL CLEARANCE |
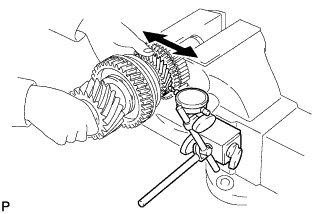 |
Using a dial indicator, measure the 5th driven gear radial clearance.
| 12. INSTALL 6TH DRIVEN GEAR |
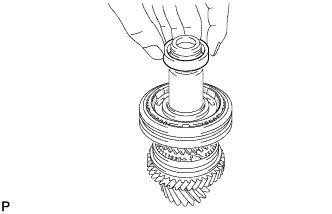 |
Install the spacer into the No. 2 output shaft.
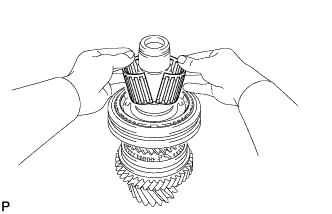 |
Coat the 2 pieces of the needle roller bearing with gear oil, and install them into the No. 2 output shaft.
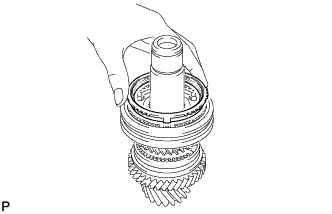 |
Coat the 6th gear synchronizer ring with gear oil, and install it into the transmission clutch hub.
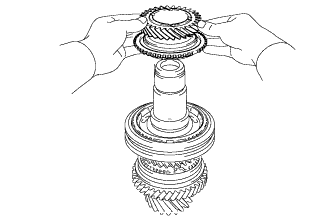 |
Coat the 6th driven gear with gear oil, and install it into the No. 2 output shaft.
| 13. INSTALL NO. 2 OUTPUT SHAFT REAR BEARING |
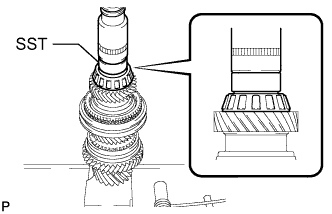 |
Using SST and a press, press in the No. 2 output shaft rear bearing to the No. 2 output shaft.
| 14. INSTALL NO. 2 OUTPUT SHAFT BEARING SNAP RING |
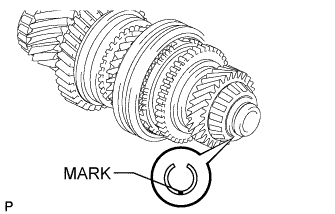 |
Select a new snap ring, using the table below, that makes the thrust clearance of the 6th gear less than 0.1 mm (0.00394 in.).
| Mark | Specified Condition | Mark | Specified Condition |
| B | 1.85 to 1.90 mm (0.0728 to 0.0748 in.) | 0 | 2.05 to 2.10 mm (0.0807 to 0.0827 in.) |
| C | 1.90 to 1.95 mm (0.0748 to 0.0768 in.) | 1 | 2.10 to 2.15 mm (0.0827 to 0.0846 in.) |
| D | 1.95 to 2.00 mm (0.0768 to 0.0787 in.) | 2 | 2.15 to 2.20 mm (0.0846 to 0.0866 in.) |
| E | 2.00 to 2.05 mm (0.0787 to 0.0807 in.) | - | - |
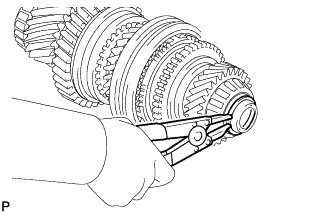 |
Using a snap ring expander, install the snap ring onto the No. 2 output shaft.
| 15. INSPECT 6TH DRIVEN GEAR THRUST CLEARANCE |
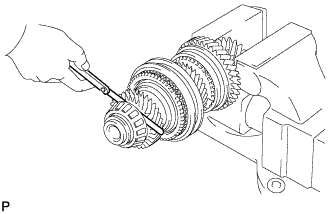 |
Using a feeler gauge, measure the 6th driven gear thrust clearance.
| 16. INSPECT 6TH DRIVEN GEAR RADIAL CLEARANCE |
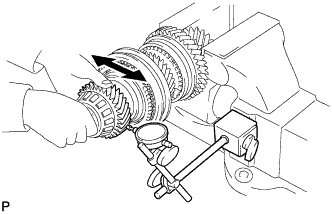 |
Using a dial indicator, measure the 6th driven gear radial clearance.
| 17. INSTALL NO. 2 OUTPUT SHAFT FRONT BEARING |
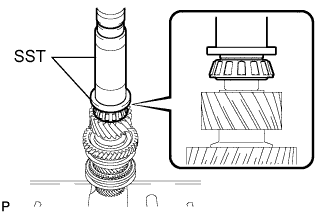 |
Using SST and a press, press in the No. 2 output shaft front bearing into the No. 2 output shaft.
| 18. INSTALL OUTPUT SHAFT FRONT BEARING |
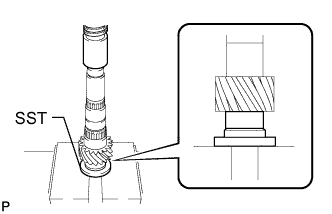 |
Using SST and a press, press in the output shaft front bearing into the No. 1 output shaft.
| 19. INSTALL OUTPUT SHAFT FRONT BEARING SHAFT SNAP RING |
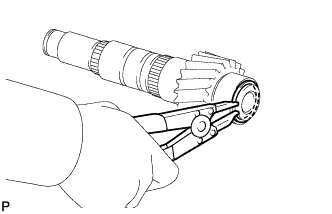 |
Using a snap ring expander, install a new snap ring into the No. 1 output shaft.
| 20. INSTALL 1ST DRIVEN GEAR |
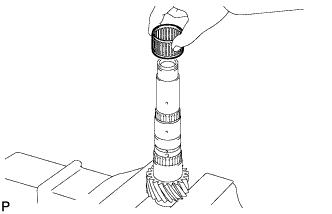 |
Coat the needle roller bearing with gear oil, and install it into the No. 1 output shaft.
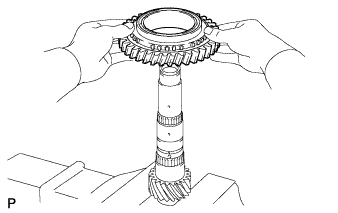 |
Coat the 1st driven gear with gear oil, and install it into the No. 1 output shaft.
| 21. INSTALL NO. 1 TRANSMISSION CLUTCH HUB |
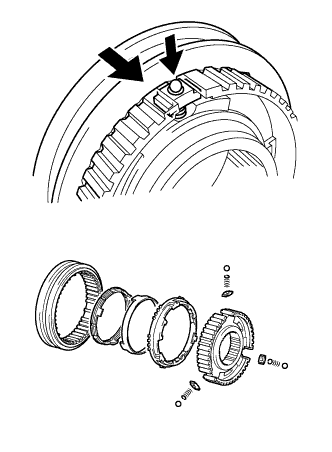 |
Apply of gear oil to the sleeve and hub.
Install the hub sleeve to the clutch hub.
Install the 3 shifting keys to the clutch hub.
Install the 3 shifting key springs to the clutch hub.
Place the 3 balls in the holes of the shifting keys, and install the hub sleeve while pushing in the balls.
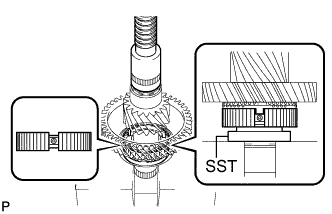 |
Coat the 3 pieces of the 1st driven gear synchronizer ring set with gear oil, and install them to the 1st driven gear.
Using SST and a press, press in the No. 1 transmission hub sleeve to the No. 1 output shaft.
| 22. INSTALL 2ND DRIVEN GEAR SYNCHRONIZER RING SET |
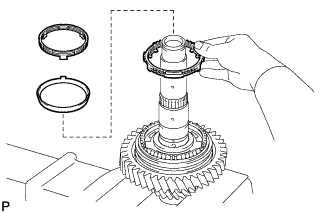 |
Coat the 3 pieces of the 2nd driven gear synchronizer ring set with gear oil, and install them to the No. 1 output shaft.
| 23. INSTALL SYNCHROMESH SHIFTING KEY BALL |
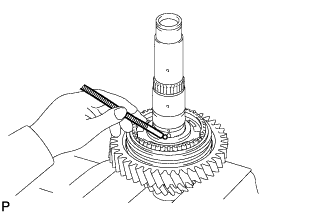 |
Using a magnet hand, install the key ball onto the No. 1 output shaft.
| 24. INSTALL NEEDLE ROLLER BEARING |
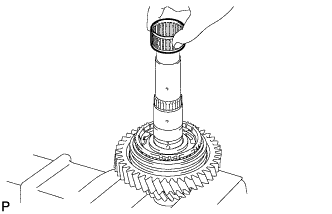 |
Coat the needle roller bearing with gear oil, and install it into the No. 1 output shaft.
| 25. INSTALL 2ND DRIVEN GEAR |
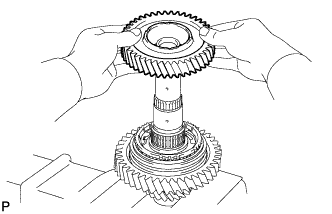 |
Coat the 2nd driven gear with gear oil, and install it into the No. 1 output shaft.
| 26. INSTALL INNER 2ND DRIVEN GEAR BEARING RACE |
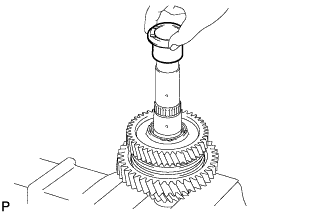 |
Align the groove of the inner 2nd driven gear bearing race with the ball, and install it.
| 27. INSTALL OUTPUT SHAFT BEARING SHAFT SNAP RING |
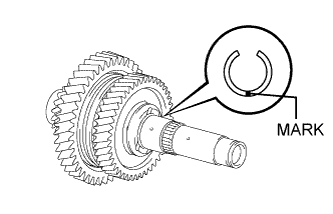 |
Select a new snap ring, using the table below, that makes the thrust clearance of the 2nd gear less than 0.1 mm (0.00394 in.).
| Mark | Specified Condition | Mark | Specified Condition |
| A | 2.25 to 2.30 mm (0.0886 to 0.0906 in.) | E | 2.45 to 2.50 mm (0.0965 to 0.0984 in.) |
| B | 2.30 to 2.35 mm (0.0906 to 0.0925 in.) | F | 2.50 to 2.55 mm (0.0984 to 0.100 in.) |
| C | 2.35 to 2.40 mm (0.0925 to 0.0945 in.) | G | 2.55 to 2.60 mm (0.100 to 0.102 in.) |
| D | 2.40 to 2.45 mm (0.0945 to 0.0965 in.) | H | 2.60 to 2.65 mm (0.102 to 0.104 in.) |
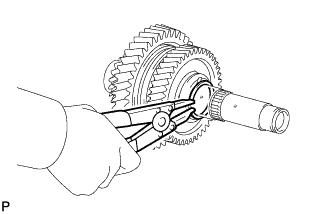 |
Using a snap ring expander, install the snap ring into the No. 1 output shaft.
| 28. INSPECT 1ST DRIVEN GEAR THRUST CLEARANCE |
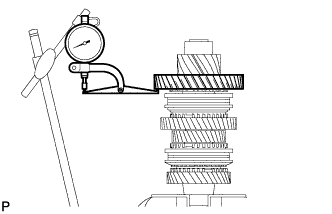 |
Using a dial indicator, measure the 1st driven gear thrust clearance.
| 29. INSPECT 1ST DRIVEN GEAR RADIAL CLEARANCE |
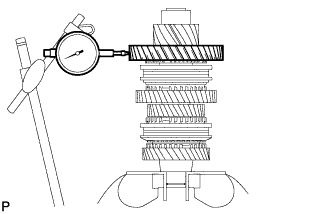 |
Using a dial indicator, measure the 1st driven gear radial clearance.
| 30. INSPECT 2ND DRIVEN GEAR THRUST CLEARANCE |
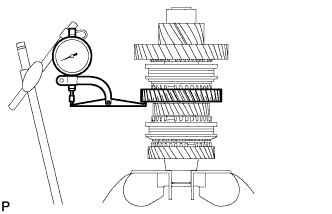 |
Using a dial indicator, measure the 2nd driven gear thrust clearance.
| 31. INSPECT 2ND DRIVEN GEAR RADIAL CLEARANCE |
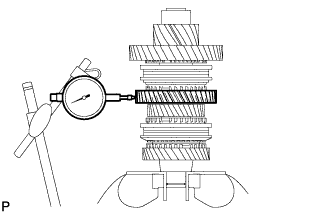 |
Using a dial indicator, measure the 2nd driven gear radial clearance.
| 32. INSTALL 4TH DRIVEN GEAR |
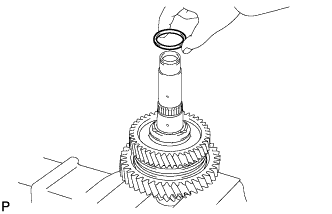 |
Install the spacer into the No. 1 output shaft.
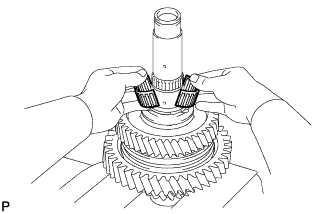 |
Coat the 2 pieces of the 4th driven gear needle roller bearing with gear oil, and install them into the No. 1 output shaft.
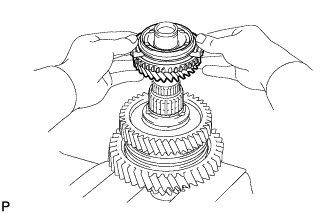 |
Coat the 4th driven gear with gear oil, and install it into the No. 1 output shaft.
| 33. INSTALL NO. 2 TRANSMISSION CLUTCH HUB |
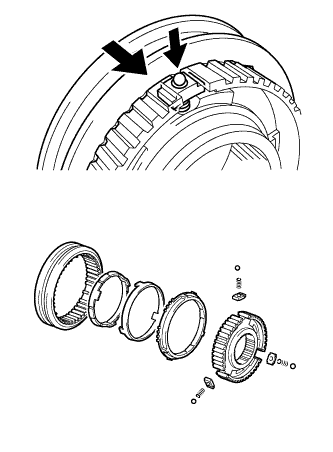 |
Apply of gear oil to the sleeve and hub.
Install the hub sleeve to the clutch hub.
Install the 3 shifting keys to the clutch hub.
Install the 3 shifting key springs to the clutch hub.
Place the 3 balls in the holes of the shifting keys, and install the hub sleeve while pushing in the balls.
Coat the 3 pieces of the 4th driven gear synchronizer ring set with gear oil, and install them into the 4th driven gear.
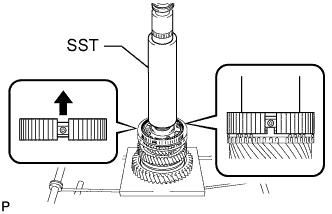 |
Using SST and a press, press in the No. 2 transmission hub sleeve to the No. 1 output shaft.
| 34. INSTALL SHAFT SNAP RING |
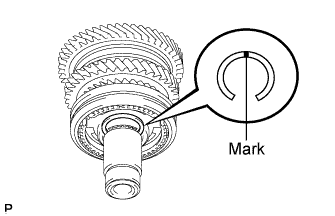 |
Select a new snap ring, using the table below, that makes the thrust clearance of the No. 2 transmission clutch hub less than 0.1 mm (0.00394 in.).
| Mark | Specified Condition | Mark | Specified Condition |
| 1 | 2.25 to 2.30 mm (0.0886 to 0.0906 in.) | 4 | 2.40 to 2.45 mm (0.0945 to 0.0965 in.) |
| 2 | 2.30 to 2.35 mm (0.0906 to 0.0925 in.) | 5 | 2.45 to 2.50 mm (0.0965 to 0.0984 in.) |
| 3 | 2.35 to 2.40 mm (0.0925 to 0.0945 in.) | 6 | 2.50 to 2.55 mm (0.0984 to 0.100 in.) |
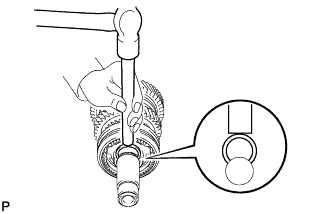 |
Using a brass bar and hammer, tap the snap ring into the No. 1 output shaft.
| 35. INSPECT 4TH DRIVEN GEAR THRUST CLEARANCE |
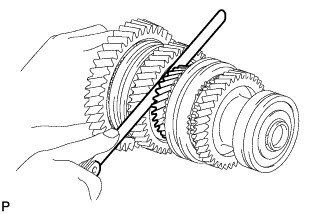 |
Using a feeler gauge, measure the 4th driven gear thrust clearance.
| 36. INSPECT 4TH DRIVEN GEAR RADIAL CLEARANCE |
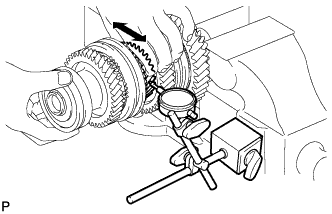 |
Using a dial indicator, measure the 4th driven gear radial clearance.
| 37. INSTALL 3RD DRIVEN GEAR |
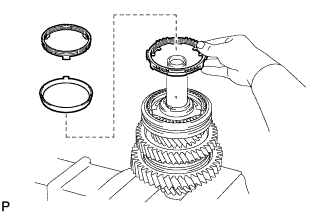 |
Coat the 3rd driven gear synchronizer ring set with gear oil, and install it into the No. 1 output shaft.
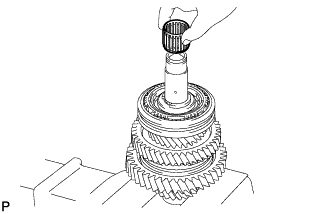 |
Coat the needle roller bearing with gear oil, and install it into the No. 1 output shaft.
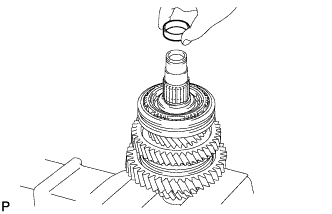 |
Install the spacer into the No. 1 output shaft.
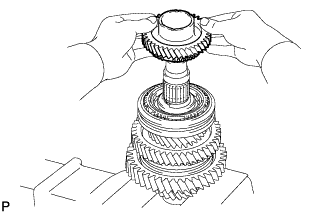 |
Coat the 3rd driven gear with gear oil, and install it into the No. 1 output shaft.
| 38. INSTALL OUTPUT SHAFT FRONT BEARING |
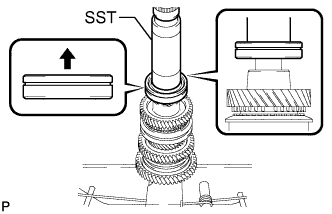 |
Using SST and a press, press in the output shaft front bearing into the No. 1 output shaft.
| 39. INSTALL OUTPUT SHAFT BEARING SHAFT SNAP RING |
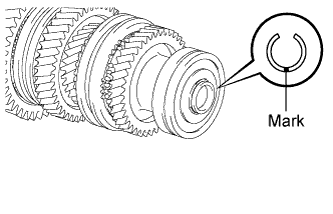 |
Select a new snap ring, using the table below, that makes the thrust clearance of the output shaft bearing less than 0.1 mm (0.00394 in.).
| Mark | Specified Condition | Mark | Specified Condition |
| B | 1.85 to 1.90 mm (0.0728 to 0.0748 in.) | 0 | 2.05 to 2.10 mm (0.0807 to 0.0827 in.) |
| C | 1.90 to 1.95 mm (0.0748 to 0.0768 in.) | 1 | 2.10 to 2.15 mm (0.0827 to 0.0846 in.) |
| D | 1.95 to 2.00 mm (0.0768 to 0.0787 in.) | 2 | 2.15 to 2.20 mm (0.0846 to 0.0866 in.) |
| E | 2.00 to 2.05 mm (0.0787 to 0.0807 in.) | - | - |
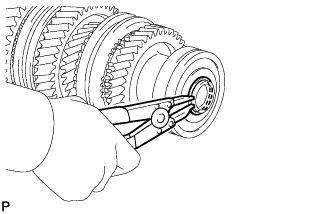 |
Using a snap ring expander, install the snap ring onto the No. 1 output shaft.
| 40. INSPECT 3RD DRIVEN GEAR THRUST CLEARANCE |
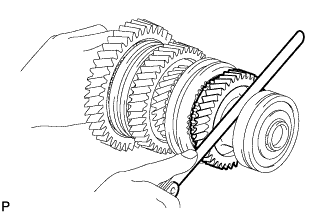 |
Using a feeler gauge, measure the 3rd driven gear thrust clearance.
| 41. INSPECT 3RD DRIVEN GEAR RADIAL CLEARANCE |
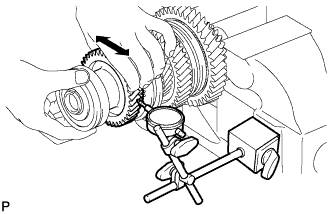 |
Using a dial indicator, measure the 3rd driven gear radial clearance.