 |
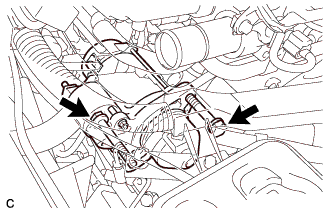
Install the starter with the 2 bolts.
- Torque:
- 64 N*m{ 652 kgf*cm , 47 ft.*lbf }
STARTER > INSTALLATION |
| 1. INSTALL STARTER ASSEMBLY |
|
Install the starter with the 2 bolts.
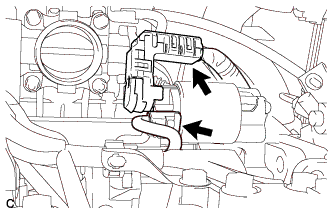 |
Install the starter wire with the nut.
Close the terminal cap.
Connect the starter connector.
| 2. INSTALL NO. 3 AIR HOSE |
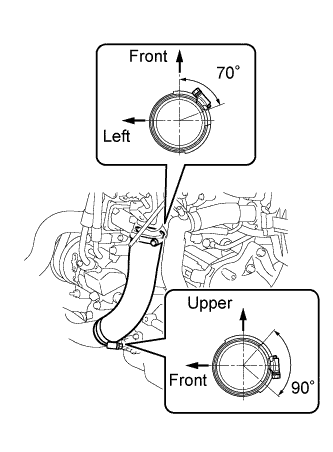 |
Install the No. 3 air hose to the No. 2 air tube and throttle body.
Tighten the 2 hose clamps as shown in the illustration.
| 3. INSTALL NO. 1 AIR TUBE |
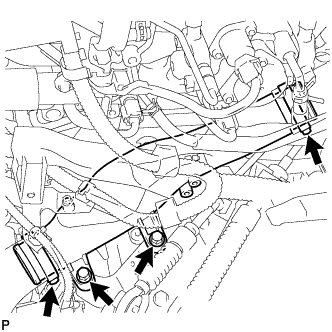 |
Install the No. 1 air tube with the 2 bolts.
Tighten the 2 clamps.
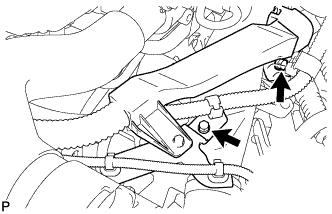 |
Install the wire harness with the 2 bolts.
| 4. INSTALL AIR CLEANER BRACKET |
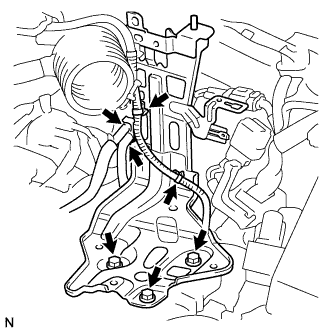 |
Install the bracket with the 3 bolts.
Connect the 2 fuel hoses to the bracket.
Connect the 2 wire harness clamps.
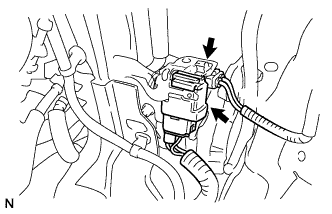 |
Install the glow plug relay.
Connect the fuel filter level switch connector.
| 5. INSTALL FUEL FILTER ASSEMBLY |
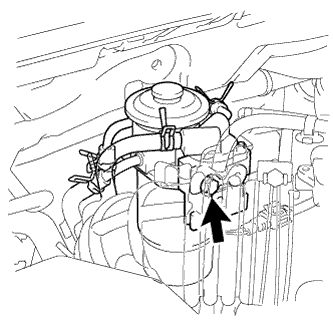 |
Install the fuel filter with the bolt.
| 6. INSTALL AIR CLEANER CASE |
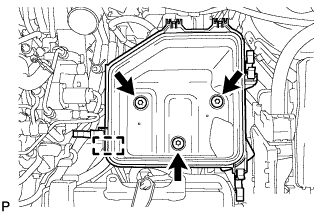 |
Attach the clamp and install the air cleaner case with the 3 bolts.
| 7. INSTALL AIR CLEANER FILTER ELEMENT SUB-ASSEMBLY |
| 8. INSTALL AIR CLEANER CAP SUB-ASSEMBLY |
Connect the air cleaner hose.
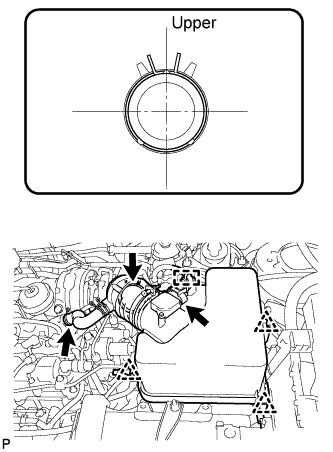 |
Attach the 3 clips to install the air cleaner cap.
Connect the PCV hose.
Attach the clamp and connect the mass air flow meter connector.
| 9. INSTALL BATTERY BRACKET REINFORCEMENT |
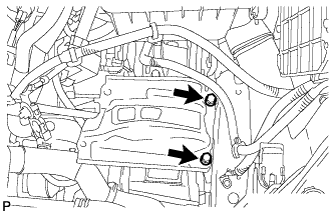 |
Install the battery bracket reinforcement with the 2 bolts.
| 10. INSTALL BATTERY CARRIER BRACKET |
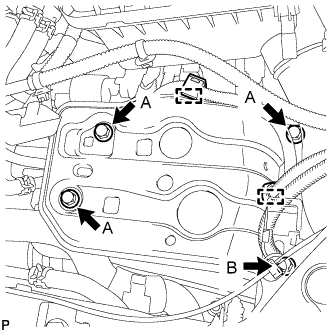 |
Install the front battery bracket with the 4 bolts.
Attach the 2 wire harness clamps.
| 11. INSTALL BATTERY TRAY |
| 12. INSTALL BATTERY |
| 13. INSTALL BATTERY INSULATOR |
| 14. INSTALL BATTERY CLAMP SUB-ASSEMBLY |
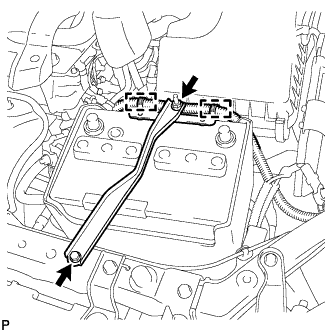 |
Attach the hook of the battery clamp to the front battery bracket.
Partially tighten the nut and temporarily install the bolt.
Adjust the battery clamp position.
Tighten the nut and bolt.
Attach the 2 wire harness clamps.
| 15. CONNECT CABLE TO POSITIVE BATTERY TERMINAL |
| 16. INSTALL NO. 1 ENGINE UNDER COVER |
Install the engine under cover with the 6 bolts and 10 clips.
| 17. INSTALL RADIATOR SUPPORT OPENING COVER |
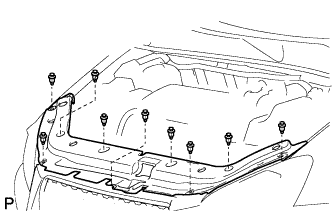 |
Install the radiator support opening cover with the 9 clips.
| 18. INSTALL NO. 1 ENGINE COVER |
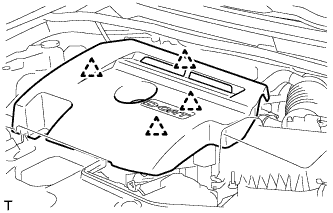 |
Attach the 4 clips to install the engine cover.
| 19. CONNECT CABLE TO NEGATIVE BATTERY TERMINAL |