 |
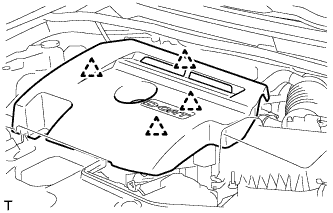
Detach the 4 clips and remove the engine cover.
- NOTICE:
- Attempting to disengage both front and rear clips at the same time may cause the cover to break.
STARTER > REMOVAL |
| 1. DISCONNECT CABLE FROM NEGATIVE BATTERY TERMINAL |
| 2. REMOVE NO. 1 ENGINE COVER |
|
Detach the 4 clips and remove the engine cover.
| 3. REMOVE RADIATOR SUPPORT OPENING COVER |
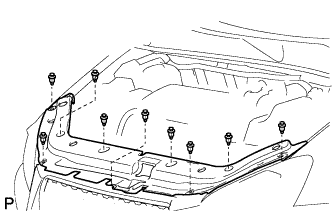 |
Remove the 9 clips and radiator support opening cover.
| 4. REMOVE NO. 1 ENGINE UNDER COVER |
Remove the 6 bolts, 10 clips and engine under cover.
| 5. DISCONNECT CABLE FROM POSITIVE BATTERY TERMINAL |
| 6. REMOVE BATTERY CLAMP SUB-ASSEMBLY |
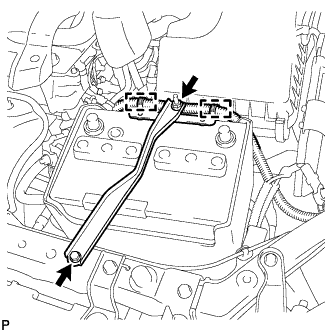 |
Remove the bolt and loosen the nut.
Detach the 2 wire harness clamps.
Detach the hook of the battery clamp from the front battery bracket, and then remove the battery clamp.
| 7. REMOVE BATTERY INSULATOR |
| 8. REMOVE BATTERY |
| 9. REMOVE BATTERY TRAY |
| 10. REMOVE BATTERY CARRIER BRACKET |
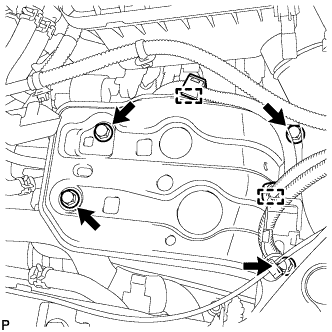 |
Detach the 2 wire harness clamps.
Remove the 4 bolts and front battery bracket.
| 11. REMOVE BATTERY BRACKET REINFORCEMENT |
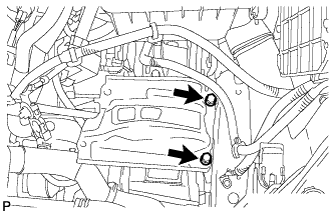 |
Remove the 2 bolts and battery bracket reinforcement.
| 12. REMOVE AIR CLEANER CAP SUB-ASSEMBLY |
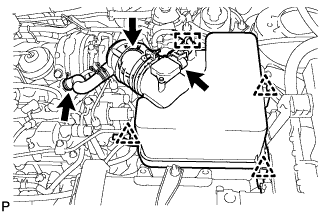 |
Detach the clamp and disconnect the mass air flow meter connector.
Disconnect the PCV hose.
Disconnect the air cleaner hose.
Detach the 3 clips and remove the air cleaner cap.
| 13. REMOVE AIR CLEANER FILTER ELEMENT SUB-ASSEMBLY |
| 14. REMOVE AIR CLEANER CASE |
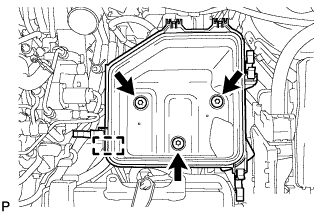 |
Detach the clamp.
Remove the 3 bolts and air cleaner case.
| 15. DISCONNECT FUEL FILTER ASSEMBLY |
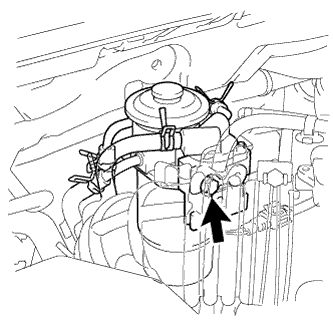 |
Remove the bolt and fuel filter assembly.
| 16. REMOVE AIR CLEANER BRACKET |
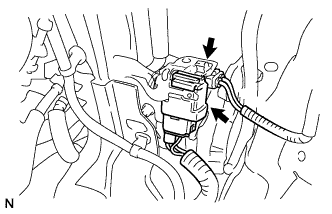 |
Remove the glow plug relay.
Disconnect the fuel filter level switch connector.
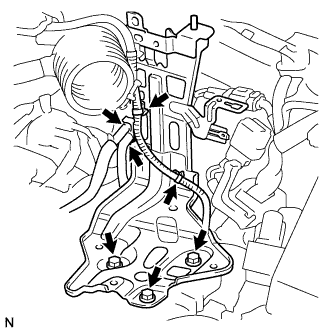 |
Disconnect the 2 wire harness clamps.
Disconnect the 2 fuel hoses from the bracket.
Remove the 3 bolts and bracket.
| 17. REMOVE NO. 1 AIR TUBE |
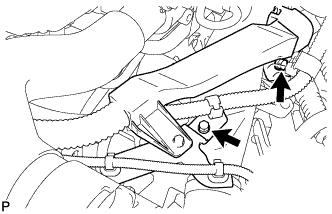 |
Remove the 2 bolts and disconnect the wire harness.
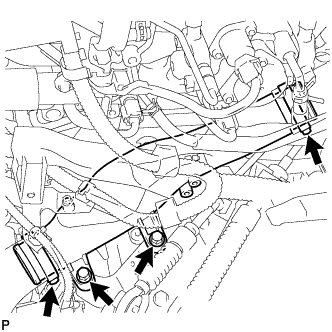 |
Remove the 2 bolts and loosen the 2 clamps.
Remove the No. 1 air tube.
| 18. REMOVE NO. 3 AIR HOSE |
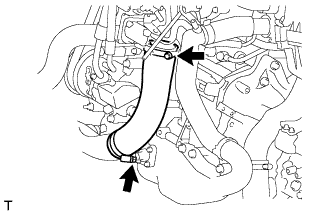 |
Loosen the 2 hose clamps.
Remove the No. 3 air hose from the No. 2 air tube and throttle body.
| 19. REMOVE STARTER ASSEMBLY |
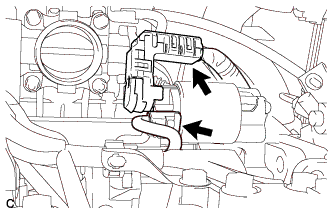 |
Disconnect the starter connector.
Open the terminal cap, remove the nut and disconnect the starter wire.
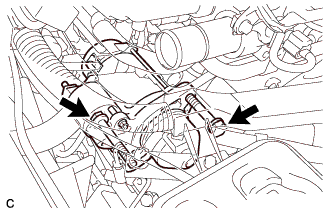 |
Remove the 2 bolts and starter.