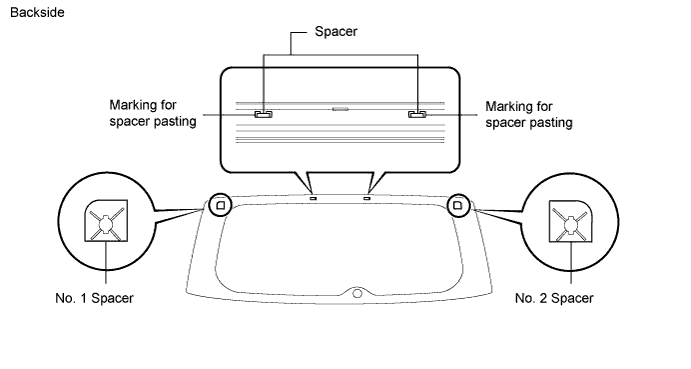
Install the 4 new spacers onto the glass as shown in the illustration.
- NOTICE:
- Allow the primer to dry for 3 minutes or more.
- Throw away any leftover primer.
- Do not apply too much primer.
BACK DOOR GLASS > INSTALLATION |
| 1. INSTALL BACK WINDOW GLASS SPACER |
Apply Primer G to the installation part of the clips.
Install the 4 new spacers onto the glass as shown in the illustration.
| 2. INSTALL BACK WINDOW MOULDING OUTSIDE |
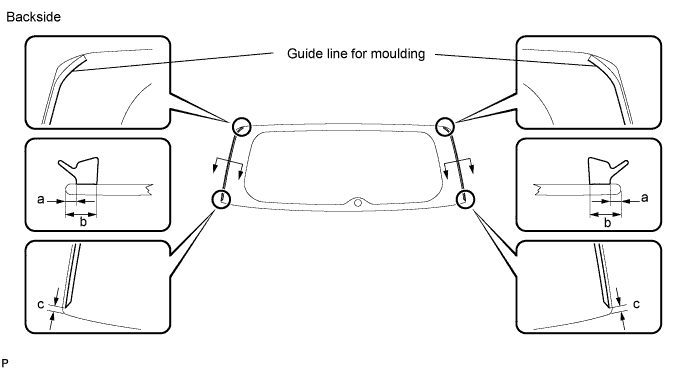
Apply Primer G to the installation part of the window moulding.
Install a new moulding as shown in the illustration.
| Area | Specified Condition |
| a | 3.0 mm (0.118 in.) |
| b | 9.0 mm (0.354 in.) |
| c | 9.0 to 11.0 mm (0.118 to 0.433 in.) |
| 3. INSTALL BACK WINDOW MOULDING LOWER |
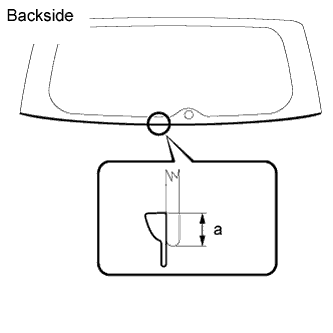 |
Apply Primer G to the installation part of the window moulding.
Install a new moulding as shown in the illustration.
| Area | Specified Condition |
| a | 7.3 mm (0.287 in.) |
| 4. INSTALL BACK DOOR GLASS |
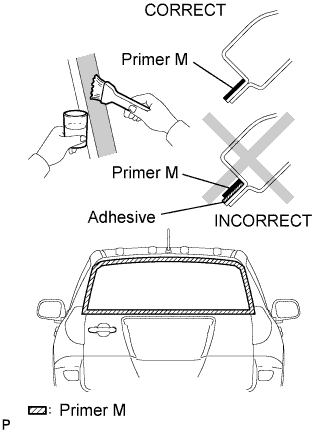 |
Using a brush or sponge, apply Primer M to the exposed part of the vehicle body.
Using a brush or sponge, apply Primer G to the contact surface of the back door glass.
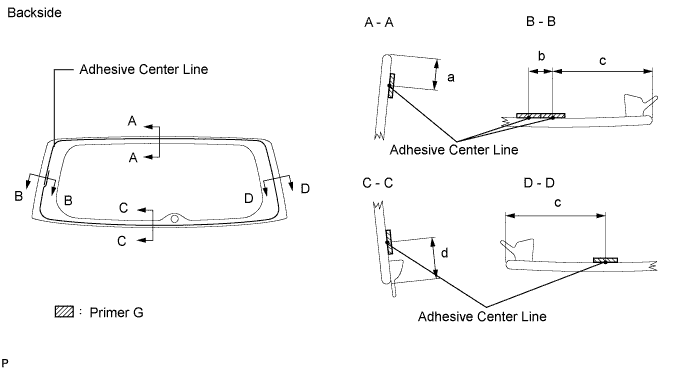
| Area | Specified Condition |
| a | 10.4 mm (0.409 in.) |
| b | 7.0 mm (0.275 in.) |
| c | 35.5 mm (1.397 in.) |
| d | 13.0 mm (0.511 in.) |
Apply adhesive to the back door glass.
Cut off the tip of the cartridge nozzle as shown in the illustration below.
| Temperature | Usage Time Frame |
| 35°C (95°F) | 15 minutes |
| 20°C (68°F) | 1 hour 40 minutes |
| 5°C (41°F) | 8 hours |
Load the sealer gun with the cartridge.
Apply adhesive to the back door glass as shown in the illustration.
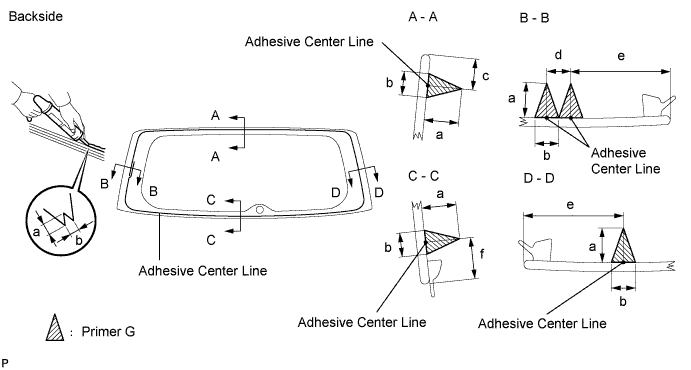
| Area | Specified Condition |
| a | 12.0 mm (0.472 in.) |
| b | 8.0 mm (0.315 in.) |
| c | 10.4 mm (0.409 in.) |
| d | 7.0 mm (0.275 in.) |
| e | 35.5 mm (1.397 in.) |
| f | 13.0 mm (0.511 in.) |
Install the back door glass to the vehicle body.
Hold the back window glass in place securely with tape or equivalent until the adhesive has hardened.
Lightly press the front surface of the back door glass to ensure that the back door glass is securely fit to the vehicle body.
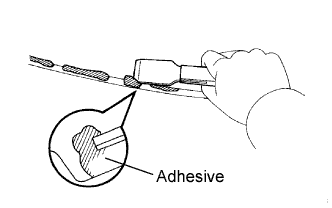 |
Using a scraper, remove any excess or protruding adhesive.
| Temperature | Minimum time prior to driving vehicle |
| 35°C (95°F) | 1 hour 30 minutes |
| 20°C (68°F) | 5 hours |
| 5°C (41°F) | 24 hours |
| 5. INSTALL REAR SPOILER |
Clean the vehicle body surface.
Using a heat light, heat the vehicle body surface.
If reusing the spoiler:
Clean the spoiler.
Using a heat light, heat the spoiler.
Connect the center stop light connector.
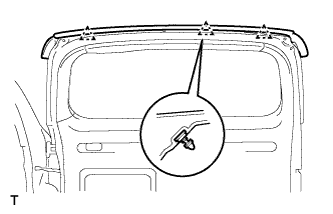 |
Install the spoiler with 3 clips.
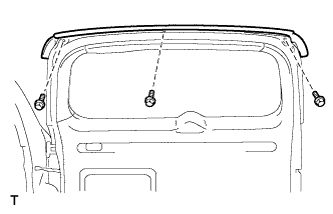 |
Install the 3 bolts.
| 6. INSTALL REAR WIPER MOTOR ASSEMBLY |
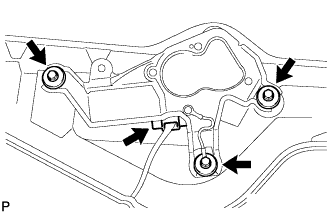 |
Install the wiper motor with the 3 bolts.
Connect the connector.
| 7. INSTALL BACK DOOR TRIM BOARD |
Install the back door trim pocket with the 5 screws.
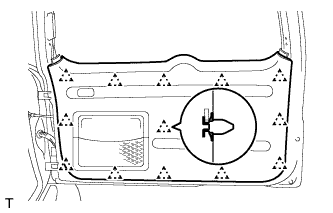 |
Attach the 13 clips to install the trim board.
| 8. INSTALL BACK DOOR SIDE GARNISH LH |
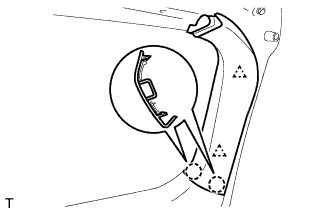 |
Attach the 2 claws and 2 clips to install the garnish.
| 9. INSTALL BACK DOOR SIDE GARNISH RH |
| 10. INSTALL BACK DOOR CENTER GARNISH |
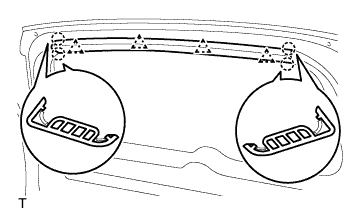 |
Attach the 4 claws and 4 clips to install the garnish.
| 11. INSTALL REAR WIPER ARM ASSEMBLY |
Stop the wiper motor at the automatic stop position.
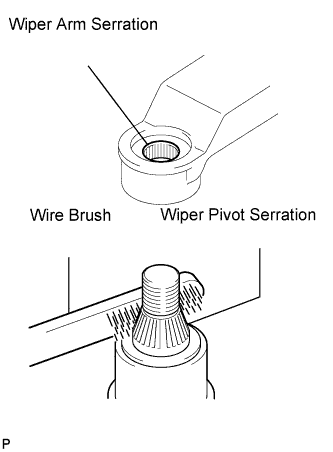 |
Clean the wiper arm serration with a round file or equivalent.
Clean the wiper pivot serration with a wire brush.
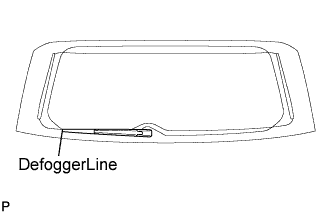 |
Install the arm and blade with the nut. Make sure that the arm and blade comes to the position shown in the illustration.
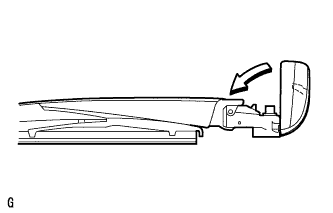 |
Install the cap.
| 12. CHECK FOR LEAKS AND REPAIR |
Conduct a leak test after the adhesive has completely hardened.
Seal any leaks with auto glass sealer.
| 13. CONNECT CABLE TO NEGATIVE BATTERY TERMINAL |