 |
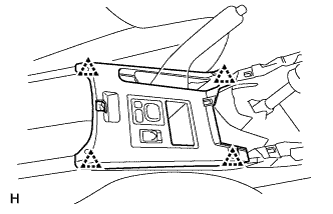
Using a screwdriver, detach the 4 clips.
- HINT:
- Tape the screwdriver tip before use.
PARKING BRAKE SYSTEM > ADJUSTMENT |
| 1. CHECK PARKING BRAKE LEVER TRAVEL |
Pull the lever upward with a force of approximately 200 N (20 kgf, 44 lbf) and count the number of clicks.
| 2. REMOVE UPPER REAR CONSOLE PANEL SUB-ASSEMBLY |
|
Using a screwdriver, detach the 4 clips.
Disconnect the connector and remove the upper rear console panel.
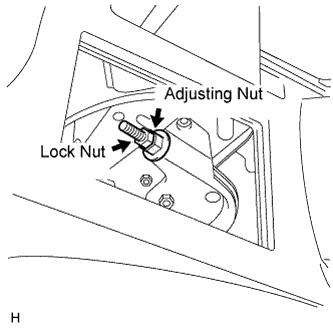
| 3. LOOSEN LOCK NUT AND NO. 1 WIRE ADJUSTING NUT |
 |
| 4. REMOVE REAR WHEEL |
| 5. ADJUST PARKING BRAKE SHOE CLEARANCE |
Temporarily install the hub nuts.
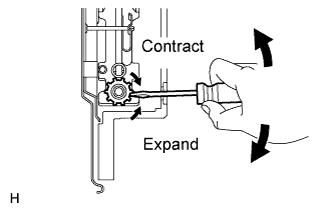 |
Remove the shoe adjusting hole plug, and then turn the adjuster to expand the shoe adjuster until the disc locks.
Turn the shoe adjuster so that it contracts to a point where the disc can rotate smoothly.
Check that the shoe has no brake drag.
| 6. INSTALL REAR WHEEL |
| 7. ADJUST PARKING BRAKE LEVER TRAVEL |
|
Turn the No. 1 wire adjusting nut until the lever travel is correct.
Tighten the lock nut.
Operate the parking brake lever 3 to 4 times, and check the parking brake lever travel.
When operating the parking brake lever, check that the brake warning light illuminates at the first click.