 |
Put protective tape around the moulding.
OUTSIDE MOULDING > REMOVAL |
| Item | Temperature |
| Vehicle body | 40 to 60°C (104 to 140°F) |
| Clip | 20 to 30°C (68 to 86°F) |
| 1. REMOVE FRONT FENDER MOULDING SUB-ASSEMBLY LH |
|
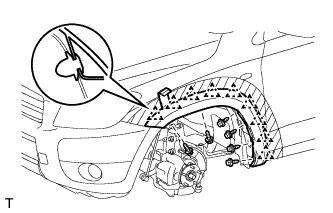
Put protective tape around the moulding.
Remove the 4 screws and detach the 2clips..
Using a moulding remover, detach the 9 clips and remove the moulding.
| 2. REMOVE NO. 2 REAR WHEEL OPENING EXTENSION LH |
Put protective tape around the moulding.
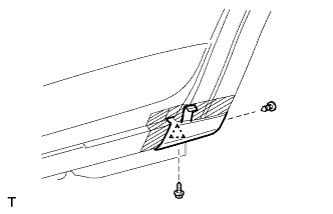 |
Remove the screw.
Using a moulding remover, detach the 2 clips and remove the extension.
| 3. REMOVE NO. 1 REAR WHEEL OPENING EXTENSION LH |
Put protective tape around the moulding.
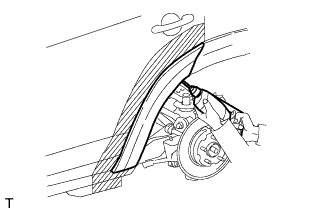 |
Using a drill bit of less than φ 4 mm (0.16 in.), drill out the 3 rivet flanges.
Continue drilling and push out the remaining rivet fragments using the drill.
Using a vacuum cleaner, remove the rivet fragments and shavings from the drilled areas.
Using a heat light, heat the extension and vehicle body.
Cut the double-sided tape that holds the moulding to the vehicle body with a knife.
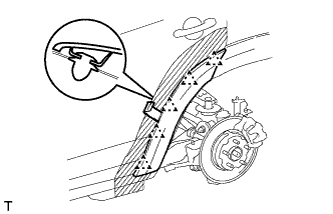 |
Using a moulding remover, detach the 5 clips and remove the extension.
| 4. REMOVE REAR QUARTER OUTSIDE MOULDING LH |
Put protective tape around the moulding.
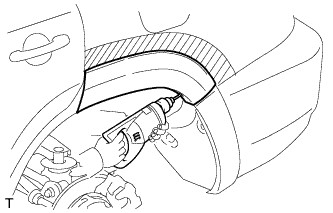 |
Using a drill bit of less than φ 4 mm (0.16 in.), drill out the 3 rivet flanges.
Continue drilling and push out the remaining rivet fragments using the drill.
Using a vacuum cleaner, remove the rivet fragments and shavings from the drilled areas.
Using a heat light, heat the moulding and vehicle body.
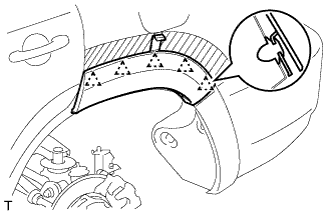 |
Using a moulding remover, detach the 5 clips and remove the moulding.
| 5. REMOVE NO. 2 ROCKER PANEL MOULDING PROTECTOR LH |
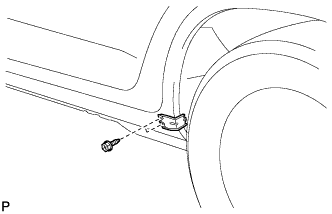 |
Remove the 2 screws and retainer.
| 6. REMOVE QUARTER OPENING RETAINER LH |
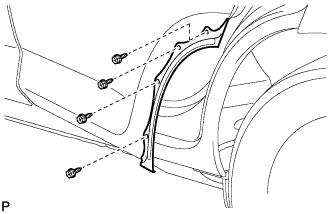 |
Remove the 4 screws and retainer.
| 7. REMOVE NO. 1 ROCKER PANEL MOULDING RETAINER |
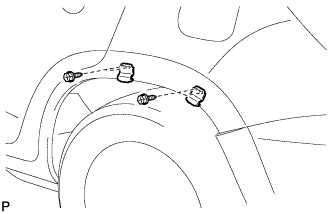 |
Remove the 4 screws and 2 retainers.