FRONT BUMPER (w/o Under Guard) > DISASSEMBLY |
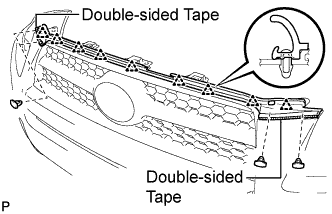
| 1. REMOVE HOOD TO RADIATOR GRILLE SEAL |
|
Remove the 4 clips.
Detach the 9 clips and remove the hood to radiator grille seal.
| 2. REMOVE RADIATOR GRILLE SUB-ASSEMBLY |
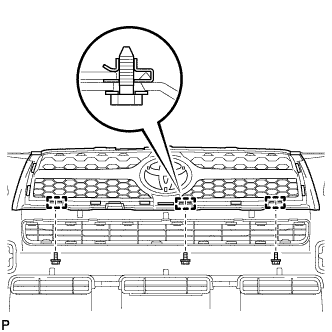 |
Remove the 3 bolts and 3 nuts.
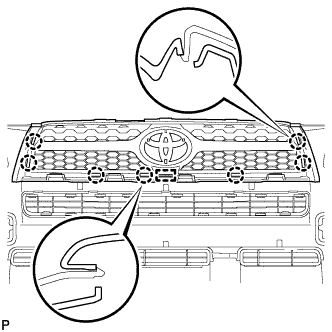 |
Detach the 7 claws and guide, and remove the radiator grille.
| 3. REMOVE LOWER NO. 1 RADIATOR GRILLE |
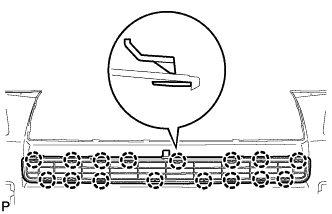 |
Detach the 16 claws and remove the lower No. 1 radiator grille.
| 4. REMOVE LOWER NO. 2 RADIATOR GRILLE |
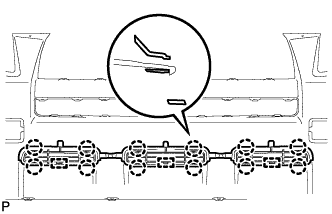 |
Detach the 12 claws and 3 guides, and remove the lower No. 2 radiator grille.
| 5. REMOVE RADIATOR GRILLE (OR FRONT PANEL) EMBLEM |
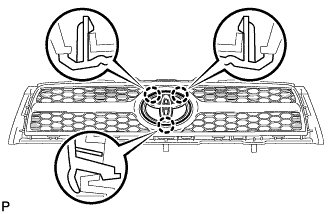 |
Detach the 3 claws and remove the emblem.
| 6. REMOVE FRONT BUMPER ARM EXTENSION LH |
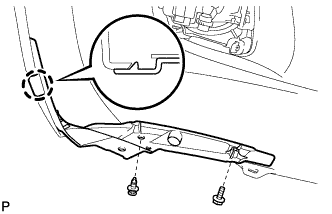 |
Using a clip remover, remove the clip.
Remove the screw.
Detach the claw and remove the arm extension.
| 7. REMOVE FRONT BUMPER ARM EXTENSION RH |
| 8. REMOVE FRONT BUMPER BAR |
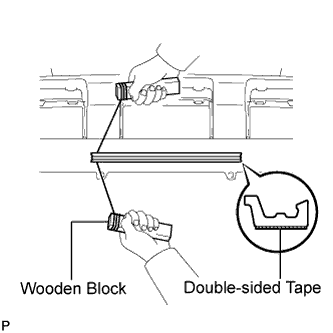 |
Using a heat light, heat the bumper cover and bumper bar.
| Item | Temperature |
| Bumper cover | 20 to 30°C (68 to 86°F) |
| Bumper bar | 20 to 30°C (68 to 86°F) |
Insert a piano wire between the bumper cover and bumper bar.
Tie objects that can serve as handles (for example, wooden blocks) to both wire ends.
Pull the piano wire and scrape off the double-sided tape that holds the bumper bar to the bumper cover.
| 9. REMOVE FRONT BUMPER EXTENSION MOUNTING BRACKET |
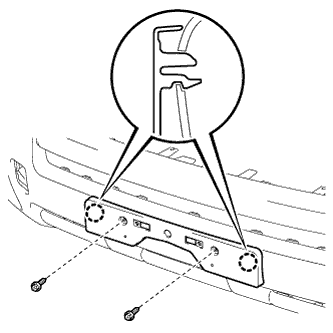 |
Remove the 2 screws.
Detach the 2 claws and remove the mounting bracket.
| 10. REMOVE FRONT BUMPER HOLE COVER LH |
Detach the 4 claws and remove the hole cover.
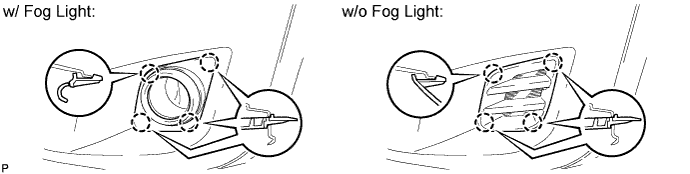
| 11. REMOVE FRONT BUMPER HOLE COVER RH |
| 12. REMOVE FOG LIGHT ASSEMBLY LH (w/ Fog Light) |
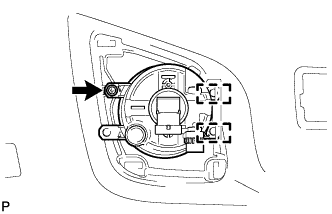 |
Remove the screw.
Detach the 2 guides and remove the fog light.
| 13. REMOVE FOG LIGHT ASSEMBLY RH (w/ Fog Light) |
| 14. REMOVE FRONT BUMPER EXTENSION LH (w/ Outside Moulding) |
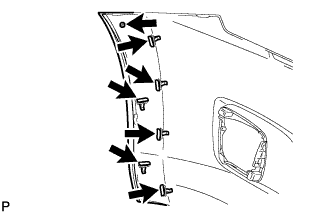 |
Remove the screw.
Detach the 6 clips and remove the extension.
| 15. REMOVE FRONT BUMPER EXTENSION RH (w/ Outside Moulding) |
| 16. REMOVE HEADLIGHT CLEANER HOSE (w/ Headlight Cleaner System) |
w/o Under Guard:
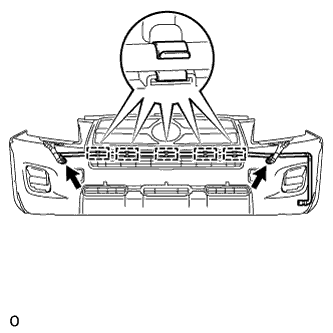 |
Disconnect the headlight washer hose from the headlight washer actuator.
Detach the 5 clamps and remove the hose from the front bumper.
w/ Under Guard:
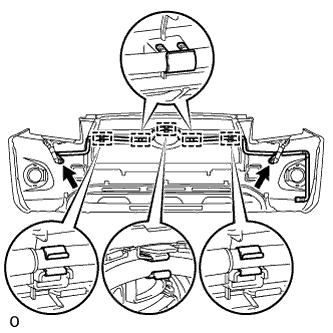 |
Disconnect the headlight washer hose from the headlight washer actuator.
Detach the 5 clamps and remove the hose from the front bumper.
| 17. REMOVE HEADLIGHT WASHER NOZZLE SUB-ASSEMBLY LH (w/ Headlight Cleaner System) |
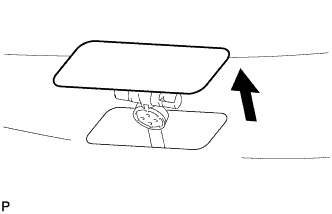 |
Extend the headlight cleaner washer nozzle.
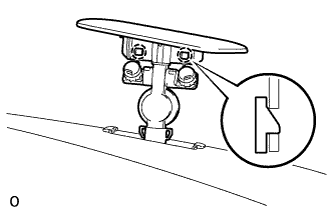 |
Detach the 2 claws and remove the headlight cleaner washer nozzle.
| 18. REMOVE HEADLIGHT WASHER NOZZLE SUB-ASSEMBLY RH (w/ Headlight Cleaner System) |
| 19. REMOVE HEADLIGHT WASHER ACTUATOR SUB-ASSEMBLY LH (w/ Headlight Cleaner System) |
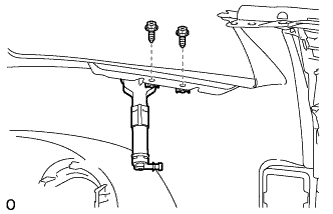 |
Remove the 2 screws.
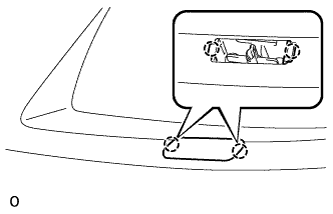 |
Detach the 2 claws and remove the headlight washer actuator sub-assembly.
| 20. REMOVE HEADLIGHT WASHER ACTUATOR SUB-ASSEMBLY RH (w/ Headlight Cleaner System) |