 |
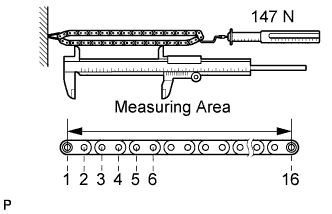
Using a spring scale, pull the chain with a force of 147 N (15 kgf, 33 lbf) as shown in the illustration.
ENGINE UNIT > INSPECTION |
| 1. INSPECT CHAIN SUB-ASSEMBLY |
|
Using a spring scale, pull the chain with a force of 147 N (15 kgf, 33 lbf) as shown in the illustration.
Using a vernier caliper, measure the length of 16 links.
| 2. INSPECT NO. 1 CHAIN TENSIONER ASSEMBLY |
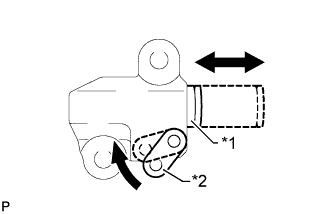 |
Move the stopper plate upward to release the lock. Push the plunger and check that it moves smoothly.
| *1 | Plunger |
| *2 | Stopper Plate |
| 3. INSPECT CAMSHAFT TIMING SPROCKET |
Wrap the chain around the camshaft timing sprocket.
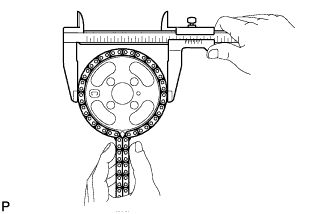 |
Using a vernier caliper, measure the sprocket diameter with the chain.
| 4. INSPECT CRANKSHAFT TIMING SPROCKET |
Wrap the chain around the crankshaft timing sprocket.
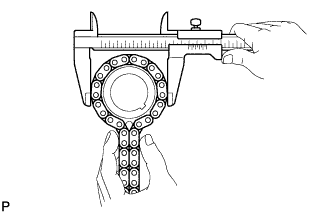 |
Using a vernier caliper, measure the sprocket diameter with the chain.
| 5. INSPECT CHAIN TENSIONER SLIPPER |
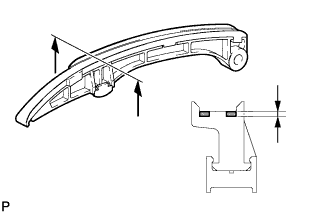 |
Using a vernier caliper, measure the tensioner slipper wear.
| 6. INSPECT NO. 1 CHAIN VIBRATION DAMPER |
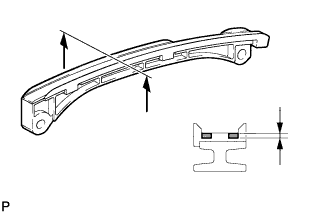 |
Using a vernier caliper, measure the vibration damper wear.
| 7. INSPECT INTAKE MANIFOLD |
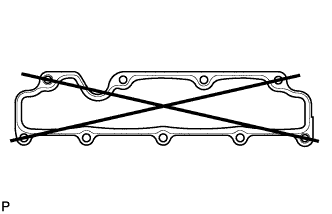 |
Using a precision straightedge and feeler gauge, measure the warpage of the surface where the intake manifold the cylinder head.
| 8. INSPECT EXHAUST MANIFOLD |
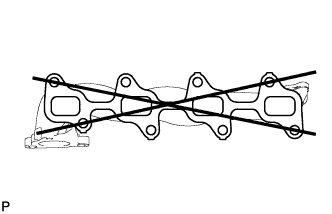 |
Using a precision straightedge and feeler gauge, measure the warpage of the surface where the exhaust manifold the cylinder head.
| 9. INSPECT CAMSHAFT |
Check the camshaft for runout.
Place the camshaft on V-blocks.
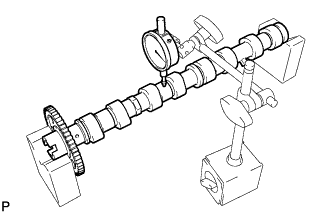 |
Using a dial indicator, measure the circle runout at the center journal.
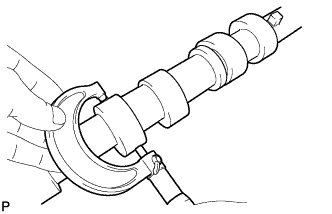 |
Using a micrometer, measure the cam lobe height.
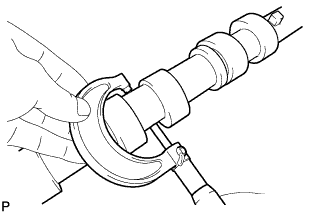 |
Using a micrometer, measure the journal diameter.
| 10. INSPECT NO. 2 CAMSHAFT |
Check the camshaft for runout.
Place the camshaft on V-blocks.
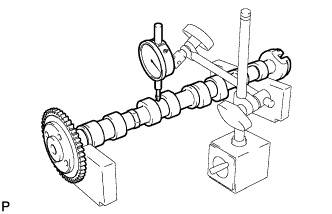 |
Using a dial indicator, measure the circle runout at the center journal.
|
Using a micrometer, measure the cam lobe height.
|
Using a micrometer, measure the journal diameter.
| 11. INSPECT CAMSHAFT OIL CLEARANCE |
Clean the bearing caps and camshaft journals.
Place the camshafts on the cylinder head.
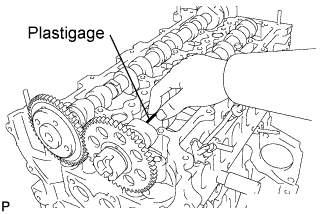 |
Lay a strip of Plastigage across each of the camshaft journals.
Install the bearing caps .
Remove the bearing caps .
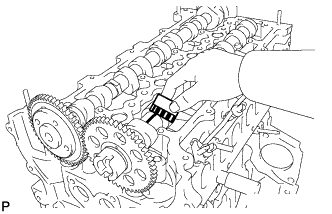 |
Measure the Plastigage at its widest point.
Completely remove the Plastigage.
| 12. INSPECT CAMSHAFT THRUST CLEARANCE |
Install the No. 2 camshaft and camshaft .
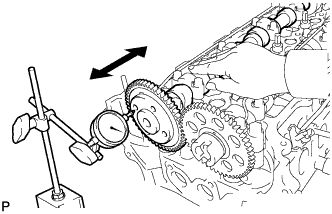 |
Using a dial indicator, measure the thrust clearance while moving the camshaft back and forth.
Remove the No. 2 camshaft and camshaft .
| 13. INSPECT CYLINDER HEAD SET BOLT |
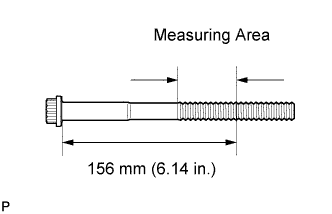 |
Using a vernier caliper, measure the outside diameter of the elongated thread in the measuring area.
| 14. INSPECT NO. 1 OIL NOZZLE SUB-ASSEMBLY |
Check the oil nozzle for damage or clogging.
If there is damage or clogging, replace the No. 1 oil nozzle sub-assembly.
| 15. INSPECT NO. 1 VALVE ROCKER ARM SUB-ASSEMBLY |
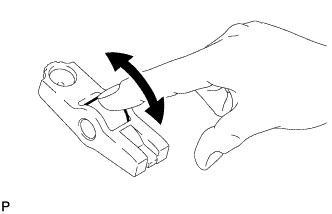 |
Turn the roller by hand to check that it turns smoothly.
If the roller does not turn smoothly, replace the No. 1 valve rocker arm sub-assembly.
| 16. INSPECT VALVE LASH ADJUSTER ASSEMBLY |
Place the lash adjuster into a container full of new engine oil.
Insert SST tip into the lash adjuster plunger and use the tip to press down on the check ball inside the plunger.
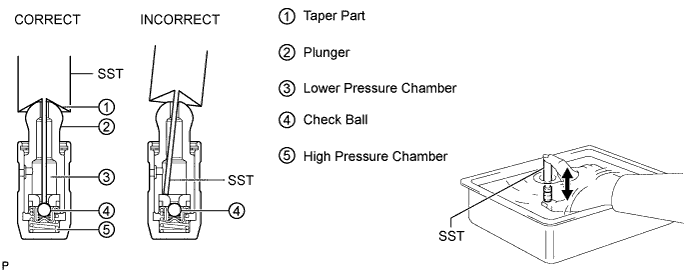
Squeeze SST and the lash adjuster together to move the plunger up and down 5 to 6 times.
Check the movement of the plunger and bleed air.
After bleeding air, remove SST. Then quickly and firmly press the plunger repeatedly with your fingers.
| 17. INSPECT ENGINE BALANCER ASSEMBLY THRUST CLEARANCE |
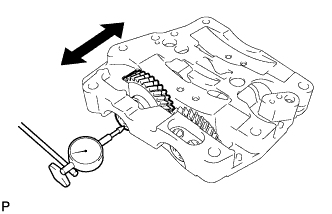 |
Using a dial indicator, measure the thrust clearance while moving the balance shaft back and forth.
| 18. INSPECT ENGINE BALANCER ASSEMBLY BACKLASH |
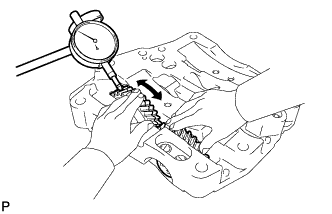 |
Fix the No. 3 balance shaft driven gear in place, and then using a dial indicator, measure the backlash of the No. 1 and No. 3 balance shaft driven gear as shown in the illustration.