 |
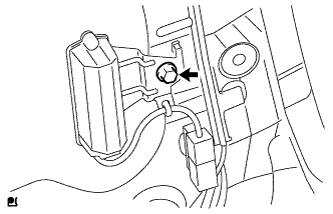
Install the antenna with the bolt.
- Torque:
- 7.5 N*m{ 76 kgf*cm , 66 in.*lbf }
TIRE PRESSURE WARNING ANTENNA > INSTALLATION |
| 1. INSTALL TIRE PRESSURE WARNING ANTENNA REAR LH |
|
Install the antenna with the bolt.
Connect the connector.
| 2. INSTALL INNER ROOF SIDE GARNISH ASSEMBLY LH |
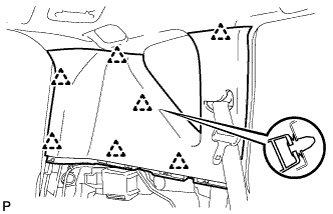 |
Attach the 7 clips to install the garnish.
| 3. INSTALL DECK TRIM SIDE PANEL ASSEMBLY LH |
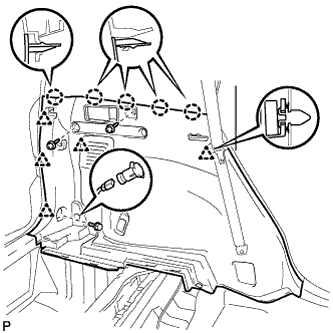 |
Install the belt hanger to the trim board.
Connect the power outlet socket connector.
Attach the 5 clips and 5 claws to install the trim board.
Install the bolt and 2 screws.
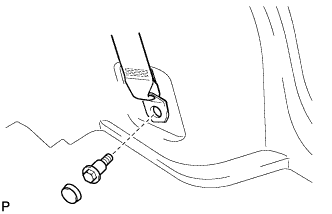 |
Connect the rear No.1 seat belt's floor anchor.
Connect the floor anchor with the bolt.
Install the anchor cover.
| 4. INSTALL CHILD RESTRAINT SEAT TETHER ANCHOR BRACKET |
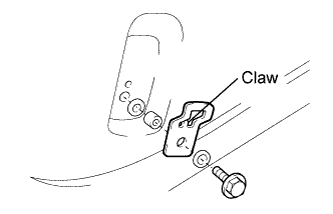 |
Align the bracket positioning hole with the claws and install the bracket with the bolt, 2 washers and collar.
| 5. INSTALL CHILD RESTRAINT SEAT TETHER ANCHOR COVER |
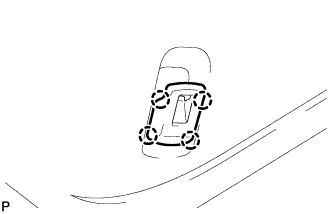 |
Attach the 4 claws to install the cover.
| 6. INSTALL RECLINING REMOTE CONTROL LEVER BEZEL LH |
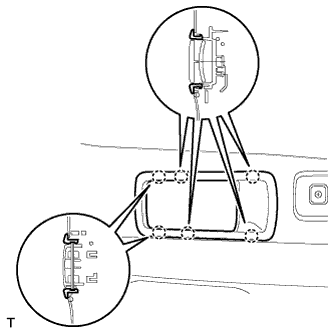 |
Attach the 6 claws to install the bezel.
| 7. INSTALL REAR FLOOR FINISH PLATE |
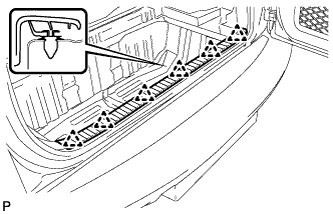 |
Attach the 6 clips to install the finish plate.
| 8. INSTALL REAR FLOOR NO. 1 MAT SUPPORT SIDE PLATE |
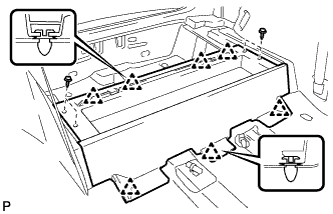 |
Attach the 7 clips to install the side plate.
Install the 4 screws.
| 9. INSTALL JACK CARRIER ASSEMBLY |
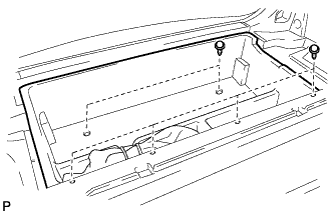 |
Install the jack carrier with the 7 clips.
| 10. INSTALL REAR FLOOR NO. 2 BOARD |
| 11. INSTALL REAR FLOOR NO. 3 BOARD |
| 12. INSTALL DECK BOARD ASSEMBLY |
| 13. INSTALL REAR FLOOR NO. 1 BOARD |
| 14. INSTALL TONNEAU COVER ASSEMBLY |
| 15. INSTALL PACKAGE TRAY TRIM POCKET SUB-ASSEMBLY |
| 16. INSTALL REAR DOOR SCUFF PLATE LH |
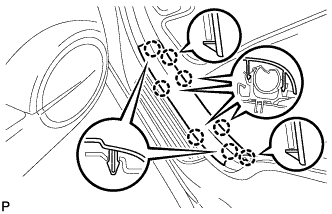 |
Attach the 8 claws to install the scuff plate.
| 17. INSTALL TIRE PRESSURE WARNING ANTENNA FRONT RH |
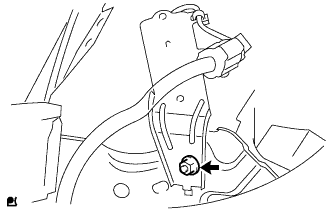 |
Install the antenna with the nut.
Connect the connector.
| 18. INSTALL HEADLIGHT ASSEMBLY RH |
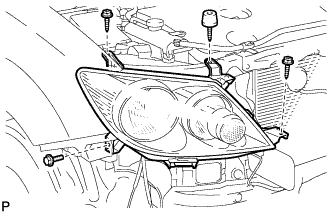 |
Install the 3 screws and bolt.
Connect the connectors and install the headlight.
| 19. INSTALL FRONT BUMPER REINFORCEMENT SUB-ASSEMBLY UPPER |
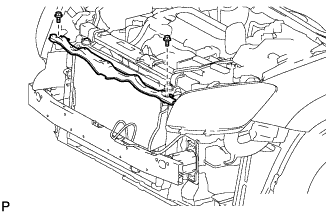 |
Install the reinforcement with the 2 bolts.
| 20. INSTALL FRONT BUMPER COVER |
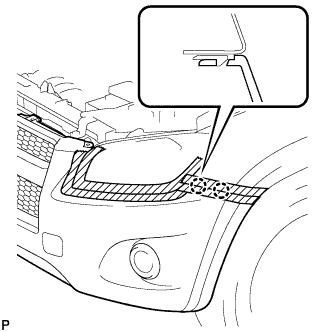 |
Connect the 2 fog light connectors.
Attach the 4 claws to install the bumper cover.
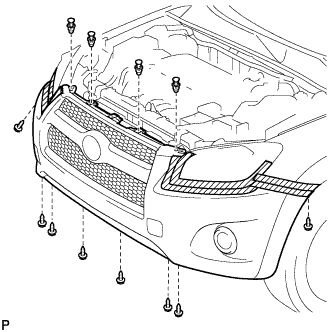 |
Install the 8 screws and 4 clips.
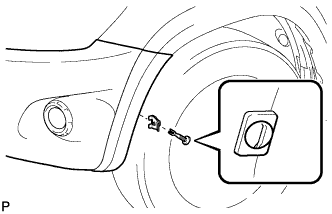 |
Install the retainer.
Position the groove on the pin hold clip vertically and insert the clip to install it.
| 21. INSTALL RADIATOR SUPPORT OPENING COVER |
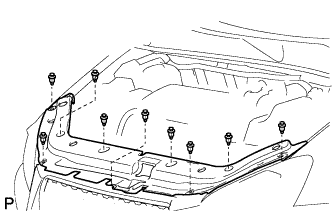 |
Install the radiator support opening cover with the 9 clips.
| 22. INSTALL FRONT FENDER LINER LH |
 |
| 23. INSTALL FRONT FENDER LINER RH |
| 24. CONNECT CABLE TO NEGATIVE BATTERY TERMINAL |
| 25. REGISTER TRANSMITTER ID |
Prepare all of the transmitter ID data before starting registration.
Set the tire pressure of all wheels (including the spare tire) to the specified value.
Turn the ignition switch off.
Connect the intelligent tester to the DLC3.
Turn the ignition switch on (IG) and the tester on.
Enter the following menus: Chassis / Tire Pressure Monitor / Data List. Then, press "Utility" to move to next screen.
Perform the following procedures displayed on the tester.
Input the IDs (ID1 to ID4) using the tester and transmit them to the tire pressure warning ECU and receiver. Then press "Next".
"ID Registration is complete" screen is displayed. Then, press "Exit".
| 26. INSPECT TIRE PRESSURE WARNING SYSTEM |
| 27. ADJUST HEADLIGHT AIMING |
Adjust the headlight aiming (Click here ).