TRANSMISSION CONTROL CABLE > INSTALLATION |
| 1. INSTALL TRANSAXLE CONTROL CABLE ASSEMBLY |
|
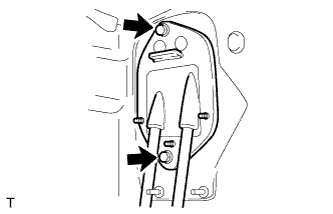
Install the control cable with the 2 bolts.
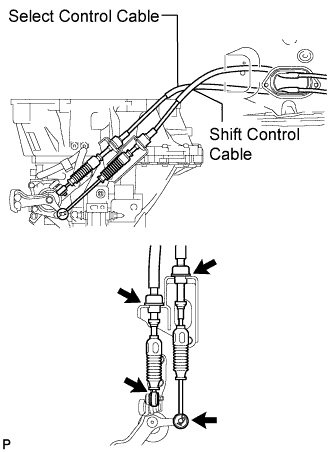 |
Connect the control cable to the control cable bracket, and install 2 new clips.
Connect the control cable to the transaxle, and install the 2 washers and 2 clips.
| 2. CONNECT TRANSAXLE CONTROL CABLE ASSEMBLY |
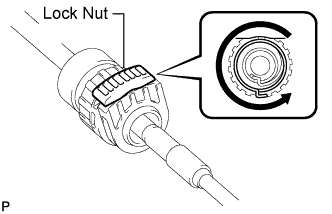 |
Connect the ends of the control cable and install the 2 clips to the shift lever.
Turn the lock nuts of the shift cable 270° counterclockwise, and hold them in that position.
Install the shift cable while holding them.
Check that the cables are installed securely.
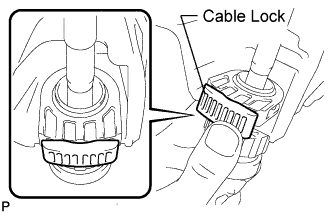 |
Push in the cable locks of the shift cable and select cable.
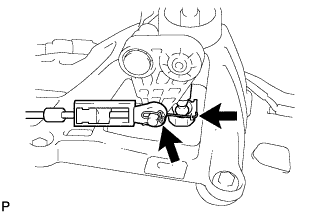 |
Connect the cable ends of the control cable and install the 2 clips.
| 3. INSTALL REAR CONSOLE BOX SUB-ASSEMBLY |
Connect the connector.
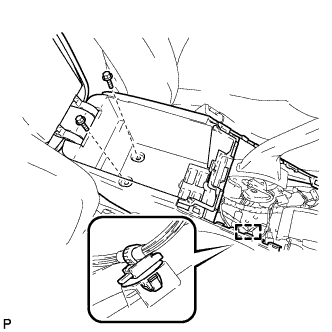 |
Install the rear console box with the 2 bolts and attach the wire harness clamp.
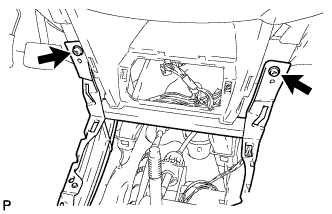 |
Install the 2 screws.
| 4. INSTALL CONSOLE REAR END PANEL |
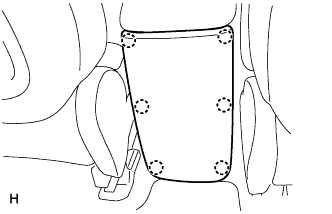 |
Attach the 6 claws to install the console rear end panel.
| 5. INSTALL UPPER REAR CONSOLE PANEL SUB-ASSEMBLY |
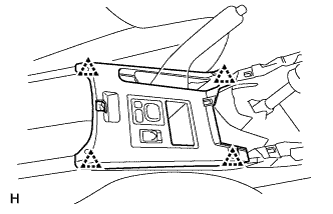 |
Connect the connector.
Attach the 4 clips to install the upper rear console panel.
| 6. INSTALL CONSOLE CUP HOLDER BOX |
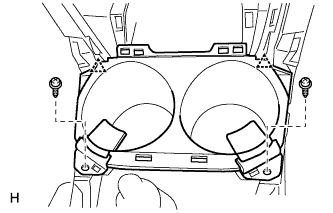 |
Attach the 2 clips to install the cup holder box.
Install the 2 screws.
| 7. INSTALL SWITCH BASE |
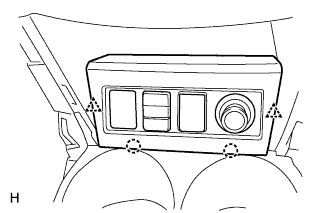 |
Connect the connectors.
Attach the 2 clips and 2 claws to install the switch base.
| 8. INSTALL UPPER CONSOLE PANEL SUB-ASSEMBLY |
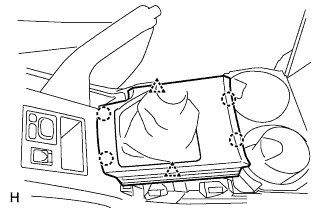 |
Attach the 2 clips and 4 claws to install the upper console panel.
| 9. INSTALL SHIFT LEVER KNOB SUB-ASSEMBLY |
| 10. INSTALL NO. 2 CONSOLE UPPER PANEL GARNISH |
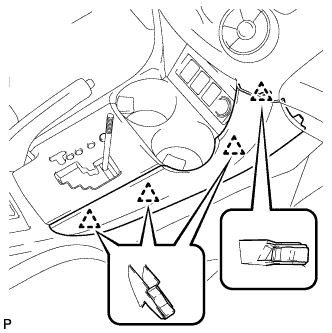 |
Attach the 4 clips to install the upper panel garnish.
| 11. INSTALL NO. 1 CONSOLE UPPER PANEL GARNISH |
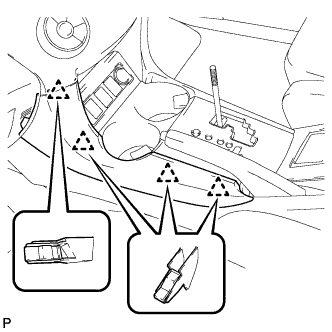 |
Attach the 4 clips to install the upper panel garnish.
| 12. CONNECT CABLE TO NEGATIVE BATTERY TERMINAL |