 |
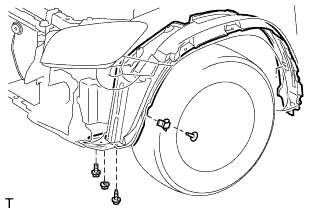
Using a screwdriver, remove the clip and fender liner retainer.
WASHER NOZZLE > REMOVAL |
| 1. DISCONNECT CABLE FROM NEGATIVE BATTERY TERMINAL |
| 2. REMOVE FRONT FENDER LINER LH |
|
Using a screwdriver, remove the clip and fender liner retainer.
Remove the screw, nut and bolt.
Partially remove the fender liner.
| 3. REMOVE FRONT FENDER LINER RH |
| 4. REMOVE RADIATOR SUPPORT OPENING COVER |
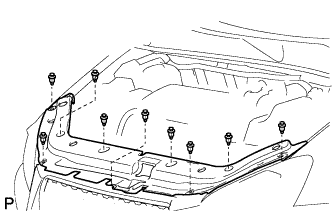 |
Remove the 9 clips and radiator support opening cover.
| 5. REMOVE FRONT BUMPER COVER |
w/o Under Guard:
Remove the front bumper cover (Click here).
w/ Under Guard:
Remove the front bumper cover (Click here).
| 6. REMOVE HEADLIGHT CLEANER HOSE |
w/o Under Guard:
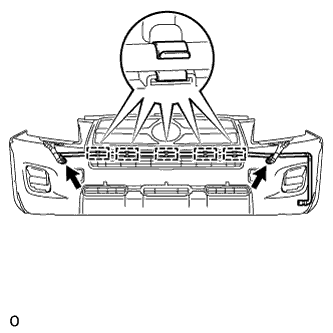 |
Disconnect the headlight washer hose from the headlight washer actuator.
Detach the 5 clamps and remove the hose from the front bumper.
w/ Under Guard:
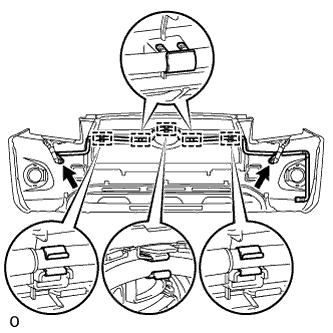 |
Disconnect the headlight washer hose from the headlight washer actuator.
Detach the 5 clamps and remove the hose from the front bumper.
| 7. REMOVE HEADLIGHT WASHER NOZZLE SUB-ASSEMBLY LH |
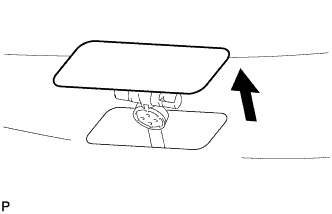 |
Extend the headlight cleaner washer nozzle.
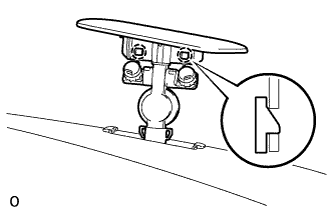 |
Detach the 2 claws and remove the headlight cleaner washer nozzle.
| 8. REMOVE HEADLIGHT WASHER NOZZLE SUB-ASSEMBLY RH |
| 9. REMOVE HEADLIGHT WASHER ACTUATOR SUB-ASSEMBLY LH |
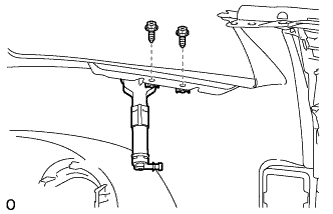 |
Remove the 2 screws.
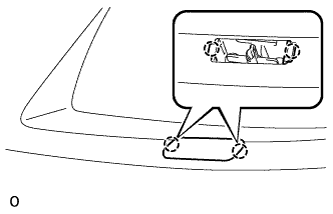 |
Detach the 2 claws and remove the headlight washer actuator sub-assembly.
| 10. REMOVE HEADLIGHT WASHER ACTUATOR SUB-ASSEMBLY RH |