 |
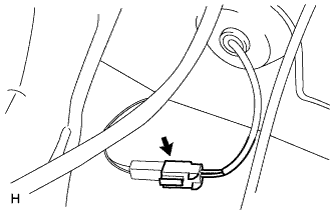
Disconnect the skid control sensor wire connector.
REAR UPPER CONTROL ARM > REMOVAL |
| 1. REMOVE REAR WHEEL |
| 2. REMOVE SKID CONTROL SENSOR WIRE (for 2WD) |
|
Disconnect the skid control sensor wire connector.
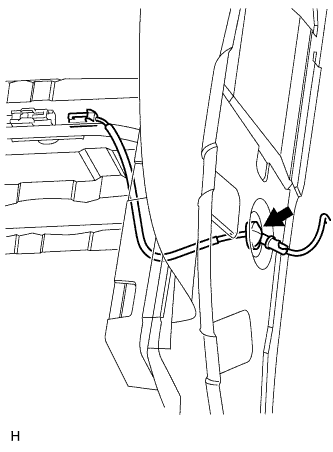 |
Disconnect the grommet of the skid control sensor wire from the hole of the wheel house.
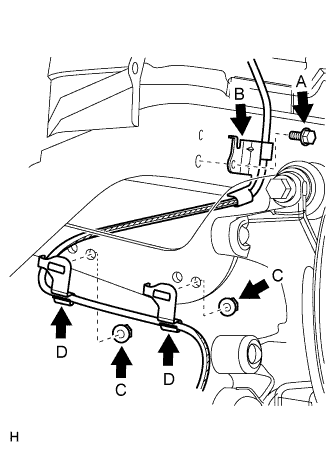 |
Remove the bolt (labeled A) and sensor clamp (labeled B) from the side member.
Remove the 2 nuts (labeled C) and 2 sensor clamps (labeled D) from the upper arm.
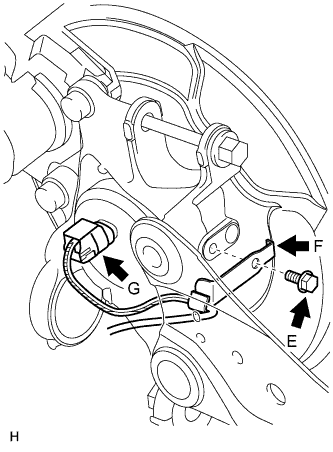 |
Remove the bolt (labeled E) and sensor clamp (labeled F) from the carrier.
Disconnect the skid control sensor wire connector (labeled G) from the skid control sensor.
| 3. REMOVE REAR SPEED SENSOR LH (for 4WD) |
|
Disconnect the speed sensor connector.
|
Disconnect the grommet of the speed sensor wire from the hole of the wheel house.
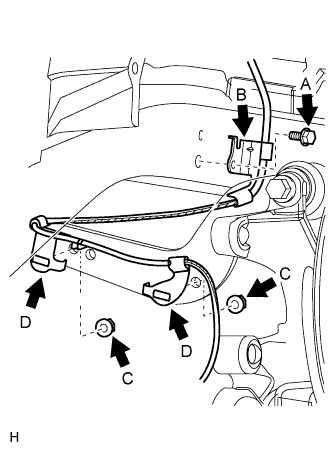 |
Remove the bolt (labeled A) and sensor clamp (labeled B) from the side member.
Remove the 2 nuts (labeled C) and sensor clamps (labeled D) from the upper arm.
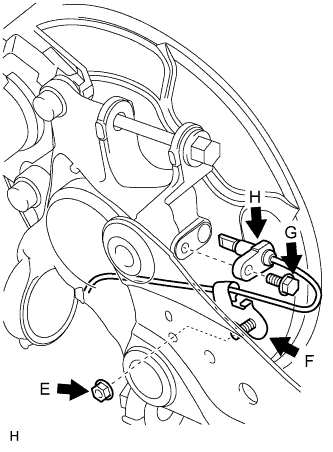 |
Remove the nut (labeled E) and sensor clamp (labeled F) from the trailing arm.
Remove the bolt (labeled G) and sensor body (labeled H) from the carrier.
| 4. REMOVE REAR UPPER CONTROL ARM ASSEMBLY LH |
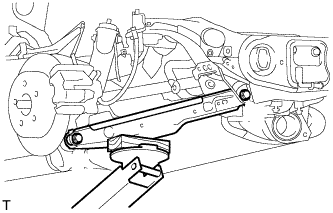 |
Support the No. 2 suspension arm.
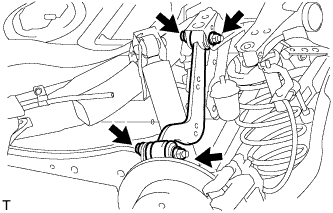 |
Remove the 2 bolts and 2 nuts, and disconnect the upper control arm.