 |
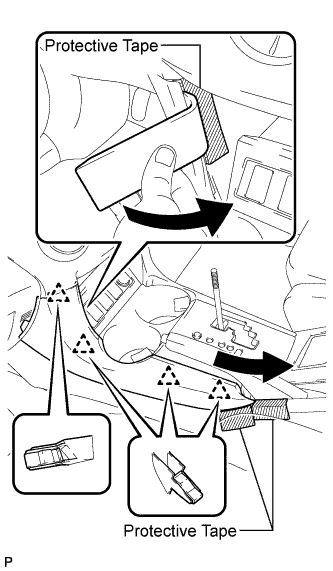
Place protective tape as shown in the illustration.
CENTER POWER OUTLET SOCKET > REMOVAL |
| 1. DISCONNECT CABLE FROM NEGATIVE BATTERY TERMINAL |
| 2. REMOVE NO. 1 CONSOLE UPPER PANEL GARNISH |
|
Place protective tape as shown in the illustration.
Using a moulding remover, detach the 4 clips and remove the upper panel garnish.
| 3. REMOVE NO. 2 CONSOLE UPPER PANEL GARNISH |
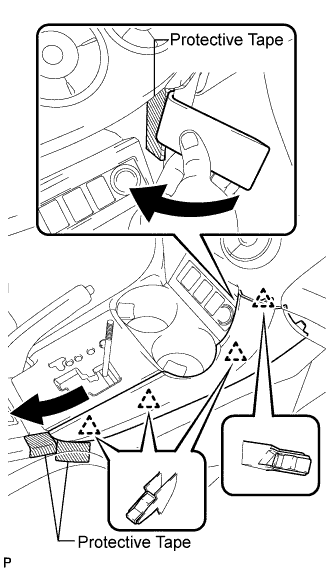 |
Place protective tape as shown in the illustration.
Using a moulding remover, detach the 4 clips and remove the upper panel garnish.
| 4. REMOVE SHIFT LEVER KNOB SUB-ASSEMBLY |
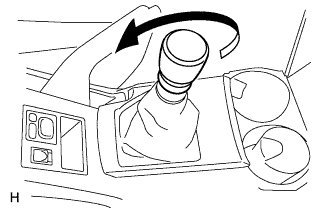 |
for Manual Transaxle:
Twist the shift lever knob in the direction indicated by the arrow and remove it.
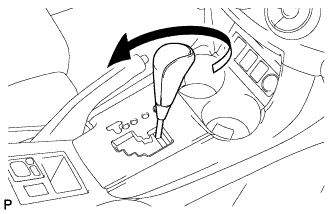 |
for Automatic Transaxle:
Twist the shift lever knob in the direction indicated by the arrow and remove it.
| 5. REMOVE UPPER CONSOLE PANEL SUB-ASSEMBLY (for Manual Transaxle) |
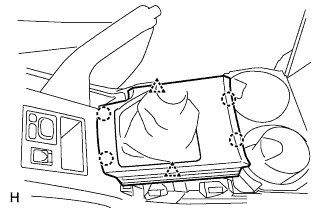 |
Using a screwdriver, detach the 2 clips and 4 claws, and then remove the upper console panel.
| 6. REMOVE FLOOR SHIFT POSITION INDICATOR HOUSING SUB-ASSEMBLY (for Automatic Transaxle) |
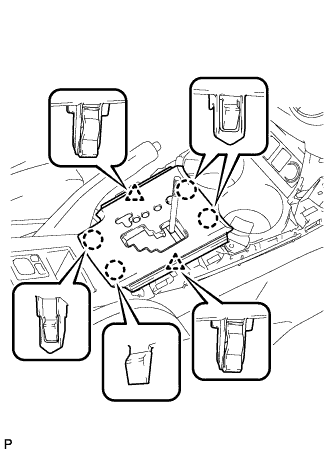 |
Using a screwdriver, detach the 2 clips and 4 claws, and then remove the floor shift position indicator housing.
Disconnect the connector.
| 7. REMOVE UPPER REAR CONSOLE PANEL SUB-ASSEMBLY |
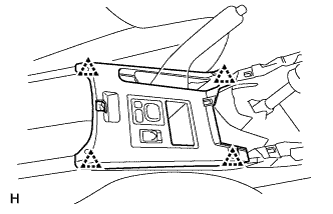 |
Using a screwdriver, detach the 4 clips.
Disconnect the connector and remove the upper rear console panel.
| 8. REMOVE CENTER POWER OUTLET SOCKET ASSEMBLY |
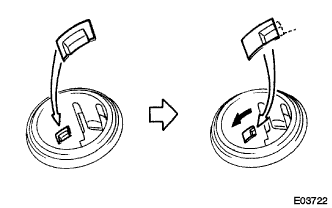 |
Rotate the socket to disengage the notch.
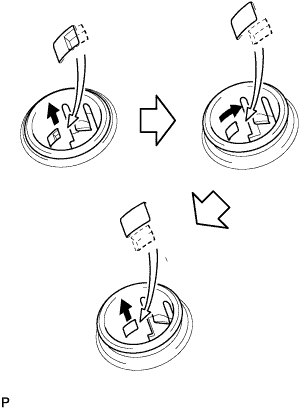 |
Pull out the socket halfway and rotate the socket until its protrusion is aligned with the groove of the cover.
Remove the socket from the cover.