Home › BODY › WINDSHIELD / WINDOWGLASS › WINDSHIELD DEICER SWITCH

WINDSHIELD DEICER SWITCH > ON-VEHICLE INSPECTION

for Preparation Click here


1. CHECK WINDSHIELD DEICER SWITCH
  1. Disconnect the windshield deicer switch connector.


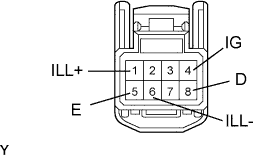
    B107834E01
  1. Measure the voltage and resistance of the switch.

    Standard voltage:
    Tester Connection
    Condition
    Specified Condition
    1 (ILL+) - 6 (ILL-)
    Headlight dimmer switch OFF → ON
    Below 1 V → 10 to 14 V
    8 (D) - 5 (E)
    Ignition switch on (IG)
    10 to 14 V
    4 (IG) - 5 (E)
    Ignition switch on (IG)
    10 to 14 V

    Standard resistance:
    Tester Connection
    Condition
    Specified Condition
    6 (ILL-) - Body ground
    Always
    Below 1 Ω
    5 (E) - Body ground
    Always
    Below 1 Ω
  1. Reconnect the windshield deicer connector.


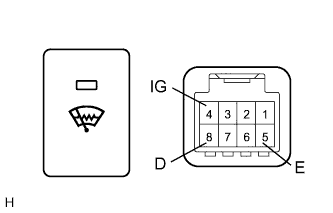
    B134615E01
  1. Measure the voltage of the switch.

    Standard voltage:
    Tester Connection
    Condition
    Specified Condition
    8 (D) - 5 (E)
    Ignition switch on (IG), windshield deicer switch OFF → ON
    10 to 14 V → Below 1 V (after 15 +-3 minutes: 10 to 14 V)
    4 (IG) - 5 (E)
    Ignition switch on (IG), windshield deicer switch ON
    10 to 14 V → Below 1 V


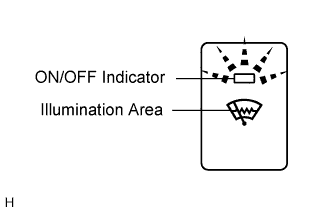
    B134593E01
  1. Check the ON/OFF indicator of the switch.

    1. Push the switch several times. Check that the ON/OFF indicator illuminates or turns off according to the switch operation.


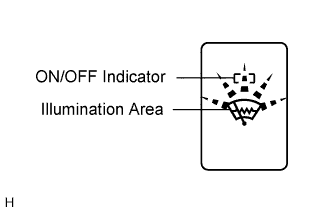
    B134594E01
  1. Check the illumination area of the switch.

    1. Check that the ON/OFF indicator illuminates or turns off according to the switch operation.