 |
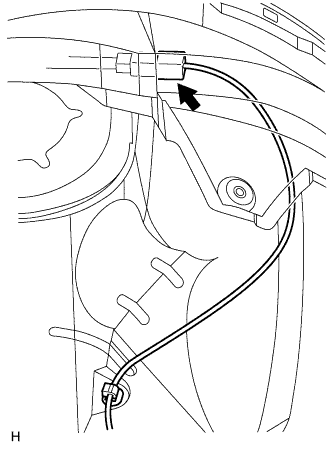
Disconnect the sensor connector.
DIFFERENTIAL OIL SEAL > REPLACEMENT |
| 1. DRAIN TRANSAXLE OIL |
Remove the filler plug and gasket.
Remove the drain plug and gasket, and drain the oil.
Install a new gasket and the drain plug.
| 2. DRAIN TRANSFER OIL |
Remove the filler plug and gasket.
Remove the drain plug and gasket, and drain the oil.
Install a new gasket and the drain plug.
| 3. REMOVE FRONT WHEEL |
| 4. REMOVE NO. 1 ENGINE UNDER COVER |
Remove the 6 bolts, 10 clips and engine under cover.
| 5. REMOVE NO. 2 ENGINE UNDER COVER |
Remove the 2 clips and engine under cover.
| 6. SEPARATE FRONT SPEED SENSOR |
|
Disconnect the sensor connector.
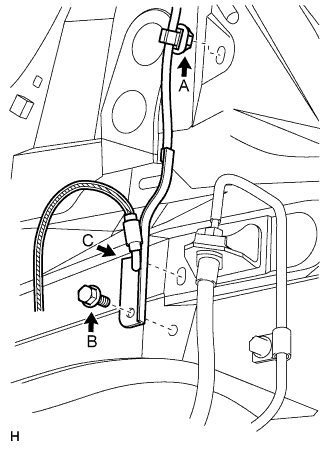 |
Remove the sensor clip (labeled A), bolt (labeled B) and sensor clamp (labeled C).
Remove the sensor clip (labeled D), bolt (labeled E) and sensor clamp (labeled F).
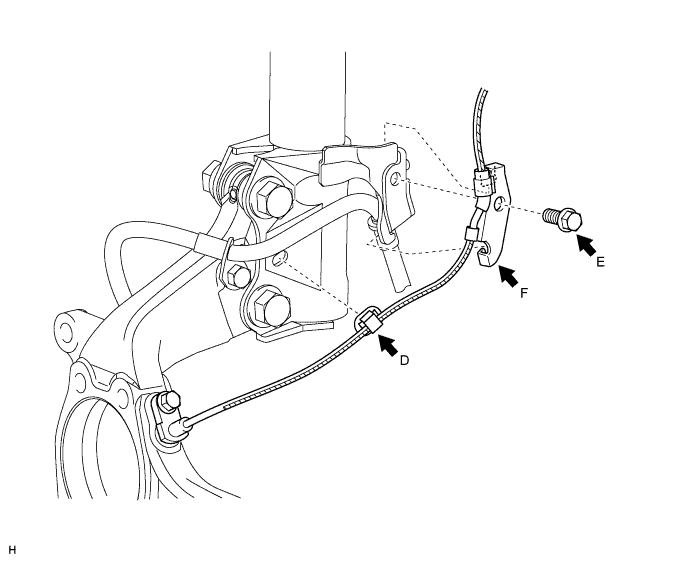
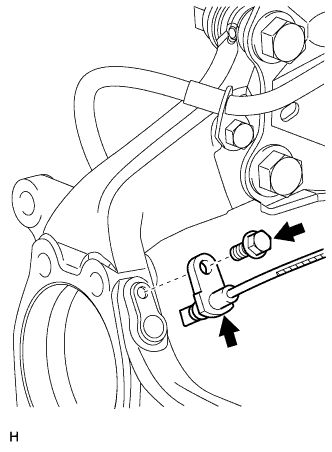 |
Remove the bolt and sensor body from the knuckle.
| 7. REMOVE FRONT AXLE HUB NUT |
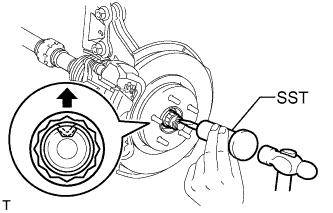 |
Using SST and a hammer, unstake the staked part of the nut.
While applying the brakes, remove the lock axle hub nut.
| 8. SEPARATE TIE ROD END SUB-ASSEMBLY |
Remove the cotter pin and castle nut.
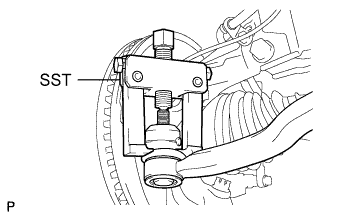 |
Using SST, disconnect the tie rod end from the steering knuckle.
| 9. REMOVE FRONT STABILIZER LINK ASSEMBLY |
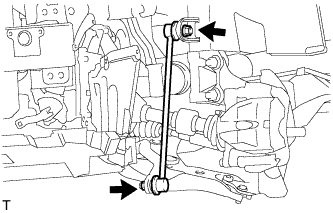 |
Remove the 2 nuts and stabilizer link.
| 10. SEPARATE FRONT SUSPENSION LOWER ARM SUB-ASSEMBLY |
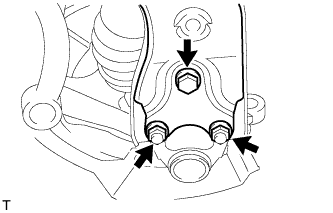 |
Remove the 2 nuts and bolt, and disconnect the lower arm from the ball joint.
| 11. REMOVE FRONT DRIVE SHAFT ASSEMBLY LH |
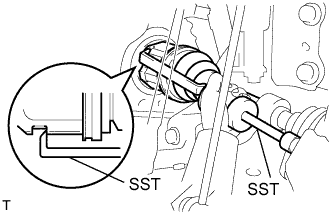 |
Using SST, remove the front drive shaft.
| 12. REMOVE FRONT DRIVE SHAFT ASSEMBLY RH |
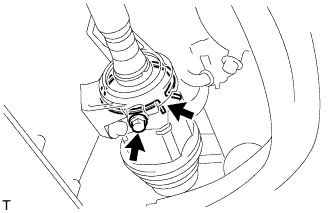 |
Squeeze the ends of the snap ring, and remove the snap ring from the bearing bracket.
Remove the bearing bracket bolt and front drive shaft from the bearing bracket.
| 13. REMOVE TRANSFER ASSEMBLY |
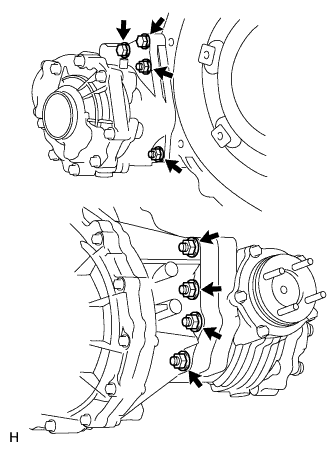 |
Remove the 6 nuts, 2 bolts and transfer from the transaxle.
| 14. REMOVE TRANSAXLE CASE OIL SEAL LH |
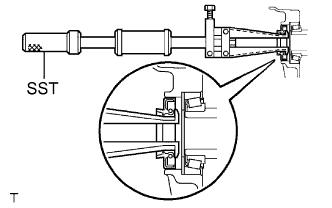 |
Using SST, tap out the oil seal.
| 15. REMOVE TRANSAXLE CASE OIL SEAL RH |
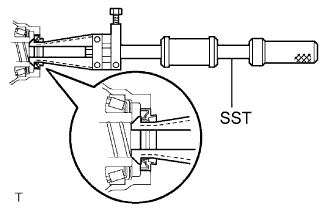 |
Using SST, tap out the oil seal.
| 16. INSTALL TRANSAXLE CASE OIL SEAL LH |
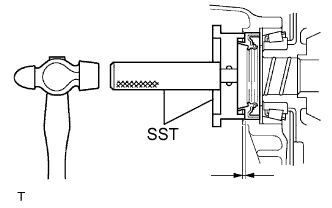 |
Coat the lip of a new oil seal with MP grease.
Using SST and a hammer, tap in the oil seal.
| 17. INSTALL TRANSAXLE CASE OIL SEAL RH |
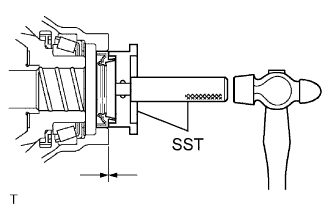 |
Coat the lip of a new oil seal with MP grease.
Using SST and a hammer, tap in the oil seal.
| 18. INSTALL TRANSFER ASSEMBLY |
|
Install the transfer to the transaxle with the 6 nuts and 2 bolts.
| 19. INSTALL FRONT DRIVE SHAFT ASSEMBLY LH |
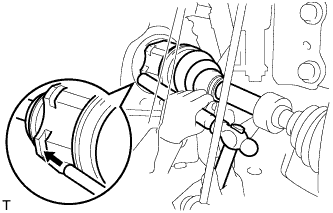 |
Coat the splines of the inboard joint shaft with gear oil.
Align the shaft splines and tap in the drive shaft with a brass bar and hammer.
| 20. INSTALL FRONT DRIVE SHAFT ASSEMBLY RH |
Coat the splines of the inboard joint shaft with gear oil.
Align the shaft splines and securely insert the drive shaft.
|
Squeeze the ends of the snap ring and install it to the bearing bracket.
Install a new bearing bracket bolt.
| 21. INSTALL FRONT AXLE HUB SUB-ASSEMBLY |
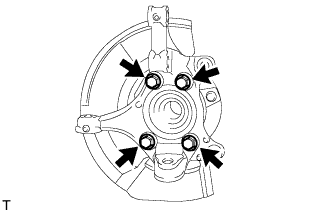 |
Install the dust cover to the steering knuckle.
Install the axle hub with the 4 bolts.
| 22. INSTALL FRONT SUSPENSION LOWER ARM SUB-ASSEMBLY |
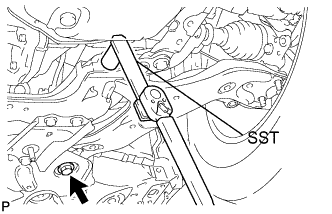 |
Using SST, and tighten the bolt on the front side.
Fix the nut in place and tighten the bolt on the rear side.
| 23. INSTALL FRONT STABILIZER LINK ASSEMBLY |
Install the link with the 2 nuts.
| 24. INSTALL TIE ROD END SUB-ASSEMBLY |
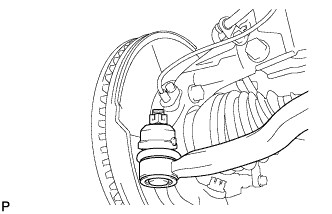 |
Connect the tie rod end onto the steering knuckle with the castle nut.
Install a new cotter pin.
| 25. INSTALL FRONT AXLE HUB NUT |
Clean the threaded parts on the drive shaft and a new axle shaft nut using a non-residue solvent.
Install a new shaft nut.
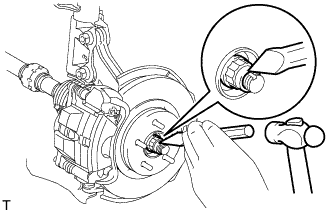 |
Using a chisel and hammer, stake the shaft nut.
| 26. INSTALL FRONT SPEED SENSOR LH |
|
Set the sensor body into the knuckle, and then install the sensor with the bolt.
Install the sensor clamp and sensor clip as follows.
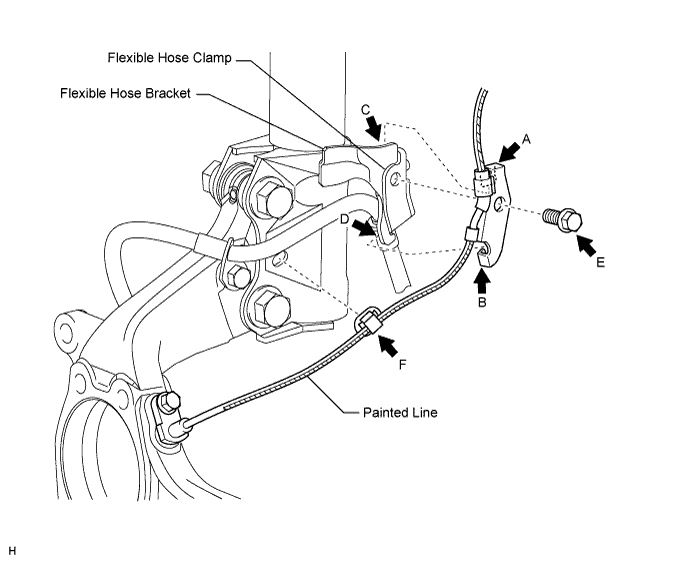
Simultaneously perform the following: 1) hang the hook part of the sensor clamp (labeled A) on the part of the flexible hose bracket (labeled C); and 2) insert the hook part of the sensor clamp (labeled B) to the part of the flexible hose bracket (labeled D).
Install the sensor clamp to the flexible hose clamp and flexible hose bracket with the bolt (labeled E).
Insert the sensor clip (labeled F) into the hole on the absorber lower bracket.
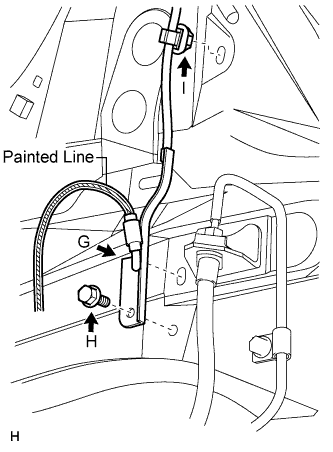 |
Install the sensor clamp and sensor clip as follows.
Set the sensor clamp (labeled G) on the side member, and then install the bolt (labeled H).
Insert the sensor clip (labeled I) into the hole on the apron.
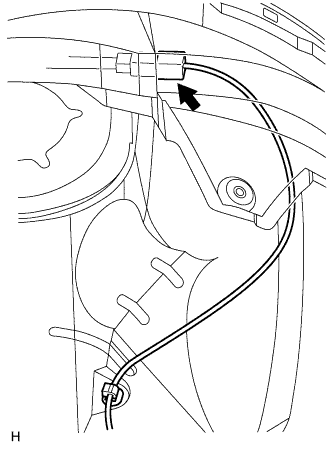 |
Connect the sensor connector.
| 27. INSTALL NO. 2 ENGINE UNDER COVER |
Install the engine under cover with the 2 clips.
| 28. INSTALL NO. 1 ENGINE UNDER COVER |
Install the engine under cover with the 6 bolts and 10 clips.
| 29. INSTALL FRONT WHEEL |
| 30. ADD TRANSFER OIL |
| 31. INSPECT TRANSFER OIL |
Inspect the transfer oil (Click here).
| 32. ADD MANUAL TRANSAXLE OIL |
| 33. INSPECT MANUAL TRANSAXLE OIL |
Inspect the manual transfer oil .