BACK DOOR OUTSIDE GARNISH (w/o Tire Carrier) > INSTALLATION |
| Item | Temperature |
| Back door outside garnish | 20 to 30°C (68 to 86°F) |
| Emblem | 20 to 30°C (68 to 86°F) |
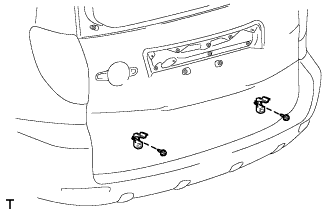
| 1. INSTALL BACK DOOR OUTSIDE GARNISH CLIP |
|
Install the 2 clips with the 2 screws.
| 2. INSTALL LOWER BACK DOOR OUTSIDE GARNISH SUB-ASSEMBLY |
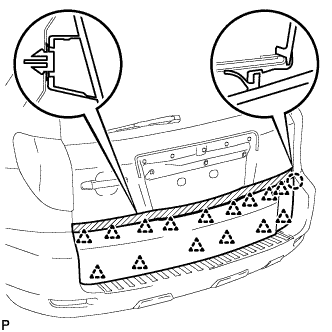 |
Attach the 15 clips and claw to install the back door outside garnish.
| 3. INSTALL NO. 1 BACK DOOR NAME PLATE |
Clean the back door outside garnish surface.
Using a heat light, heat the back door outside garnish surface.
Remove the double-sided tape from the back door outside garnish.
Wipe off any tape adhesive residue with cleaner.
Install a new name plate.
Using a heat light, heat the back door outside garnish and a new name plate.
Remove the peeling paper from the face of the name plate.
Align the boss positions and install the name plate.
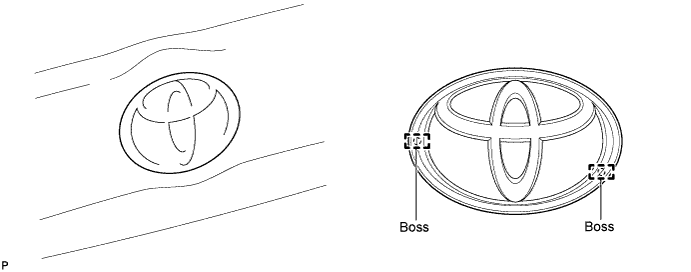
| 4. INSTALL LICENSE PLATE LIGHT ASSEMBLY |
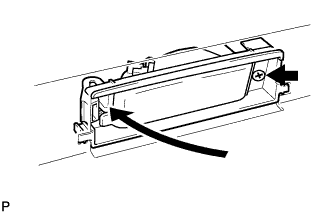 |
Install the light as shown in the illustration.
Install the screw.
Connect the connector.
| 5. INSTALL BACK DOOR OUTSIDE GARNISH SUB-ASSEMBLY |
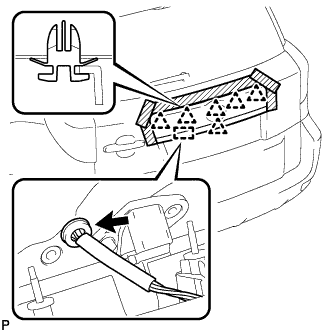 |
Install the grommet to the back door panel.
Attach the 6 clips to install the back door outside garnish.
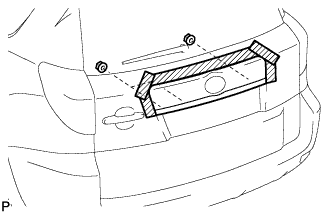 |
Install the 3 nuts.
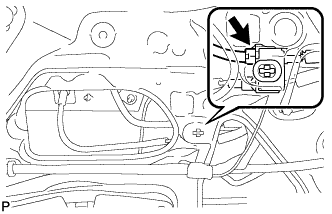 |
Connect the connector.
| 6. INSTALL BACK DOOR SERVICE HOLE COVER |
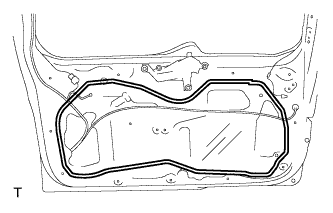 |
Apply butyl tape to the door panel, then install a new back door service hole cover as shown in the illustration.
Connect each connector.
| 7. INSTALL BACK DOOR TRIM BOARD ASSEMBLY |
Install the back door trim pocket with the 5 screws.
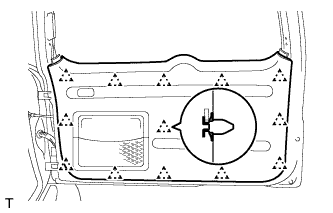 |
Attach the 13 clips to install the trim board.
| 8. INSTALL BACK DOOR COURTESY LIGHT ASSEMBLY |
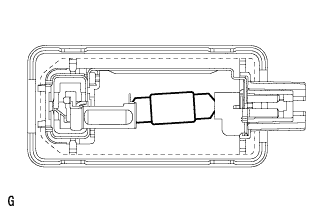 |
Install the bulb to the light.
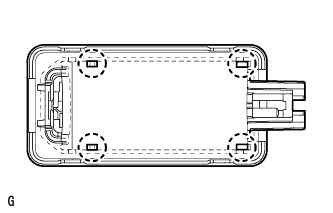 |
Attach the 4 claws to install the light shade.
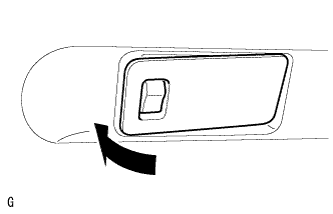 |
Install the light as shown in the illustration.
| 9. INSTALL BACK DOOR SIDE GARNISH LH |
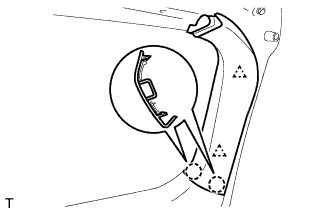 |
Attach the 2 claws and 2 clips to install the garnish.
| 10. INSTALL BACK DOOR SIDE GARNISH RH |
| 11. INSTALL BACK DOOR CENTER GARNISH |
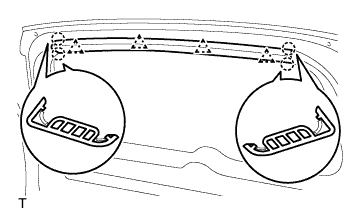 |
Attach the 4 claws and 4 clips to install the garnish.