 |
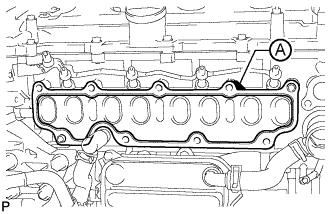
Install a new gasket to the cylinder head.
- HINT:
- Install the gasket with the part labeled A facing the right side of the vehicle as shown in the illustration.
INTAKE MANIFOLD > INSTALLATION |
| 1. INSTALL INTAKE MANIFOLD |
|
Install a new gasket to the cylinder head.
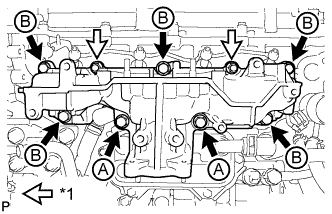 |
Install the intake manifold with the 7 bolts and 2 nuts.
| *1 | Nut |
| Item | Length |
| Bolt A | 90 mm (3.54 in.) |
| Bolt B | 25 mm (0.984 in.) |
| 2. CONNECT NO. 2 VACUUM TRANSMITTING HOSE |
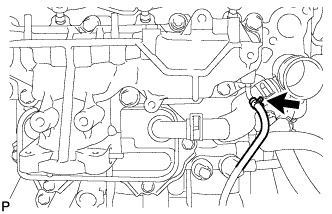 |
Connect the No. 2 vacuum transmitting hose to the intake manifold.
| 3. INSTALL NO. 2 INTAKE MANIFOLD |
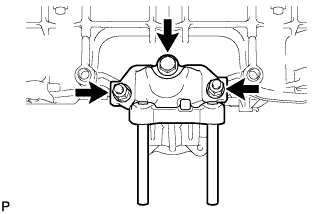 |
Install a new gasket and the No. 2 intake manifold with the bolt and 2 nuts.
| 4. INSTALL ENGINE COVER BRACKET |
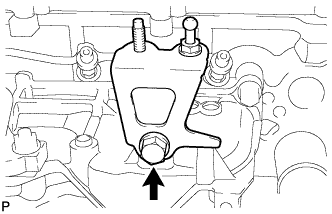 |
Install the engine cover bracket with the bolt.
| 5. INSTALL GAS FILTER BRACKET |
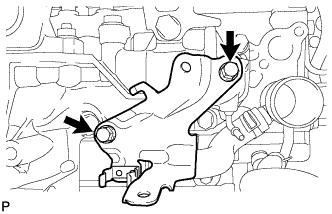 |
Install the gas filter bracket with the 2 bolts.
| 6. INSTALL NO. 1 GAS FILTER |
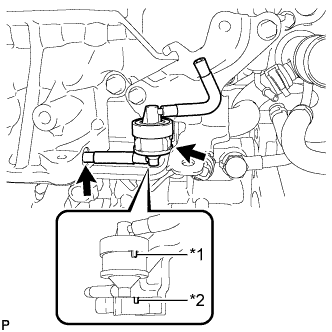 |
Install the No. 1 gas filter to the gas filter bracket.
| *1 | Protrusion |
| *2 | Groove |
Connect the vacuum hose.
| 7. INSTALL DIESEL TURBO PRESSURE SENSOR |
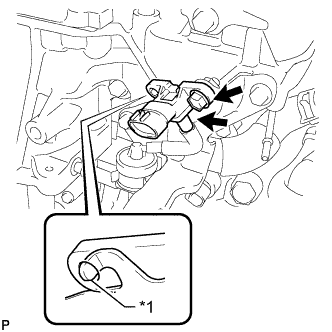 |
Install the sensor with the bolt.
| *1 | Protrusion |
Connect the vacuum hose.
Connect the sensor connector.
| 8. INSTALL ENGINE OIL LEVEL DIPSTICK GUIDE |
Install a new O-ring to the engine oil level dipstick guide.
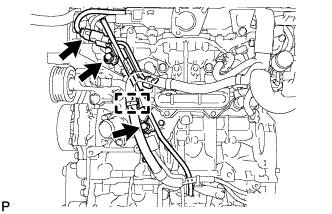 |
Install the engine oil level dipstick guide with the 2 bolts.
Connect the connector and attach the wire harness clamp to the engine oil level dipstick guide.
Install the engine oil level dipstick.
| 9. INSTALL INTAKE MANIFOLD INSULATOR |
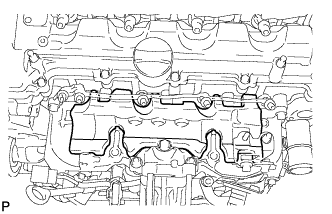 |
Install the intake manifold insulator to the intake manifold.
| 10. INSTALL COMMON RAIL ASSEMBLY |
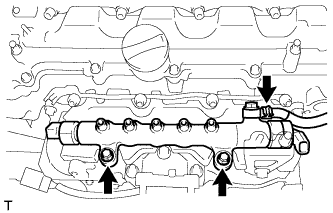 |
Install the common rail with the 2 bolts.
Using pliers, grip the claws of the clip and slide the clip to connect the fuel hose.
| 11. INSTALL INJECTION PIPE SUB-ASSEMBLY |
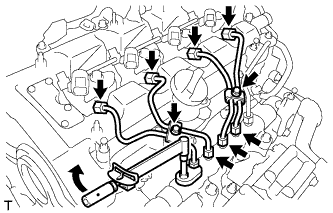 |
Using a 14 mm union nut wrench, tighten the 4 nuts at the common rail end of the injection pipes.
Using a 14 mm union nut wrench, tighten the 4 nuts at the injector end of the injection pipes.
Install the 4 injection pipe clamps with the 2 bolts.
| 12. INSTALL FUEL INLET PIPE SUB-ASSEMBLY |
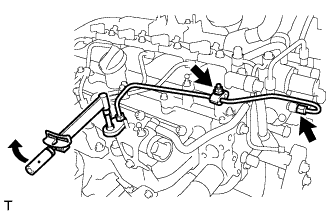 |
Temporarily install the fuel inlet pipe with the 2 clamps and nut.
Using a 14 mm union nut wrench, first tighten the nut at the common rail end of the fuel inlet pipe.
Using a 14 mm union nut wrench, tighten the nut at the supply pump end of the fuel inlet pipe.
Tighten the No. 2 injection pipe clamp nut.
| 13. INSTALL ELECTRIC EGR CONTROL VALVE ASSEMBLY |
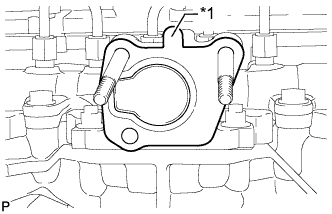 |
Install a new gasket.
| *1 | Protrusion |
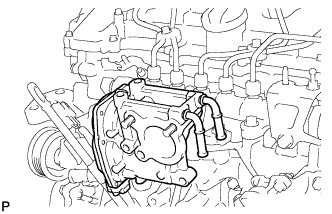 |
Install the electric EGR control valve.
| 14. INSTALL NO. 2 EGR PIPE SUB-ASSEMBLY |
Install a new gasket to the electric EGR control valve.
Install a new gasket to the No. 2 EGR pipe.
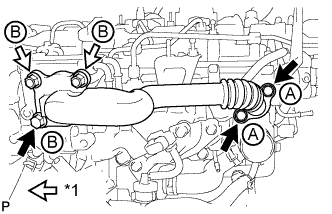 |
Temporarily install the No. 2 EGR pipe with the 3 bolts and 2 nuts.
| *1 | Nut |
| Item | Length |
| Bolt A | 25 mm (0.984 in.) |
| Bolt B | 70 mm (2.76 in.) |
Tighten the 2 bolts labeled A shown in the illustration.
Tighten the bolt and 2 nuts labeled B shown in the illustration.
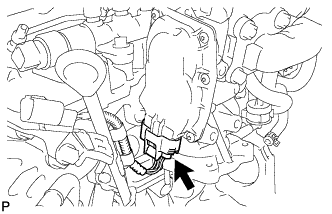 |
Connect the electric EGR control valve connector.
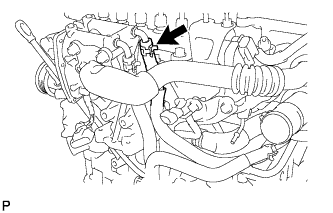
| 15. CONNECT NO. 8 WATER BY-PASS HOSE |
 |
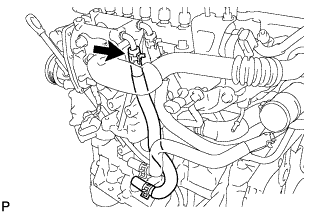
| 16. INSTALL NO. 7 WATER BY-PASS HOSE |
 |
| 17. INSTALL EGR VALVE BRACKET |
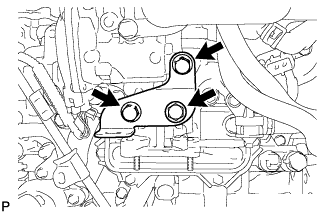 |
Install the EGR valve bracket with the 3 bolts.
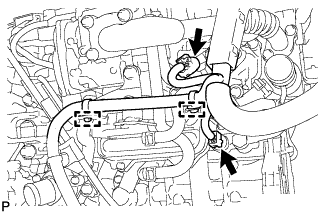 |
Connect the 2 connectors and attach the 2 wire harness clamps.
| 18. CONNECT ENGINE WIRE |
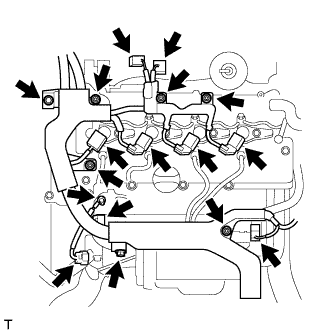 |
Connect the engine wire to the engine cover bracket with the bolt and 5 nuts.
Connect the engine wire to the wire bracket with the bolt.
Connect the pressure discharge valve connector.
Connect the emission control valve wire connector.
Connect the fuel pressure sensor connector.
Connect the glow plug wire harness with the nut and grommet.
Connect the 4 injector connectors.
Connect the vacuum switching valve connector.
Connect the vacuum regulating valve connector.
| 19. INSTALL DIESEL THROTTLE BODY ASSEMBLY |
Install the diesel throttle body assembly (Click here).
| 20. BLEED AIR FROM FUEL SYSTEM |
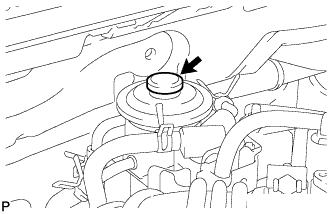 |
Using the hand pump mounted on the fuel filter cap, bleed the air from the fuel system. Continue pumping until the pump resistance increases.
Start the engine.
When the engine can be started, proceed to the next step.
If the engine cannot be started, bleed the air again using the hand pump until the hand pump resistance increases (refer to the procedures above). Then start the engine.
Turn the ignition switch off.
Connect the intelligent tester to the DLC3.
Turn the ignition switch to ON and turn the intelligent tester on.
Clear DTCs (Click here).
Start the engine.*1
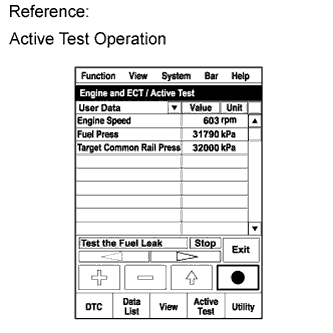 |
Enter the following menus: Powertrain / Engine and ECT / Active Test / Test the Fuel Leak.*2
Perform the following test 5 times with on/off intervals of 10 seconds: Active Test / Test the Fuel Leak.*3
Allow the engine to idle for 3 minutes or more after performing the Active Test for the fifth time.
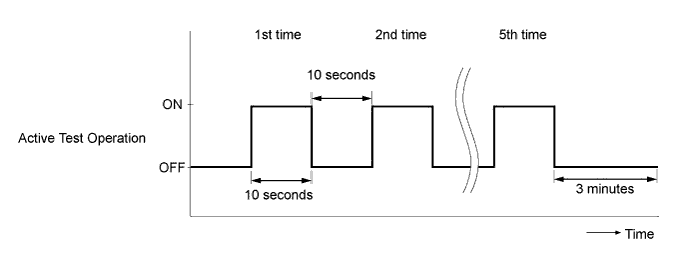
Enter the following menus: Powertrain / Engine and ECT / DTC.
Read Current DTCs.
When no DTCs are output, the air bleeding is completed.
If any DTCs are output, proceed to the next step.
Clear the DTCs (Click here).
Repeat steps *1 to *3.
Enter the following menus: Powertrain / Engine and ECT / DTC.
Read Current DTCs.
| 21. INSPECT FOR FUEL LEAK |
Perform Active Test.
Connect the intelligent tester to the DLC3.
Turn the ignition switch to ON.
Start the engine.
Turn the intelligent tester on.
Enter the following menus: Powertrain / Engine and ECT / Active Test.
Perform the Active Test.
| Tester Display | Test Part | Control Range | Diagnostic Notes |
| Test the Fuel Leak | Pressurizes common rail internal fuel pressure, and checks for fuel leaks | Stop/Start | Performs inspection of the high pressure fuel system.
|