 |
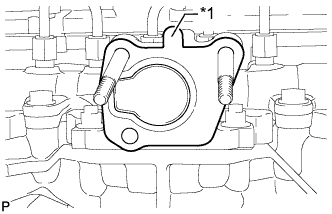
Install a new gasket.
| *1 | Protrusion |
- NOTICE:
- Make sure the protrusion of the gasket is facing upward as shown in the illustration.
EGR VALVE > INSTALLATION |
| 1. INSTALL ELECTRIC EGR CONTROL VALVE ASSEMBLY |
|
Install a new gasket.
| *1 | Protrusion |
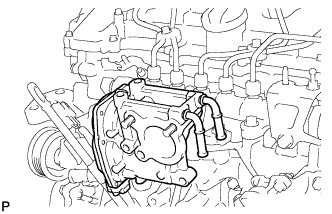 |
Install the electric EGR control valve.
| 2. INSTALL NO. 2 EGR PIPE SUB-ASSEMBLY |
Install a new gasket to the electric EGR control valve.
Install a new gasket to the No. 2 EGR pipe.
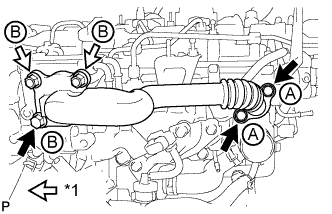 |
Temporarily install the No. 2 EGR pipe with the 3 bolts and 2 nuts.
| *1 | Nut |
| Item | Length |
| Bolt A | 25 mm (0.984 in.) |
| Bolt B | 70 mm (2.76 in.) |
Tighten the 2 bolts labeled A shown in the illustration.
Tighten the bolt and 2 nuts labeled B shown in the illustration.
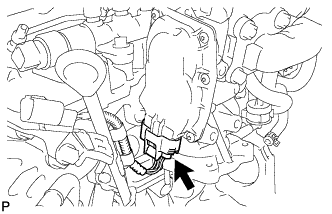 |
Connect the electric EGR control valve connector.
| 3. CONNECT NO. 8 WATER BY-PASS HOSE |
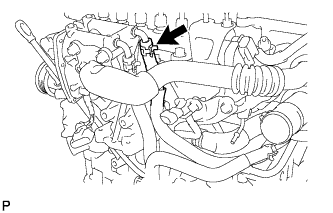 |
| 4. CONNECT NO. 7 WATER BY-PASS HOSE |
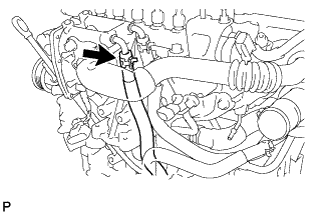 |
| 5. INSTALL EGR VALVE BRACKET |
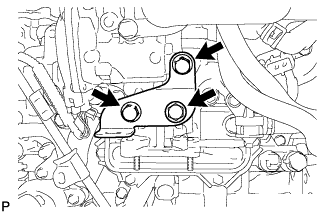 |
Install the EGR valve bracket with the 3 bolts.
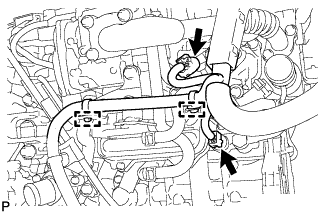 |
Connect the 2 connectors and attach the 2 wire harness clamps.
| 6. ADD ENGINE COOLANT |
Tighten the radiator drain cock plug by hand.
Tighten the cylinder block drain cock plug.
Add TOYOTA Super Long Life Coolant (SLLC) to the radiator reservoir filler opening.
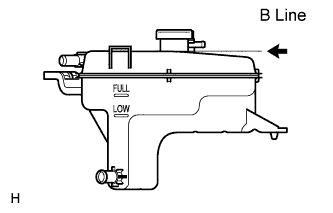 |
Continue adding TOYOTA SLLC until it is filled to the B line.
| Item | Specified Condition |
| w/o Combustion Type Power Heater | 7.3 liters (7.7 US qts, 6.4 Imp. qts) |
| w/ Combustion Type Power Heater | 7.7 liters (8.1 US qts, 6.8 Imp. qts) |
Press the inlet and outlet radiator hoses several times by hand, and then check the level of the coolant.
If the coolant level drops below the B line, add TOYOTA SLLC to the B line.
Install the radiator reservoir cap.
Start the engine, and warm it up until the cooling fan operates.
Set the air conditioning as follows while warming up the engine.
| Item | Condition |
| Manual Air Conditioning System | Fan speed - Any setting except "OFF" |
| Temperature - Toward WARM Air conditioning switch "OFF" | |
| Automatic Air Conditioning System | Temperature - Toward MAX Air conditioning switch "OFF" |
Maintain the engine speed at 2000 to 2500 rpm and warm up the engine until the cooling fan operates.
Press the inlet and outlet radiator hoses several times by hand to bleed air.
Stop the engine and wait until the coolant cools down to ambient temperature.
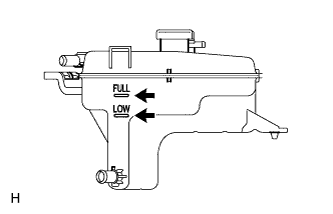 |
Check that the coolant level is between the FULL and LOW line.
If the coolant level is below the LOW line, repeat all of the procedures above.
If the coolant level is above the FULL line, drain coolant so that the coolant level is between the FULL and LOW line.
| 7. INSPECT FOR COOLANT LEAK |
Remove the radiator reservoir cap.
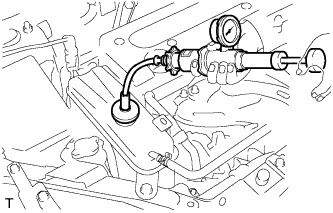 |
Fill the radiator with coolant, and then attach a radiator cap tester.
Warm up the engine.
Pump the radiator cap tester to 118 kPa (1.2 kgf/cm2, 17 psi), and then check that the pressure does not drop.
If the pressure drops, check the hoses, radiator and water pump for leakage.
If there are no signs of external coolant leaks, check the heater core, cylinder block and head.
Reinstall the radiator cap.
| 8. INSTALL NO. 1 ENGINE UNDER COVER |
Install the engine under cover with the 6 bolts and 10 clips.
| 9. INSTALL RADIATOR SUPPORT OPENING COVER |
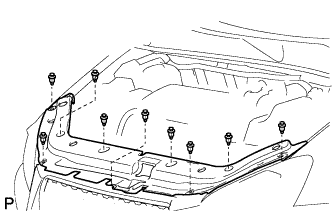 |
Install the radiator support opening cover with the 9 clips.
| 10. INSTALL NO. 1 ENGINE COVER |
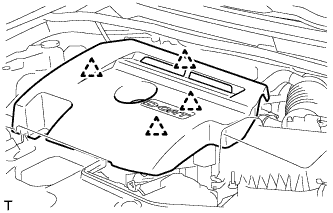 |
Attach the 4 clips to install the engine cover.
| 11. PERFORM ELECTRIC EGR CONTROL VALVE FULLY CLOSED POSITION LEARNING |
Turn the ignition switch to ON.
Turn the ignition switch off and wait 30 seconds.