Home › ENGINE ยท 3ZR-FAE › ENGINE MECHANICAL › FRONT CRANKSHAFT OIL SEAL

FRONT CRANKSHAFT OIL SEAL > REMOVAL

for Preparation Click here


1. REMOVE NO. 2 CYLINDER HEAD COVER


    A209050
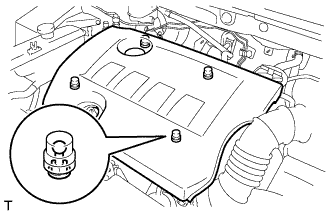
  1. Hold the rear of the cover and raise it to detach the 2 clips on the rear of the cover. Continue to raise the cover to detach the 2 clips on the front of the cover and remove the cover.

    NOTICE:
    Attempting to detach both front and rear clips at the same time may cause the cover to break.


2. REMOVE FRONT WHEEL RH


3. REMOVE NO. 1 ENGINE UNDER COVER


    A206200
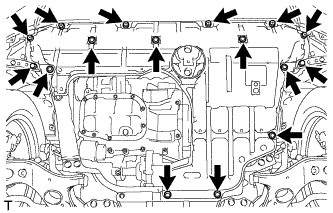
  1. Remove the 6 screws, 10 clips and under cover.


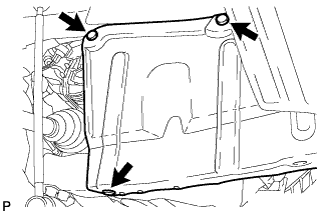
4. REMOVE REAR ENGINE UNDER COVER RH


    A196892
  1. Remove the 3 clips and under cover.


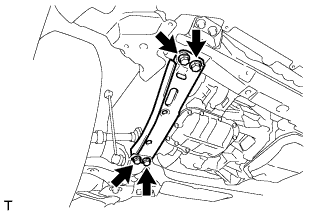
5. REMOVE FRONT SUSPENSION MEMBER REINFORCEMENT RH


    A206202
  1. Remove the 4 bolts and reinforcement.


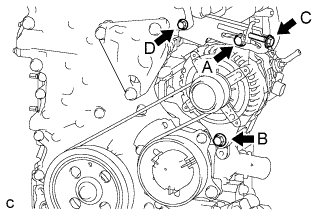
6. REMOVE V-RIBBED BELT


    A165469E01
  1. Loosen bolts A and B.

  1. Loosen bolt C and remove the V-ribbed belt.

    NOTICE:
    Do not loosen bolt D.


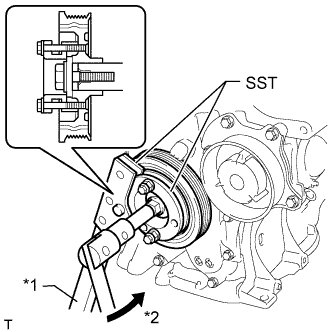
7. REMOVE CRANKSHAFT PULLEY


    A200710E01
  1. Using SST, hold the crankshaft pulley and loosen the pulley bolt. Further loosen the bolt until 2 or 3 threads are screwed into the crankshaft.
    Text in Illustration 
    *1
    Hold
    *2
    Turn

    SST
    09213-58014   (91551-80840)
    09330-00021  


    A200711E01
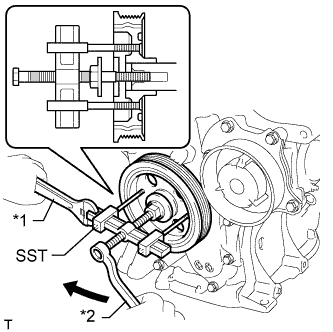
  1. Using SST and the pulley bolt, remove the crankshaft pulley and pulley bolt.
    Text in Illustration 
    *1
    Hold
    *2
    Turn

    SST
    09950-50013   (09951-05010, 09952-05010, 09953-05020, 09954-05021)

    HINT:
    Apply lubricant to the threads and end of SST.


8. REMOVE TIMING CHAIN COVER OIL SEAL


    A200713E01
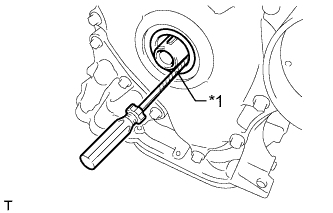
  1. Using a screwdriver, pry out the oil seal.
    Text in Illustration 
    *1
    Protective Tape

    HINT:
    Tape the screwdriver tip before use.

    NOTICE:
    1. Do not damage the surface of the oil seal press fit hole or the crankshaft.
    2. After removing the oil seal, check the crankshaft for damage. If damaged, smooth the surface with 400-grit sandpaper.