 |
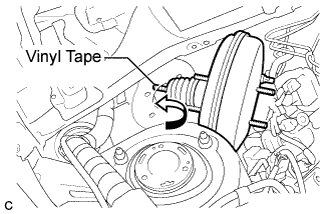
Tape the tip of the push rod of the brake booster assembly.
BRAKE BOOSTER (for 2GR-FE RHD) > INSTALLATION |
| 1. INSTALL CHECK VALVE GROMMET |
Install the check valve grommet to the brake booster assembly.
| 2. INSTALL BRAKE VACUUM CHECK VALVE ASSEMBLY |
Install the brake vacuum check valve assembly to the brake booster assembly.
| 3. INSTALL BRAKE BOOSTER GASKET |
Install a new brake booster gasket to the brake booster assembly.
| 4. INSTALL BRAKE BOOSTER ASSEMBLY |
|
Tape the tip of the push rod of the brake booster assembly.
Install the brake booster assembly to the body by pushing the push rod as shown in the illustration.
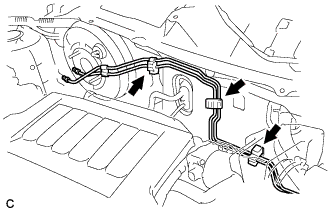 |
Engage the 3 clamps with the brake lines.
| 5. INSTALL BRAKE MASTER CYLINDER PUSH ROD CLEVIS |
Temporarily install the lock nut and brake master cylinder push rod clevis to the brake booster assembly.
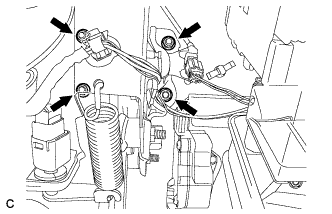 |
Completely install the brake booster assembly with the 4 nuts.
| 6. INSTALL NO. 1 HOSE TO HOSE TUBE |
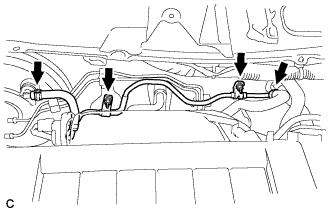 |
Install the No. 1 hose to hose tube with the 2 nuts.
Slide the 2 clips and connect the No. 1 hose to hose tube.
| 7. INSTALL BRAKE MASTER CYLINDER SUB-ASSEMBLY |
Install a new O-ring to the master cylinder.
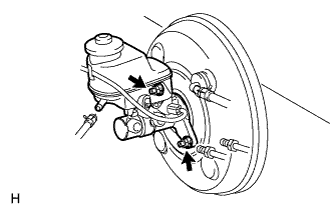 |
Install the master cylinder to the booster with the 2 nuts.
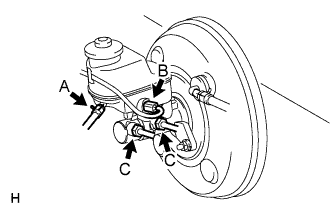 |
Using a union nut wrench, connect the 2 brake lines labeled C to the master cylinder.
Connect the brake fluid level warning switch connector labeled B to the master cylinder.
for Manual Transaxle:
Connect the clutch reservoir tube labeled A to the master cylinder.
| 8. INSTALL COWL BODY MOUNTING REINFORCEMENT RH |
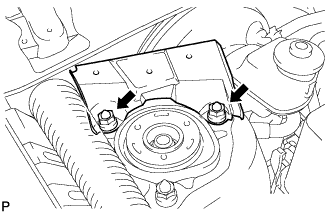 |
Install the cowl body mounting reinforcement RH with the 2 nuts.
| 9. INSTALL COWL TOP PANEL OUTER SUB-ASSEMBLY |
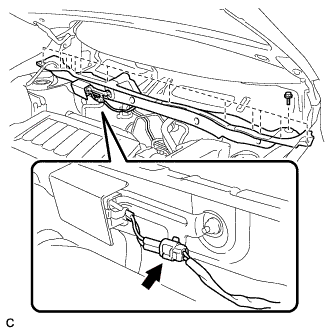 |
Install the cowl top panel outer sub-assembly with the 14 bolts.
Connect the connector.
| 10. INSTALL COWL VENTILATOR HOUSING SUB-ASSEMBLY |
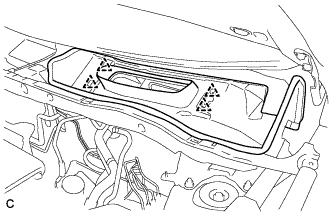 |
Engage the 4 clips to install the cowl ventilator housing sub-assembly.
| 11. INSTALL WINDSHIELD WIPER MOTOR AND LINK ASSEMBLY |
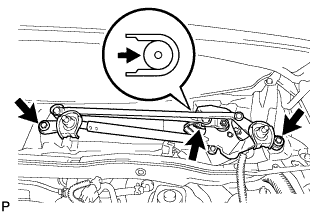 |
Connect the connector and attach the clamp.
Move the wiper motor and link in the direction shown by the arrow in the illustration to attach the wiper cushion to the body, and install the wiper motor and link.
Install the 2 bolts.
| 12. INSTALL COWL TOP VENTILATOR LOUVER |
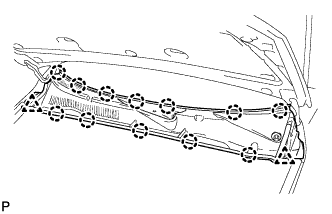 |
Attach the 12 claws and install the louver.
Install the 2 clips.
| 13. INSTALL FRONT FENDER TO COWL SIDE SEAL LH |
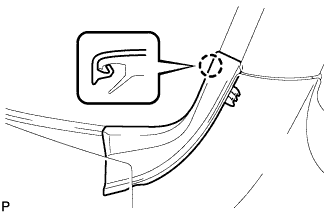 |
Attach the claw to install the front fender to cowl side seal.
| 14. INSTALL FRONT FENDER TO COWL SIDE SEAL RH |
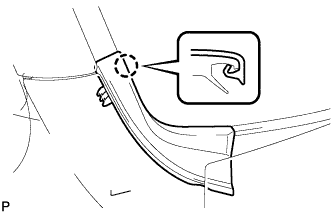 |
Attach the claw to install the front fender to cowl side seal.
| 15. INSTALL FRONT WIPER ARM AND BLADE ASSEMBLY RH |
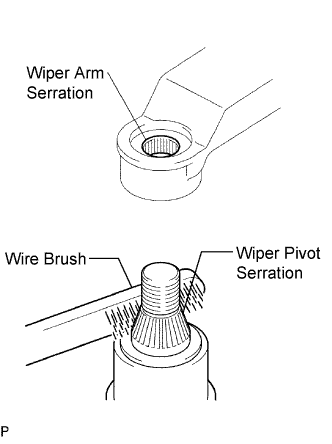 |
Stop the wiper motor at the automatic stop position.
Clean the wiper arm serration with a round file or equivalent.
Clean the wiper pivot serration with a wire brush.
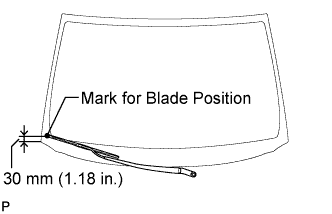 |
Install the arm and blade with the nut. Make sure that the arm and blade comes to the position shown in the illustration.
| 16. INSTALL FRONT WIPER ARM AND BLADE ASSEMBLY LH |
|
Clean the wiper arm serration with a round file or equivalent.
Clean the wiper pivot serration with a wire brush.
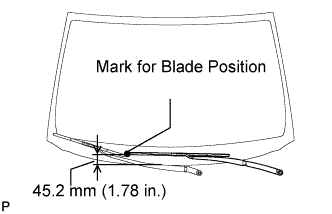 |
Install the arm and blade with the nut. Make sure that the arm and blade comes to the position shown in the illustration.
Operate the front wipers while spraying water or washer fluid on the windshield. Ensure that there is no interference between the blades and pillar.
| 17. INSTALL WINDSHIELD WIPER ARM COVER |
Install the 2 caps.
| 18. INSTALL PUSH ROD PIN |
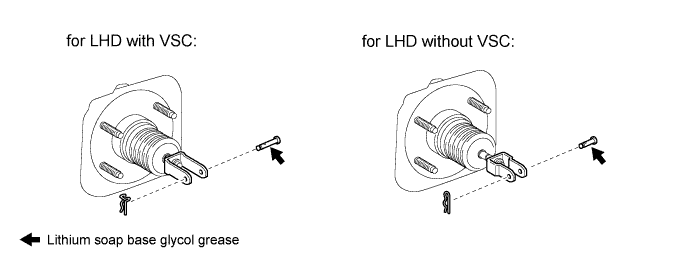
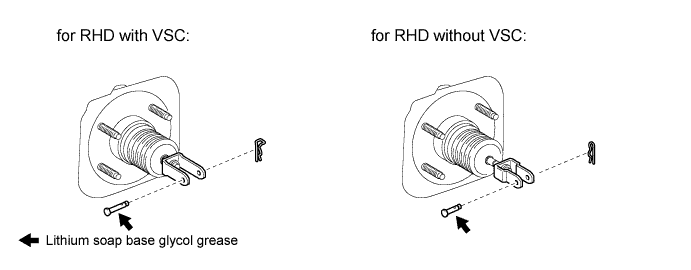
Apply lithium soap base glycol grease to the push rod pin.
Install the push rod pin to the push rod clevis.
Install a new clip to the push rod pin.
| 19. FILL RESERVOIR WITH BRAKE FLUID |
| 20. BLEED BRAKE MASTER CYLINDER |
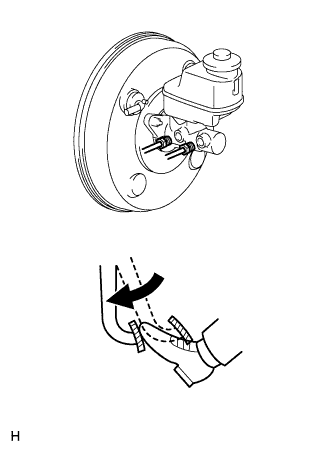 |
Using a union nut wrench, disconnect the 2 brake lines from the master cylinder.
Slowly depress and hold the brake pedal.
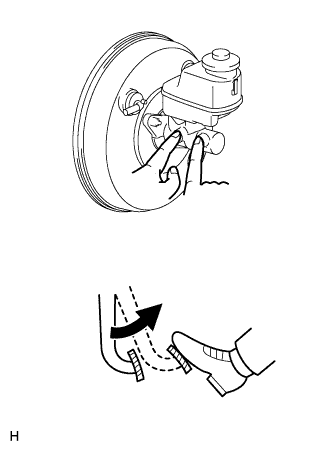 |
Block the outer holes with your fingers, and release the pedal.
Repeat the 2 previous steps 3 or 4 times.
Using a union nut wrench, connect the 2 brake lines to the master cylinder.
| 21. BLEED BRAKE LINE |
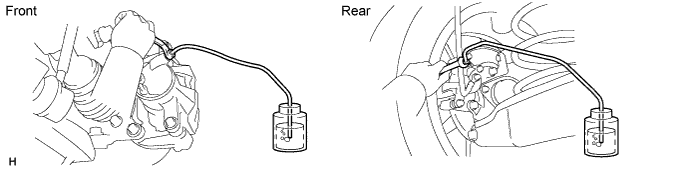
Remove the bleeder plug cap.
Connect the vinyl tube to the bleeder plugs.
Depress the brake pedal several times, and then loosen the bleeder plug with the pedal depressed.
When fluid stops coming out, immediately tighten the bleeder plug. Then release the pedal.
Repeat the 2 previous steps until all the air in the brake fluid is gone.
Tighten the bleeder plug.
Install the cap.
Bleed air from the brake line for each wheel by repeating the above procedures.
| 22. BLEED ABS AND TRACTION ACTUATOR |
Depress the brake pedal more than 20 times with the engine off.
Connect the intelligent tester to the DLC3, and turn the ignition switch on (IG).
Select AIR BLEEDING on the intelligent tester.
Bleed the air out of the suction line.
Connect a vinyl tube to the bleeder plug at the right front wheel or the right rear wheel.
Loosen the bleeder plug.
Operate the brake actuator to bleed the air using the intelligent tester.
Check if the operation has stopped by referring to the intelligent tester display.
Temporarily tighten the bleeder plug.
Repeat the 4 previous steps until all air in the fluid is completely bled out.
Tighten the bleeder plug.
Repeat all of the above procedures for the right rear wheel to bleed the air out of the suction line.
Bleed the air out of the pressure reduction line.
Connect a vinyl tube to either one of the bleeder plugs.
Loosen the bleeder plug.
Using the intelligent tester, operate the brake actuator assembly, completely depress the brake pedal and hold it there.
Tighten the bleeder plug, then release the brake pedal.
Repeat the 3 previous steps until all air in the fluid is completely bled out.
Tighten the bleeder plug.
Repeat all of the above procedures for the other wheels to bleed the air out of the pressure reduction line.
| 23. INSPECT BRAKE FLUID LEVEL IN RESERVOIR |
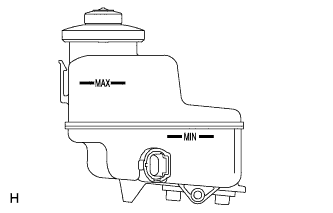 |
Check the fluid level and add fluid if necessary.
| 24. INSPECT FOR FLUID LEAK |