BRAKE BOOSTER (for 2GR-FE RHD) > REMOVAL |
| 1. REMOVE WINDSHIELD WIPER ARM COVER |
Remove the 2 caps.
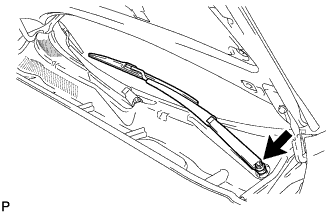
| 2. REMOVE FRONT WIPER ARM AND BLADE ASSEMBLY LH |
|
Remove the nut and arm and blade.
| 3. REMOVE FRONT WIPER ARM AND BLADE ASSEMBLY RH |
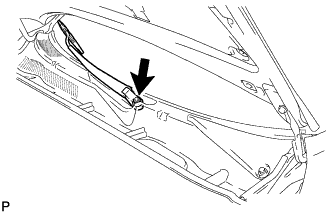 |
Remove the nut and arm and blade.
| 4. REMOVE FRONT FENDER TO COWL SIDE SEAL LH |
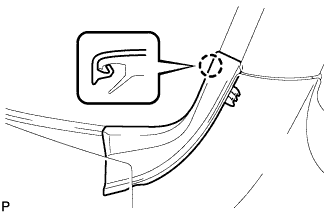 |
Detach the claw and remove the front fender to cowl side seal.
| 5. REMOVE FRONT FENDER TO COWL SIDE SEAL RH |
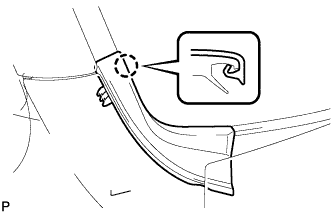 |
Detach the claw and remove the front fender to cowl side seal.
| 6. REMOVE COWL TOP VENTILATOR LOUVER |
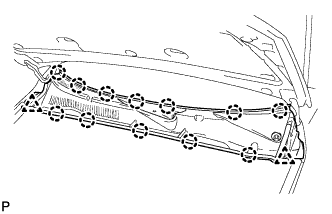 |
Remove the 2 clips.
Detach the 12 claws and remove the louver.
| 7. REMOVE WINDSHIELD WIPER MOTOR AND LINK ASSEMBLY |
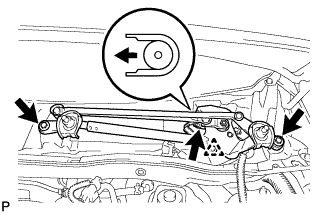 |
Remove the 2 bolts.
Move the wiper cushion in the direction shown by the arrow in the illustration to detach the wiper cushion from the body, and remove the wiper motor and link.
Disconnect the connector and detach the clamp.
| 8. REMOVE COWL VENTILATOR HOUSING SUB-ASSEMBLY |
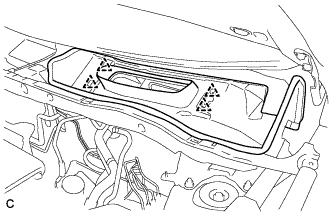 |
Disengage the 4 clips and remove the cowl ventilator housing sub-assembly.
| 9. REMOVE COWL TOP PANEL OUTER SUB-ASSEMBLY |
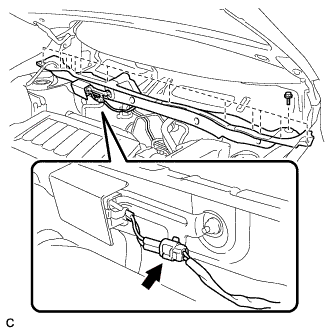 |
Disconnect the connector.
Remove the 14 bolts and cowl top panel outer sub-assembly.
| 10. REMOVE COWL BODY MOUNTING REINFORCEMENT RH |
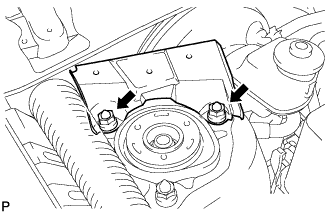 |
Remove the 2 nuts and cowl body mounting reinforcement RH.
| 11. REMOVE BRAKE MASTER CYLINDER SUB-ASSEMBLY |
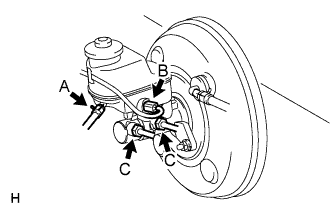 |
Release the vacuum pressure in the brake booster as follows.
Stop the engine.
Depress the brake pedal several times.
for Manual Transaxle:
Disconnect the clutch reservoir tube labeled A from the master cylinder.
Disconnect the brake fluid level warning switch connector labeled B.
Using a union nut wrench, disconnect the 2 brake lines labeled C from the master cylinder.
Remove the 2 nuts.
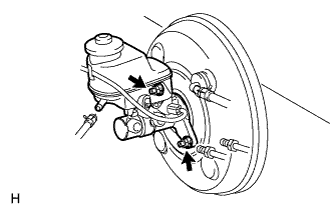 |
Pull out the master cylinder from the brake booster.
Remove the O-ring from the master cylinder.
| 12. REMOVE PUSH ROD PIN |
Remove the clip from the push rod pin.
Remove the push rod pin from the push rod clevis.
| 13. REMOVE NO. 1 HOSE TO HOSE TUBE |
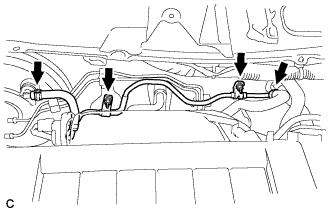 |
Slide the 2 clips and disconnect the No. 1 hose to hose tube.
Remove the 2 nuts and No. 1 hose to hose tube.
| 14. REMOVE BRAKE MASTER CYLINDER PUSH ROD CLEVIS |
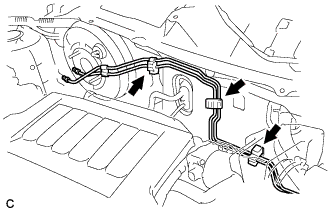 |
Disengage the 3 clamps and separate the 2 brake lines from the body.
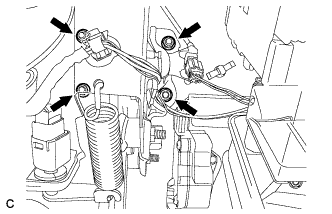 |
Remove the 4 nuts and push out the brake booster assembly to the engine room.
Loosen the lock nut, and remove the brake master cylinder push rod clevis and lock nut.
| 15. REMOVE BRAKE BOOSTER ASSEMBLY |
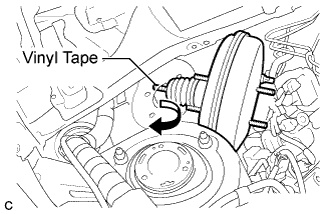 |
Tape the tip of brake booster push rod.
Remove the brake booster assembly from the body by pushing the push rod of the brake booster assembly as shown in the illustration.
| 16. REMOVE BRAKE BOOSTER GASKET |
Remove the brake booster gasket from the brake booster assembly.
| 17. REMOVE BRAKE VACUUM CHECK VALVE ASSEMBLY |
Remove the brake vacuum check valve assembly from the brake booster assembly.
| 18. REMOVE CHECK VALVE GROMMET |
Remove the check valve grommet from the brake booster assembly.